You can use it on wood, ceramics, tumblers, glass, candles and more - all without almost no 'hand' (aka you can't feel it on the surface).
For your first waterslide decal I would suggest you use clear waterslide paper and a white surface. I'll explain more on why in a minute.
Here's how waterslide paper works.
How to Set Up a Waterslide Decal in Silhouette Studio
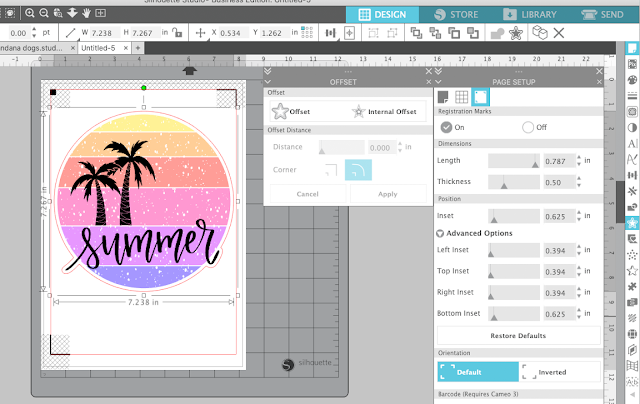
You'll start in Silhouette Studio like any other print and cut design. However, most waterslide paper is A4 size so adjust the material size from the Page Setup panel. Add registration marks to the work area as well.If this is your first waterslide decal I would suggest you pick a design that is pretty much one solid piece to make it easier to work with when you go to slide it on the surface. This one is available in the Must Have Summer SVG Bundle.
If you you are using clear waterslide paper, as I suggest for your first waterslide design, add an offset around the design.
The reason I like clear waterslide paper and a white surface for beginners is clear waterslide allows you to add a rather large offset cut line around your design. This makes handling the cut design much easier while you are transferring it. The clear areas will not be visible while the colored printed areas, on the white background, will be very vibrant.
Make sure your printer and print settings are correctly set up for A4 paper then send your design to print on your inkjet printer.
Wait a few minutes for the ink to dry before removing it from the printer.
Preparing Waterslide Paper to Cut with Silhouette CAMEO or Portrait
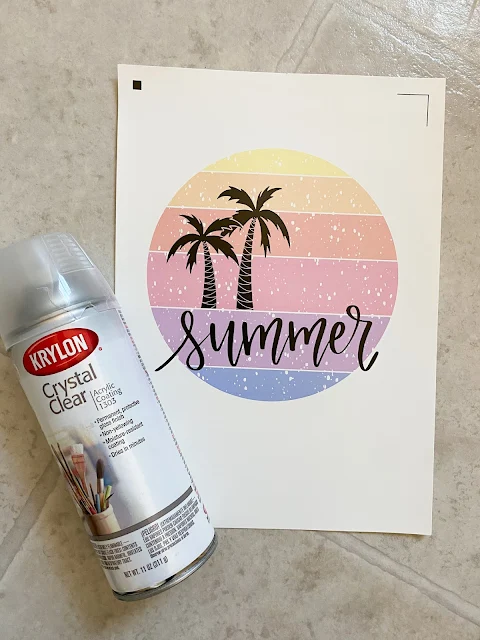
You now need to spray three coats of clear sealer on the waterslide paper. I use Kyrlon Crystal Clear Acrylic Spray for this step. Spray a light, even coat over the printed area of the decal. Wait about a minute and repeat...and then repeat again.After the third and final layer wait about five minutes before moving on to cut your design.
How to Cut a Waterslide Decal with Silhouette CAMEO
Place the printed sheet of waterslide paper on a Silhouette cutting mat. In Silhouette Studio move to the Send panel. Select the design and click "Cut Edge" so only the outer offset line cuts.The best Silhouette cut settings for waterslide paper are:
Blade: 3
Force: 33
Speed: 4
Pass: 1
When you're ready send the design to cut.
How to Apply a Waterslide Decal
Fill a shallow dish with room temperature water.
Place the decal into the water. It will start to curl up but hold it under the water gently.
Place the decal into the water. It will start to curl up but hold it under the water gently.
You want to remove the decal from the water after about 30 seconds...or when the decals start too slide off the backing. Do not let it sit in the water too long or it will start to lift off the backing making it difficult to pick up and transfer.
Use your finger to gently work out any wrinkles or bubbles. If you need to move your design slightly you can shift it around - that's the nice thing about waterslide you have a little bit of flexibility when positioning.
Let it dry for a few hours. If you're using waterslide on ceramics you should bake in the oven at 230 degrees for about 15 minutes to cure.
Note: This post may contain affiliate links. By clicking on them and purchasing products through my links, I receive a small commission. That's what helps fund Silhouette School so I can keep buying new Silhouette-related products to show you how to get the most out of your machine!
Get Silhouette School lessons delivered to your email inbox! Select Once Daily or Weekly.


.png)


Great post! I’m totally new to water slide decals, but love their look. What’s your favorite brand to purchase?
ReplyDeleteI can't wait to try these water slide decals. I too love the look. Question: How durable are the decals that are baked onto ceramic and how durable are the decals on something like a plastic tumbler? Are they dishwasher safe?
ReplyDeleteBig AHA! for me there, thank you!
ReplyDeleteI've known water slide decals for all my crafting life, my first ones were ready printed of course, a pile of flower decals my mum had (I suspect) since her childhood, so anywhere between the 40ies and 60ies. And I have printed my own since, mainly to decorate dollhouse miniature furniture. And never, ever did I lift the decal out of the water before the backing came off! I thought it was supposed to ...
What setting do you put your silhouette on like example stencil, cardstock??
ReplyDelete