There are a lot of different ways to customize a blank doormat but in this Silhouette doormat tutorial I'm going to share the way I have found to get the best results - using HTV and spray paint!
I picked up this 30x18" blank doormat from Target and it's just been waiting for me to paint it with a cute doormat saying! Given the size of the doormat, I decided to use my 15" Silhouette CAMEO 4 Plus which allows me to make a design I think fit better on the doormat. But if you don't have a CAMEO Plus - you can use a 12" Silhouette CAMEO 4/3/2/1 too! You can either make a smaller design or break your design into multiple pieces.
There are a lot of different materials you can pick from to paint your own doormat. Since HTV was the only 15" wide material I had on hand that's what I decided to use - it's perfect in my CAMEO Plus. As far as paint - I went with spray paint. So if you're wondering "Can you use HTV on a doormat?" the answer is YES!!!
Silhouette CAMEO Plus Software Settings
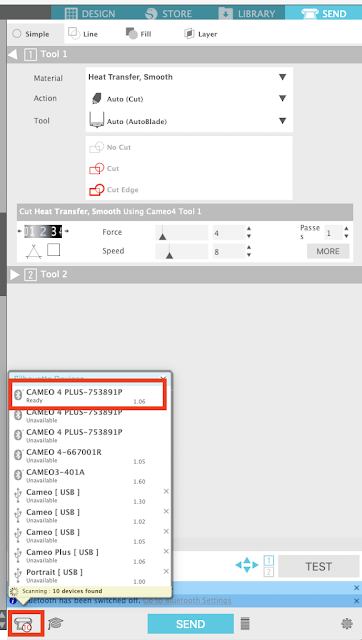
Power on and connect your Silhouette machine so you can select it from the machine list in Silhouette Studio.
Move to the Design area and from the Page Setup Panel select the correct machine. You can either cut without a cutting mat or use a 24" cutting mat if you are cutting with a Silhouette CAMEO 3 or 4 or an older machine.
Open the design you want to paint on the doormat.
I am using one of the funny doormat quotes from So Fontsy's Doormat SVG Bundle: Come In! We are Awesome.
One trick to size your design for any blank is to draw out the shape in Studio using the drawing tools. In this case, use the Draw a Rectangle tool to draw a rectangle with the exact dimensions of your doormat. I call this a guide shape.
Select the doormat SVG design by clicking it and dragging it into the rectangle then resize it.
Remember if you are using a 12" Silhouette CAMEO your design can't be any larger than about 11.5" on the shorter side. With the CAMEO Plus I was able to make my design about 3" wider (and therefore also longer) at 14.25 x 24"
How to Design a Stencil for Silhouette CAMEO 4 Plus
Usually you would remove the guide shape because you're not going to cut it. It's there to help you with sizing. But because we need to make this design into stencil, we should keep the rectangle. That shape will also need to fit on your material so resize it (not the doormat quote) so it's slightly closer around the edge of the design. Some edge is good because it will protect the areas of your doormat you don't want paint on.
TIP: It can be challenging to "see" stencils in Silhouette Studio if the entire design is transparent. If you are having a hard time select both the rectangle and the design > right click > Make Compound Path > fill with a color from the Quick Access Tool Bar.
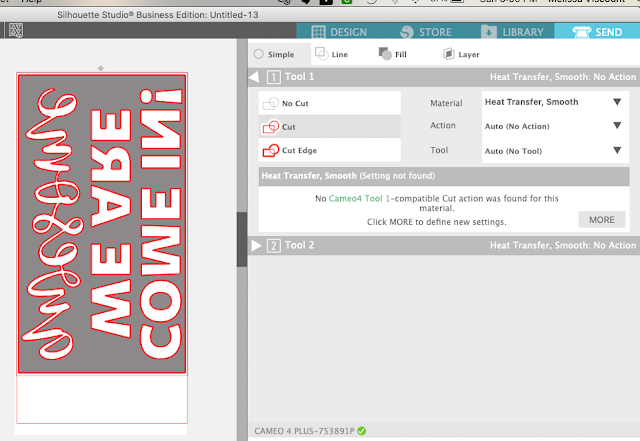
Since this stencil is being cut on HTV we need to mirror the image. To do that select the design > right click > Flip Horizontally.
The final step is to rotate the entire design so it fits on cutting mat. You can select the design and use the green rotation handle at the top of the design or you an open the Transform panel and rotate the design 90 degrees. Position the design on the virtual cutting mat.
Move to the Send panel and make sure all of your cut lines are on and select the material as Heat Transfer Vinyl Smooth.

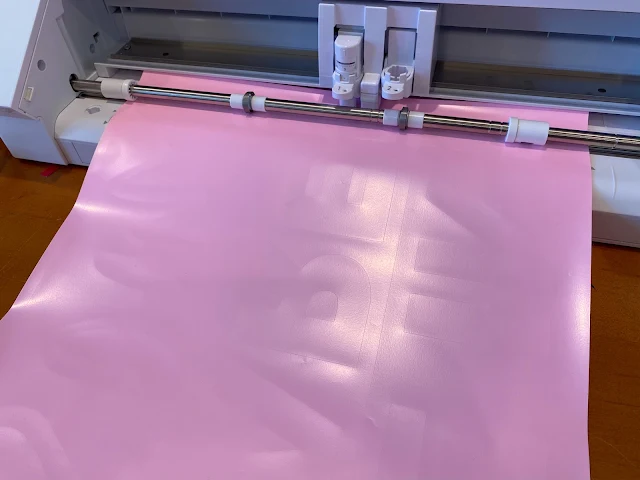
Before you send to cut, load your material into the machine. Remember, HTV needs to be loaded with the shiny side down. If you are cutting without a cutting mat on Silhouette and need a refresher to ensure the HTV doesn't slip, check out this tutorial.
When you're ready, click "Send" from the software to send the design to cut.
Weeding a Silhouette Stencil Design
When the design is finished being cut, I would suggest you not unload it until you make sure it's cut cleanly. Using a weeding tool, try to remove one letter. If it weeds easily you can unload the material from the cutting machine by pressing the down arrow (unload) to remove your Silhouette stencil.When making your own stencils you need to weed out the areas where you want paint to be applied on the doormat. This is opposite of every other type of designs where you would weed away the negative space. This is why we needed the rectangle around our design.
Carefully weed out all the letters to create your stencil.
If you have extra HTV beyond the rectangle you created, you can trim it off with scissors.
How to Make a Doormat with Silhouette, HTV and Spray Paint
Flip the stencil over and position it on your doormat. HTV gives you the ability to position and reposition until you press which is great for ensuring the design is centered and even.I used a combination of my heat press and 9x9 EasyPress to apply the HTV stencil to the doormat. I used a temperature of 305 degrees on both for as much time as needed to get it to stick ;)
Please know NOTHING sticks easily to these doormats. That's actually a blessing because you can then easily remove the HTV after painting. You just need it to stick well enough that you can get the transfer (clear sheet) off.
Don't worry if the HTV gets a little wrinkled while you work to apply the heat transfer vinyl stencil.
We worked in sections applying more heat with the Cricut Easypress, peeling back the carrier sheet, and trimming the carrier sheet until it was totally removed.
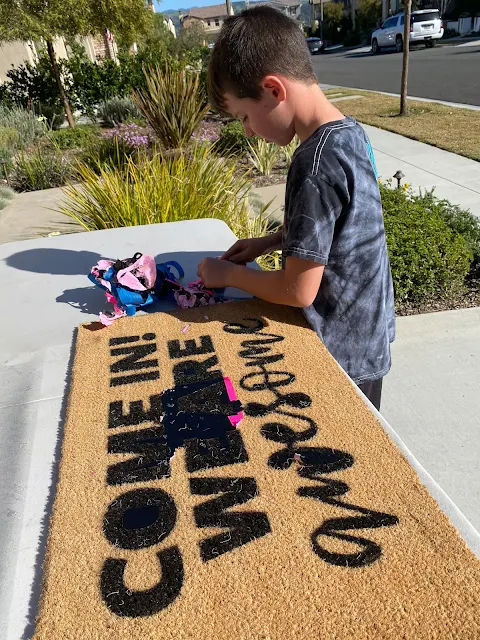
If you need to, use tape to tape off the edges to protect the doormat from overspray. I had an 8 year old who LOVES spray paint helping me so I needed all the protection I could get!
One or two medium even coats of black 2x Ultra Cover Rustoleum spray paint was all it took. Be sure to spray the paint directly from above - not at an angle to avoid bleeds until the stencil. I think you get a darker, more vibrant doormat design with spray paint than using a sponge or brush and paint, but that is an alternative - especially if your doormat design includes multiple colors. I'll be sharing tricks for that method next week.
Let the paint dry for a few minutes then quickly remove the HTV stencil by just peeling it off.
I was shocked at how crisp the paint lines were. We had NO bleeding at all on the doormat.
Finally to seal a painted doormat you can use a spray sealer. I sprayed two coats of Krylon Crystal Clear Acrylic Spray to help protect the paint.
Note: This post may contain affiliate links. By clicking on them and purchasing products through my links, I receive a small commission. That's what helps fund Silhouette School so I can keep buying new Silhouette-related products to show you how to get the most out of your machine!
Get Silhouette School lessons delivered to your email inbox! Select Once Daily or Weekly.


.png)


This is AMAZING!!!!! So many ideas are now bumping around in my brain......
ReplyDeleteI’m pretty sure I could make the design you used above with the 12” cutter just as wide as the one you show that you made with the 15” cutter. You can make letters 12 inches tall and as long as whatever roll of vinyl you got. But since none of the letters in your example are over 12 inches, you are fine with either cutter.
ReplyDelete