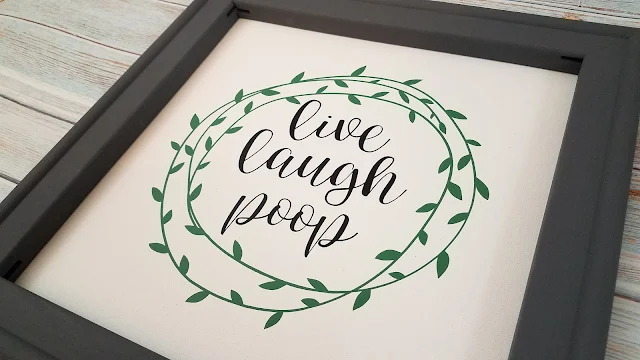
Today I'm going to share some tips with you on how turn a reverse blank canvas into a custom DIY sign in just a few minutes!
Creating a beautiful reverse canvas sign doesn't have to be a big hassle.
This bathroom sign I created using a design from the February So Fontsy Bundle came together really fast. Once you see how fast these reserve canvas with heat transfer vinyl comes together you'll be making signs with all 166 designs and 31 fonts in the bundle.
This bathroom sign I created using a design from the February So Fontsy Bundle came together really fast. Once you see how fast these reserve canvas with heat transfer vinyl comes together you'll be making signs with all 166 designs and 31 fonts in the bundle.
How To Remove Staples for Reverse Canvas Sign
First, using a utility knife, carefully cut the back of the canvas to remove it from the wooden frame. I recommend using a steel-edge ruler to get nice, straight cuts. The canvas was stapled to the frame on the corners, but I just used the knife to carefully cut around them. This blank 12x12 canvas is from Michaels. In other words the trick is NOT to remove the staples, but cut around them instead!
You can sand the wooden frame if you want - but this step is optional.
Painting the frame is so much easier when the wood has been sanded because the paint goes on much more smoothly. It didn't take me very long to sand the frame because I focused the sanding mostly on the front of the frame because the back won't really be seen.
Painting the frame is so much easier when the wood has been sanded because the paint goes on much more smoothly. It didn't take me very long to sand the frame because I focused the sanding mostly on the front of the frame because the back won't really be seen.
Next paint the frame. Again, this is an optional step. If you are going to paint the reverse canvas frame, you can use a foam brush and chalk paint. If you've sanded the wood, the paint should go on really well and you will probably only need two coats.
Making Reverse Canvas Signs with Heat Transfer Vinyl
Use your Silhouette CAMEO to cut out the heat transfer vinyl design while the paint is drying.If you are using a 12 by 12-inch canvas, I recommend sizing the design to about 10 by 10 inches in Silhouette Studio (and don’t forget to mirror before cutting!).
Pre-press the canvas to flatten it and remove any moisture. Then use your heat press (or iron) to press the HTV onto the canvas.
Use Tape to Re-Assemble Reverse Canvas Signs with Vinyl
Another tip to quickly creating a reverse canvas sign is to use strong, double-sided adhesive to adhere the canvas to the wooden frame (instead of using like a staple gun or glue). I put down strips of 1/2 inch Scor-Tape around the inner edge of the backside of the frame. You can really do this quickly because you don’t even need scissors to tear off the strips, you can just rip the sections off with your hands.
Remove the tape backing from one of the tape strips, flip the frame over, and press that side of the wooden frame straight down onto the canvas, making sure you have the design centered as best as possible.
Next, flip the canvas back over again and removed the backing from the other strips of Scor-Tape. Before securing the other sides of the canvas gently pull it across the frame so it is taut against the wood.
Finally, burnish the Scor-Tape under the canvas really, really well to get a good stick!
I finished the reverse canvas sign by applying a piece of thick, kraft card stock to the back of the frame using Scor-Tape. This kraft card stock just covers up the entire back of the frame and is a totally optional step. No one is really going to see the back of the sign, but it does give it a finished look.
The finished sign is very lightweight so just a couple of Command strips should keep it firmly in place (and then you don’t have to mess around with putting nails in the wall!).
You can find more of these humorous bathroom quotes to make your own reverse canvas sign in So Fontsy’s February Bundle. But hurry this is a limited time bundle that expires February 29, 2020 at 11:59pm EST.
Note: This post may contain affiliate links. By clicking on them and purchasing products through my links, I receive a small commission. That's what helps fund Silhouette School so I can keep buying new Silhouette-related products to show you how to get the most out of your machine!
Get Silhouette School lessons delivered to your email inbox! Select Once Daily or Weekly.


.png)


Hi Melissa! This a great tutorial. Thanks
ReplyDeleteI really love this idea! I haven't tried this out yet, bc I wanted to get more info on how to do this, which u have covered for me in this blog. So thank u for explaining how to do this in detail...which is exactly what I needed! Now I can't wait to get some of these canvases to try out. Especially since I want to redo my theme in my house for more of a rustic farmhouse feel.
ReplyDeleteThank you so much! This was great!
ReplyDelete