Today I'm sharing not only a free simple quilling design to get started, I'm going to take you step by step from cutting to finished project.
Paper quilling involves rolling paper into various shapes then arranging the paper into a pattern to create artwork.
Using your Silhouette CAMEO to cut the paper quill strips ensures they're all the same width. You can download the paper quilling design pattern for your first project here.
You'll notice there are two larger strips off to the side. Those are going to be used as a guide for where to place the curled strips. Do not curl them.
Depending on the size of your finished design you may need more or fewer strips. I used two partial sheets of 12x12 pieces of American Crafts Textured Precision Cardstock.
I find the best Silhouette cut settings for AC Precision Cardstock are:
Blade Depth: 5
Speed: 30 (for strips with CAMEO 4)
Force: 33
Passes: 2
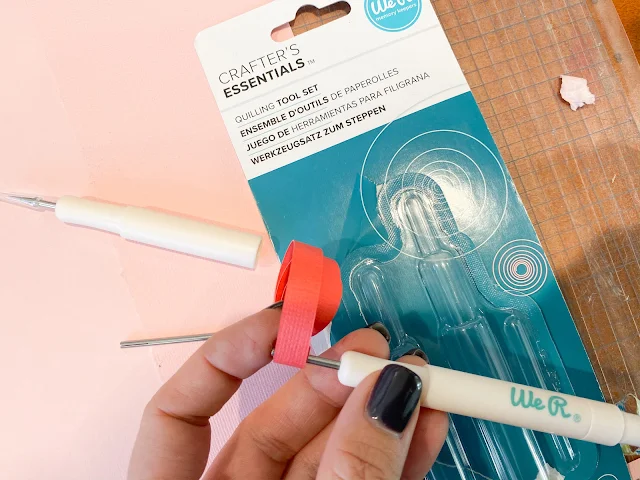
Once you have all of your strips cut you can start rolling them. The hands-down easiest and fastest way to curl paper strips is with a quilling tool. Quilling tools have thin slices in them to hold the paper while you roll it.
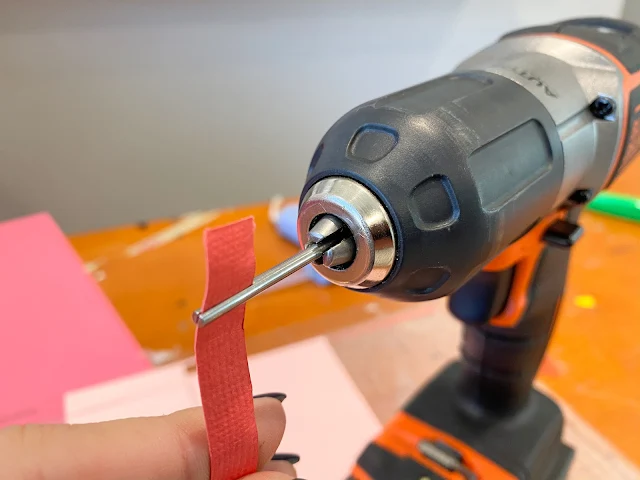
I like the WRMK Quilling Tool Kit. It comes with three tools - but my favorite is the drill bit.
You put it into a power drill, slide one end of a strip on there, then turn on the drill and let it roll.
Repeat like 50 times...with each of the thin strips of paper. Now it's time to arrange the rolled paper. I am using the back side of a wood canvas like a frame. The two thicker strip were hot glued together then formed into a heart.
I originally thought I was just going to use the heart border as a guide to make the quilling design easy to layout...but I regret not leaving it. You'll see what I mean in this video of my first paper quilling project.
Note: This post may contain affiliate links. By clicking on them and purchasing products through my links, I receive a small commission. That's what helps fund Silhouette School so I can keep buying new Silhouette-related products to show you how to get the most out of your machine!
Get Silhouette School lessons delivered to your email inbox! Select Once Daily or Weekly.


.png)


Oh my thank, you so much. I've been quilling for several years now, and reluctantly had to quit because of arthritis and Dupuytren's constractures in my hands. Using a drill to quill will make it so much easier. And cutting the paper with my Silhouette, such a unique idea. Can't wait to get back to it.
ReplyDeleteThis is such an AWESOME tip! I knew about using a quilling tool in a drill, but didn't realize that they made qulling DRILL BIT!!! It seems the WRM one is discontinued, but I just ordered almost identical one from Michaels. I can't tell you HOW MUCH I appreciate finding this old post. I don't "quill" but I do make rolled paper flowers and can't wait to get this tool! Thanks again!!!!
ReplyDelete