The ability to create your own stickers using your Silhouette CAMEO 4 is very easy - even if those designs are made from fonts or text-based designs.
This tutorial on how to print and cut text with Silhouette CAMEO 4 can apply to much more than just stickers though. Think DIY temporary tattoos, paper embellishments and printable vinyl decals!
Using
print and cut is simple once you set up your design properly. Let's
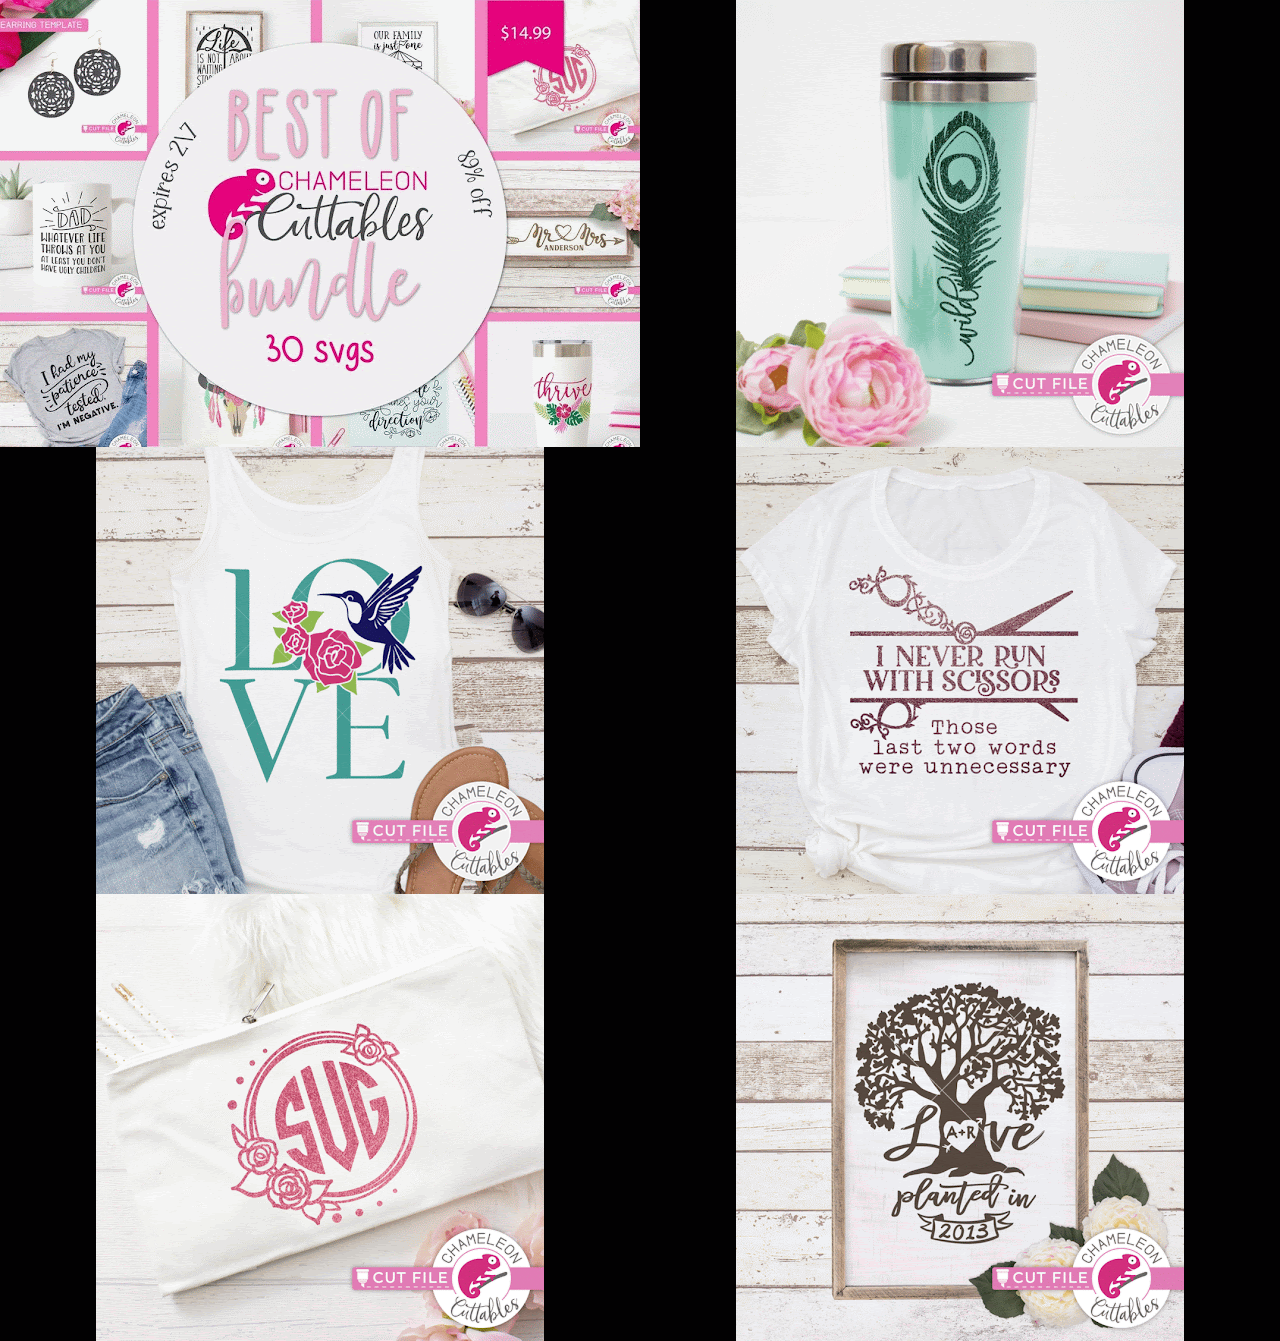
look at how to set up your stickers using SVG designs. This specific tutorial refers to the CAMEO 4, but it applies to all Silhouette machines. For this tutorial I'm going to use these warm-weather themed designs which are part of the gorgeous, Chameleon Cuttables Bundle on So Fontsy. For real, her 30 SVGs cut like butter and look so professional. I just adore her style. Now in this rare limited time bundle, it's a no brainer to grab them all!
How to Print and Cut Text with Silhouette CAMEO 4
First, let's open Silhouette Studio. From the Send panel make sure the connected machine is selected and says "Ready".
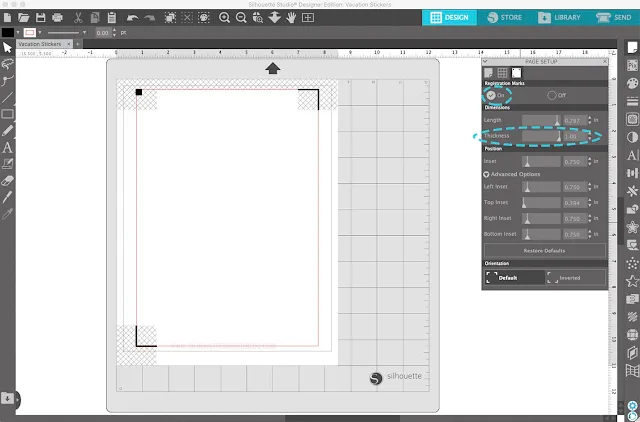
Move to the Design area and open the Page Setup Panel by clicking the top icon on the right sidebar.
Move to the Design area and open the Page Setup Panel by clicking the top icon on the right sidebar.
Change the media size to Letter.
Check to show both the Print Border and the Cut Border. This will help keep your stickers within the print and cut guidelines.
Click the third tab on the Page Setup panel. This will give you the options for Registration Marks. Toggle on the Registration Marks.
I like to change the thickness of the corners and adjust them to 1 it makes it easier for the machine to read them.
With print and cut stickers you can easily change the color of your designs (or add a pattern fill) to customize them.
Align them on your page so there is enough room in between them.
Select all of the designs, right click and choose Group.
Then right click again and select Copy and Paste.
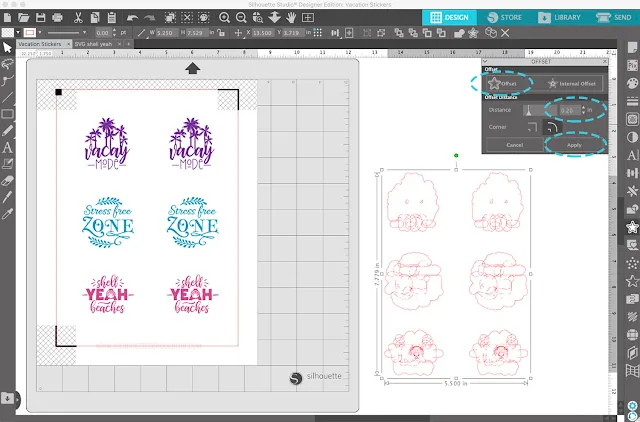
Move the duplicated group of designs off the mat, change the fill to transparent and line color to red.
Open the Offset Panel from the right sidebar and select Offset.
Change the offset distance to your liking. I chose 0.20, Rounded corner. You want to pick an offset distance that will create a sold outline/offset aorund your text designs. That's how it's going to cut a solid sticker and how you'll be able to successfully print and cut text with Silhouette CAMEO.
Don't forget offset lines automatically weld so yo what you won't have all those overlapping lines you see after you click Apply.
Select the entire offset group and move it over the duplicated layer.
Select both the original designs and the offset lines and click on the Center Align Button on the Quick Access Toolbar.
Now move to the Send panel by clicking Send. Select Cut Edge.
I use a custom Sticker Paper setting for the Online Labels Sticker Paper - which I love! It comes in 8.5 x 11 sheets and cuts perfectly.
How to Print from Silhouette Studio
Now go to File > Print and send to your printer. I like to make sure that the quality of my print is set to Best.
Once you have printed your vacation themed stickers, place them on your cutting mat so the printed sheet lines up properly to the top left corner. It's best to slightly cover the top left part of the grid with the sticker paper.
Cutting Stickers with Silhouette CAMEO 4
Load your mat. Click Send in Silhouette Studio to cut your stickers.
I think these turned out great! You can find these vacation themed SVGs in the So Fontsy Chameleon Cuttables Bundle, which has 30 easy-to-cut designs.
Get Silhouette School lessons delivered to your email inbox! Select Once Daily or Weekly.


.png)


I would love to know what kind of sticker paper you are using. the one I bought is super thick and hard to use. thanks
ReplyDeleteI would love to know what sticker paper is the closest to the ones the kids get from stores like Vineyard Vines and put on the hydroflasks? Thanks
ReplyDelete