The 3mm Silhouette Kraft Blade, which can ONLY be used in the CAMEO 4, is a very powerful tool which not only can cut through thick materials, but can also take advantage of the increased force of Carriage 2. However, it requires a whole different type of cutting - and thinking and planning.
I would suggest you read this blog post first before you get started as I've intended it to be an overview with some best practices for using the Silhouette 3mm Kraft Blade.
Unlike the AutoBlade or even the CAMEO 4 Rotary blade, you can not just pop the 3mm Kraft Blade in the Silhouette machine and expect to have a successful cut. You need to plan. And you need to be patient. This is NOT a fast process - in either the design or cutting process.
If you rush, if you pick the wrong design, and if you try to cut corners you will end up wasting a lot of material and potentially damaging your machine and certainly your materials.
I have spent days upon days and a whole lot of money in testing materials and bad cuts to finally crack the code on the best practices for using the 3mm Kraft Blade.
This blade is so new there is NO information out there from Silhouette and there's hardly any default cut settings for materials the manufacture claims to cut. For that reason, I am giving you MY best tips. This is what's worked for me...based on the EXACT materials I'm using. There are a lot of variations of leather and balsa wood and mat board...
What Materials Can the 3mm Kraft Blade Cut:
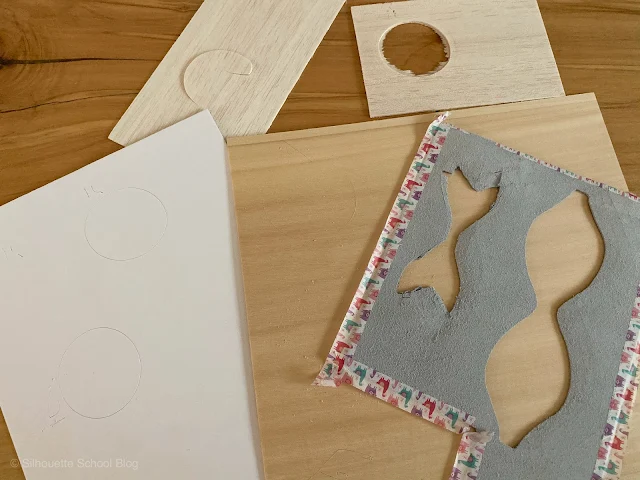
The 3mm Kraft Blade should be considered for thick, dense materials. I have successfully cut - multiple times - this genuine Cricut leather, this 2mm balsa wood, and I am currently testing to find the right combination of materials and cut settings for mat board and basswood sheets.Preparing Your Material and Cutting Mat
A high tack cutting mat is suggested for a lot of the materials that can be cut with the 3mm Kraft Blade. The mat will keep the material in place - and help prevent slipping - during the necessary multiple passes.You'll also want to tape your material onto the mat to ensure it doesn't move. I used washi tape on all four sides of my material to secure it to the mat. If possible try to put your material towards the center of the mat as opposed to right near the edge of the grid - or at least position your design there.
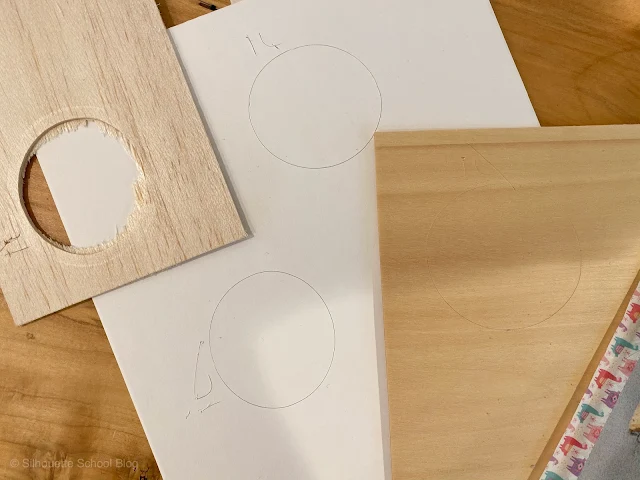
I used both the Silhouette Strong Grip mat and the Cricut Strong Grip Mat. The Silhouette mat is thinner and more pliable. While I successfully cut balsa wood on it, I found the mat bubbled a bit - side to side - while cutting. I think this was due to taping the material to it and then it slowly moving out from under the roller. The bubbling caused the multiple passes to be slightly off which resulted in some bad cuts. There are also no mat supports on the CAMEO 4 so you need a mat sturdy enough to support itself and the material on it.
The Cricut mats are thicker and more
sturdy. I did not experience any bubbling or mat movement with them.
However be aware the thickness of your mat CAN change your cuts because a
thicker mat may result in more pressure during cutting.
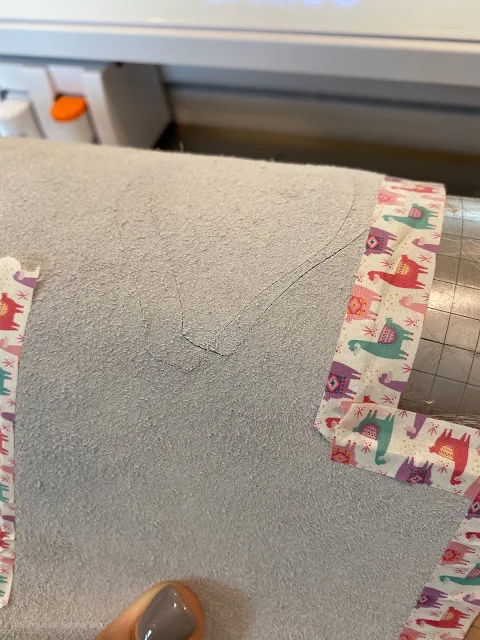
Finally, I found it best to cut from the back side of the material (so the design is cut in reverse). This keeps your mat cleaner (especially on materials like this leather), your cuts cleaner, and if you get a bad cut on the first pass you likely won't even see it on the front side. ;)
Picking the Right Design for the 3mm Kraft Blade
The 3mm Kraft Blade - and 2mm Kraft Blade for that matter - are NOT for small intricate cuts. I repeat, the Silhouette Kraft Blades are NOT for small intricate cuts. This is a big broad blade. It can not make small intricate cuts.A few other things to keep in mind when picking designs for your Silhouette Kraft Blade. It does better on curves than it does on sharp corners. Designs should be at least a third of an inch wide at their narrowest point.
Designs should also be positioned so they are NOT too close to the edge of the material to avoid splintering and to avoid the blade going off the edge of the material.
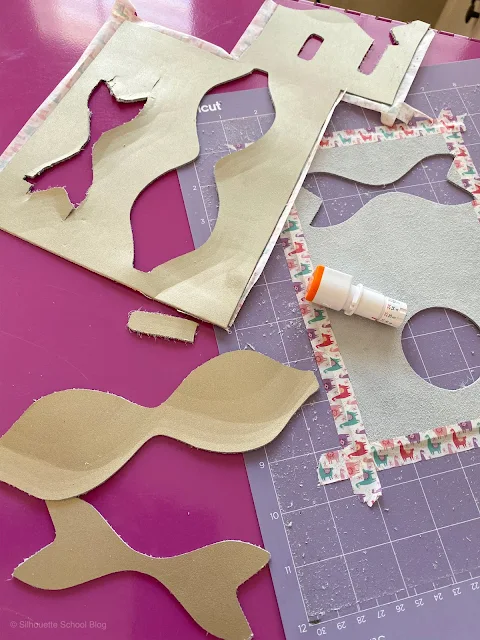
If you have a design - like this three piece bow - I would highly suggest you cut each separately and not all in a single pass. The reason is, if the blade gets caught up at any point, the multiple cut lines can end up off. It's better to have one piece off than three. Trust me...I did a lot of testing.
Multiple Passes with Varying Force and Blade Depth
Remember that video I shared with you up there? There are two big reasons it did all that grinding.
The first is I tried cutting with the loops or smart cuts on. Those are the small cuts in the negative space that the software automatically adds for rotating the blade, when you use the Action "Kraft Cut". The problem is the blade often got stuck in them and then it messed up the entire cut.
Turning those off helped significantly.
Secondly, I tried to just cut the material at full force at full blade depth from the start. That's NOT how the 3mm Kraft Blade works....if you want to get good cuts. Believe me. I know.
Basically you need to first puncture and then score the material with the initial pass. Then you need to add a few more passes increasing the force SLIGHTLY with each pass then finish it with a deeper cut but lesser force.
What this does is after you have cut through the material about 95% of the way, the deeper blade depth then does the last pass with just the tip of the blade slicing through the very last layer of the material. By backing off the pressure on this last pass you are preventing the blade from digging in and grinding into your cutting mat.
What this does is after you have cut through the material about 95% of the way, the deeper blade depth then does the last pass with just the tip of the blade slicing through the very last layer of the material. By backing off the pressure on this last pass you are preventing the blade from digging in and grinding into your cutting mat.
Setting Up Your Design for the 3mm Kraft Blade
Since the Silhouette software can't automatically apply varying force with each pass - you'll need to force it to do it. You do that in both the Design area and the Send panel by setting up a stacked set of copies of your design and then utilizing the Cut By Fill Color option.
Each of these layers will then be assigned a different cut setting - each with a different force.
Each of these layers will then be assigned a different cut setting - each with a different force.
Cutting by Color with Multiple Passes and Varying Settings
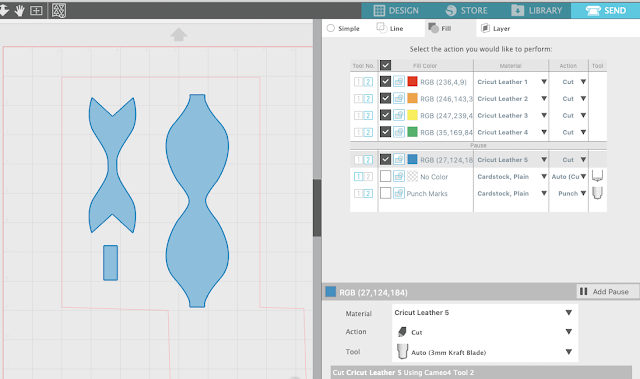
In the Send Panel, it will look something like this.
You'll notice each color layer has a different Material. All of those custom material settings I had to add manually - and each has a slightly different force as we talked about earlier with the scoring then adding increasing force with each pass.
This is something you'll have to do one time for each material you try to cut. Once you add the material set you don't need to do it every time you cut that material again. So the next time I cut a piece of genuine Cricut leather, the settings will already be in there for me. If I cut a different type of leather I will need to add settings for that leather since there are likely variations on thickness!!
I will, of course, have a Silhouette tutorial soon on how to add these special types of custom material settings. For today, however, I don't want you to get overwhelmed with information. I just want you to be aware of this different type of cutting when using the 3mm Silhouette Kraft Blade.
The final step is to hold on tight. Say a prayer. Sip your wine and press Send. DO NOT WALK AWAY FROM YOUR MACHINE WHILE IT'S CUTTING. I would actually suggest you keep a light hand on the edge of your mat. This first pass is basically a score. You're making a track of the blade to follow for the rest of the passes.
If the blade stutters at all - just kind of help it out of the rut by pushing or pulling lightly so it keeps moving. Don't worry if the second pass is slightly off from the first. As long as passes 2-5 are in the same spot you should be okay!
The machine will slightly lift the blade between each pass as it adjusts the pressure/force you set up before completing passes 2-4. You'll adjust the actual blade depth after the 4th pass for that final pass.
Before you unload the mat and material, check that you can pop your cut out. It should be a clean cut.
Once you've confirmed it's a clean cut you can unload the cutting mat and your material.
Now you're ready to either cut your next piece or start assembling your project!!
Note: This post may contain affiliate links. By clicking on them and purchasing products through my links, I receive a small commission. That's what helps fund Silhouette School so I can keep buying new Silhouette-related products to show you how to get the most out of your machine!
Get Silhouette School lessons delivered to your email inbox! Select Once Daily or Weekly.










.png)


Hello, can we cut Happy Birthday cake topper on balsa wood with this 3mm blade ?
ReplyDeleteI haven't tried it myself, but I have seen it done
DeleteHi, thanks for this. its very informative. just want to know if it can cut the likes of fridge magnets? thanks
ReplyDeleteYou put quality thought into this and wrote an informative post before anyone else. Much appreciated as this single feature applied to veneer and thin woods will be the reason I upgrade to the Silhouette Cameo 4 ...you took me over the top!
ReplyDeletegreat explaination but SO. MUCH. WORK.
ReplyDeletei'm not sure i have the patience to set up multiple layers!
Thank you so much for putting this together!!! I have stagnated for a couple months now trying to figure this out and have been so frustrated with the lack of knowledge base to pull from out there. You have given me a starting point... Thanks again!!!
ReplyDeleteHello. Total newb to the cameo world here. I am at the mercy of these tutorials, so thanks! I do not know what I'm doing wrong when loading the wood. I can't get it to load at all. I've found tips on how to cut it, but can't find anything on how to load it. What am I missing? Thanks!
ReplyDeleteHi there! Check out this blog post: https://www.silhouetteschoolblog.com/2019/11/6-materials-you-should-cut-on.html
Deletehow do you turn off the kraft blade extra cut lines? Mine keeps getting stuck on those.
ReplyDeleteHey there! Check out this blog post: https://www.silhouetteschoolblog.com/2020/01/how-to-turn-off-silhouette-kraft-blade.html
DeleteMy cameo 4 is not registering the kraft blade. It only shows 2mm and 1 mm. .. Do you know how I can get it to read this blade?
ReplyDeleteHello - My Cameo is not reading the kraft blade.. Do you know how I can get it to ?
ReplyDeleteHey there! If you're using the Cameo 4, make sure that you are putting the Kraft Blade in the right hand carriage.
DeleteMy cameo 4 plus keeps choosing the cartridge 1 blade even though I have it collapsed. So frustrating.
ReplyDeleteHey there! You will need to make sure that you've selected your design and changed the tool in your send panel.
DeleteI'm having the same issue about how to change from the number 1 cartridge slot to the number 2 slot I must be missing something
DeleteIf we are looking to cut something intricate, should we just avoid wood or is there a way to make intricate cuts on wood using the Cameo 4?
ReplyDeleteDid you ever successfully cut mat board?
ReplyDeleteHello. I am not sure if you are already aware of it: But one of your images was used on the Amazon product page (4th image): https://www.amazon.com/Silhouette-Kraft-Blade-Stück-Cameo/dp/B07ZQN453L#aw-udpv3-customer-reviews_feature_div
ReplyDeleteHi! Thank you for the tutorial!! I just updated the software and the firmware of my cameo 4 to the latest version and tried to cut leather. I cannot turn off the loops (i followed your tutorial about that but it was with no effect). Do you know if this is not possiböe anymore?? Thank you for your advise!! :-)
ReplyDeleteI been through both tutorials on using the kraft 3mm blade that were written in late 2019. I have set up my design and send panels as per instructions in both tutorials including turning off smart cut and adjusting the blade and pressure depths for each cut on basswood. Still stuck at the grinding/stuttering part like is shown in a video example in the above video in this tutorial. The blade is constantly stuck on the material and not advancing through the cut. One difference (and it may be due to version updates) is the only options given in the cut settings is "auto (kraft cut)" and "kraft cut". I can't choose just "cut" but if I go into the "more" tab I can click "disable smart cut" so that should do the same thing, right? Are there any additonal tutorials or updated information on cutting materials like balsa wood or bass wood (1.5mm)?
ReplyDelete