 |
| This is a sponsored post but all opinions are my own |
This Silhouette print and cut tutorial assumes you know the basics of print and cut. If you are a beginner or need a print and cut refresher head over here for this beginner Silhouette print and cut tutorial.
Set up your stickers in Silhouette Studio. From the Page Setup Panel make sure you have the print border on. You can get even more out of your sticker sheets (I am using Online Labels sticker sheets, as always) if your printer allows you to borderless print.
Do not add registration marks before sending the sticker designs to print.
Sidenote: Look how many stickers I'd have to get rid of on the page if I have to account for registration marks - even registration marks moved as far out as possible.
I printed this workout sticker set (get it free here with code WORKOUT) on Online Labels printable clear sticker paper, but you can use of their awesome types of sticker paper for this tutorial - glossy, removable, matte, kraft paper, silver or gold, etc.
When the printing is done, take the sticker sheet and place it on your Silhouette Pixscan mat. Make sure the entire sheet is within the black border. If you need to, trim the edge down just slightly.
Take a straight on picture - in good lighting - without any shadows or glare of the entire Silhouette Pixscan mat. I usually place my Pixscan mat on the floor and stand over to take the picture.
*From here on out, do not move or remove the sticker sheet from the Pixscan mat. It must stay in the exact same position.
Send the picture to your computer.
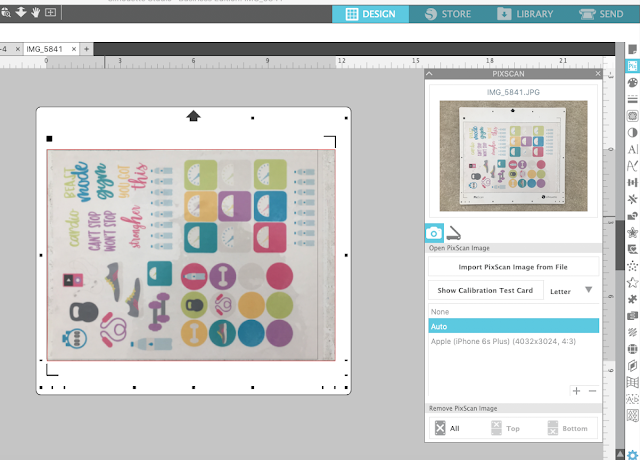
Then using the Pixscan tool on the right tool bar of Silhouette Studio, load the image into the software.
It may take a few minutes for the image to load depending on the size. When it does, it should look like this.
If the sticker designs you have came with a separate SVG or DXF cut line, like the free set included above, grab that.
If you need to create cut lines, you can select all of the stickers and make a duplicate set, then give them a transparent fill and a colored cut line.
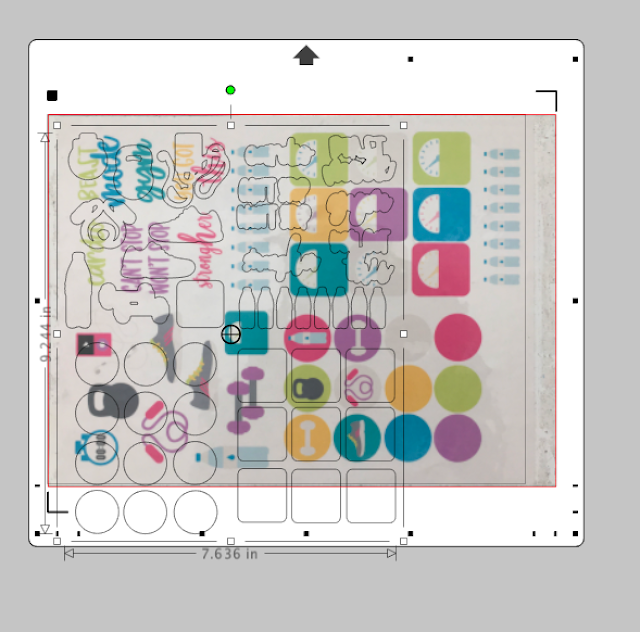
Copy the cut lines to your clipboard and move into the work area tab with the Pixscan image. Paste the cut lines there.
If you need to rotate the cut lines, use the Rotate 90 option in the Transform panel from the right sidebar.
Line the cut lines up over the Pixscan image of the stickers.
Now load your Silhouette Pixscan mat, with the sticker sheet on it into the Silhouette CAMEO. Adjust the blade depth if necessary for the best Silhouette cut settings on the type of Online Labels sticker material you are cutting.
From the Send panel in Silhouette Studio click Send.
The machine will first look for the registration marks on the mat then begin cutting.
When the cutting is finished you can unload the Pixscan mat.
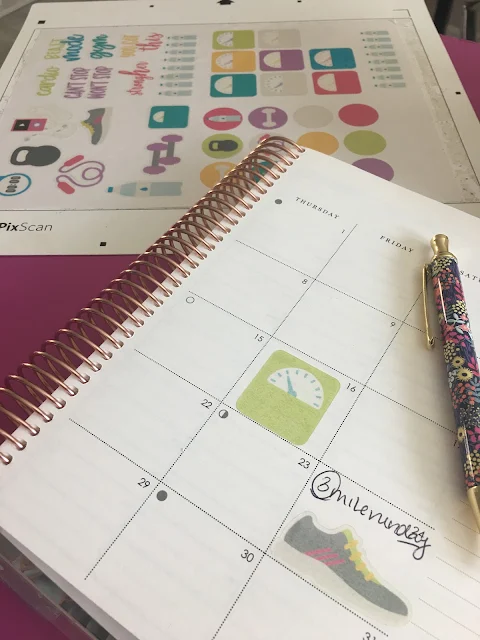
You can see how the machine cuts right around the stickers! It's able to do this because the Pixscan mat has its own set of registration marks so they're not necessary on the printed sticker sheet itself.
Note: This post may contain affiliate links. By clicking on them and purchasing products through my links, I receive a small commission. That's what helps fund Silhouette School so I can keep buying new Silhouette-related products to show you how to get the most out of your machine!
Get Silhouette School lessons delivered to your email inbox! Select Once Daily or Weekly.


.png)


Me gustaría que pudieran tener subtítulos en español todos los vídeos para poder tomar las clases
ReplyDelete