 |
| This is a sponsored blog post but all opinions are my own |
To start you want to find your sticker design. Online Labels has a large collection of free designs you can use for stickers. You'll just need to export as a JPEG and bring into Silhouette Studio to trace.
I picked the Class of 2019 sticker design and have already converted it to a full sheet of Foil Quill stickers for you to to download so you can learn this technique without worrying too much about the set up. Click here to download Silhouette sticker set
The great thing about these stickers is there's no need for registration marks because you're not printing - you're foiling then cutting!! Woohoo.
With your sticker designs in Silhouette Studio - the areas you want foiled need a different line color than the area (edge of sticker) you want cut. This is so you can more easily assign them to different tools in the Send panel.
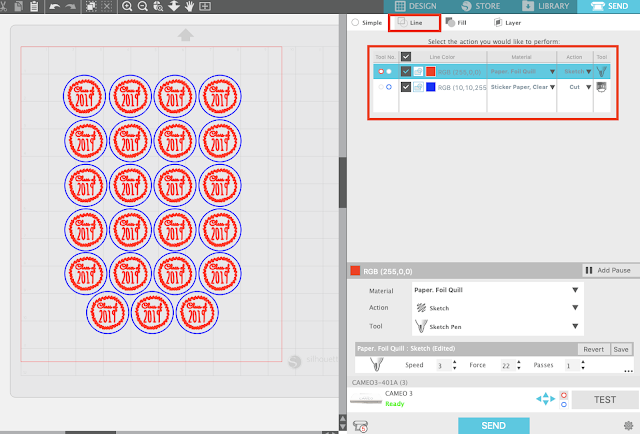
Move to the Send panel and click the Action By "Line".

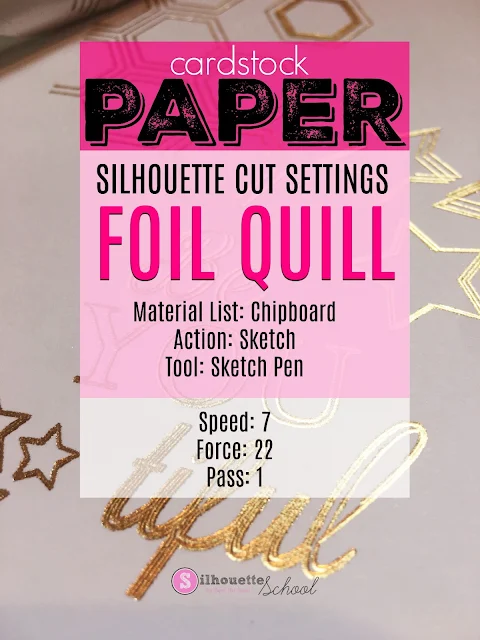
The red lines will be assigned to the red tool carriage in the CAMEO 3. This is where you want to put your Foil Quill. Ideal Foil Quill settings for the Online Label clear sticker sheets - and their printable matte and glossy sheets - are the same as the Foil Quill paper settings.
The reason the Foil Quill needs to go in the left/red tool carriage is you want to foil first. The foiled area kind of keeps the foil in place enough for you to then cut around it. If you cut first, the foil may slip around while you try to foil.
The blue line is the sticker's edge so it needs to be assigned to a Silhouette blade that is in the blue/right carriage. The best cut settings to get through the foil and yet still kiss cut Online Label's clear sticker paper are: Blade 3, Speed 4, Force 33, 1 Pass.

Position a sheet of Clear Sticker paper onto your cutting mat and then place the foil over top with with tape or by using the Foil Quill Magnetic Mat. Make sure the sticker sheet and the foil are both positioned so the stickers actually foil and cut on them. Also ensure your Foil Quill has had at least 5 minutes to warm up. For designs with fine details you'll get the best results with the fine or standard size quill.
Then Send to foil/cut from Silhouette Studio's Send panel.
The Foil Quill will go to work first.
When the foiled areas are completed, then blade will then cut the edge of the stickers.
Look how great they turned out - and perfect for envelope closures.
Of course you can customize with the color foil you use too!
Note: This post may contain affiliate links. By clicking on them and purchasing products through my links, I receive a small commission. That's what helps fund Silhouette School so I can keep buying new Silhouette-related products to show you how to get the most out of your machine!
Get Silhouette School lessons delivered to your email inbox! Select Once Daily or Weekly.


.png)


I have the generation before the Cameo 3 so how would that work for my machine?
ReplyDeleteHave you tried the Minc machine? Just wondering how these would compare, especially if I wanted to use premade clear labels...
ReplyDelete