DPI stands for Dots Per Inch and the higher the DPI the better resolution the image.
With Silhouette Studio Business Edition you can save as a JPEG or PNG and manually enter a custom DPI.
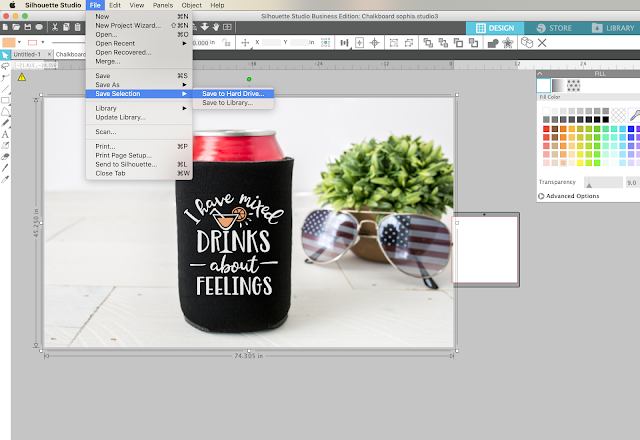
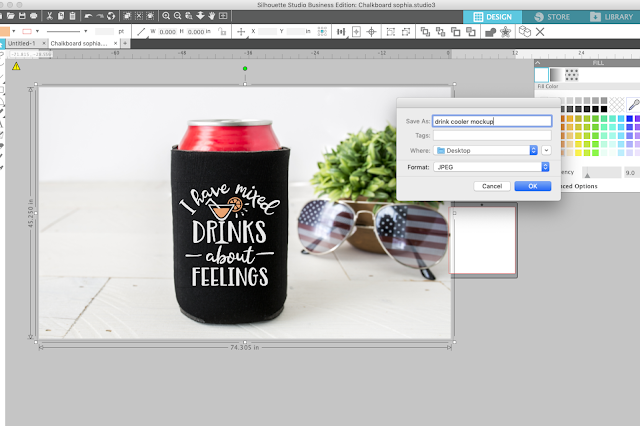
After clicking Save Selection or Save As from the File menu, a window will appear where you can select the type of file you want to save as.
When saving from Silhouette Studio as a JPEG or PNG you'll then get a second box where you can enter the DPI of the exported image.
However sometimes when you try to save after entering the DPI a lower DPI will display in the box.
This is a common issue when saving out mock up photos, like this one from So Fontsy's April Bundle, which are often high resolution and large.
The reason the manual DPI won't 'stick' is because the size of the image or design you're trying to save is too large. By reducing the size of the design or image, by pulling in one corner, you'll then able to to save with a higher DPI.
Very easy fix!
Note: This post may contain affiliate links. By clicking on them and purchasing products through my links, I receive a small commission. That's what helps fund Silhouette School so I can keep buying new Silhouette-related products to show you how to get the most out of your machine!
Get Silhouette School lessons delivered to your email inbox! Select Once Daily or Weekly.


.png)


Thanks for sharing this post. I'm very interested in this topic. onlineconvertfree.com A couple of PDF to Phrase converter even have the choice of batch and partial conversion of recordsdata. Batch conversion signifies that varied paperwork will be transformed within the required format abruptly and this in all probability is one of the best for individuals who have scarcity of time.
ReplyDelete