 |
| This is a sponsored post, but all opinions are my own |
Let's say you have a bunch of motivational quotes that you want to use in your planner or journal - with just a few clicks you can convert them into stickers and then print on my favorite repositionable and removable sticker paper!
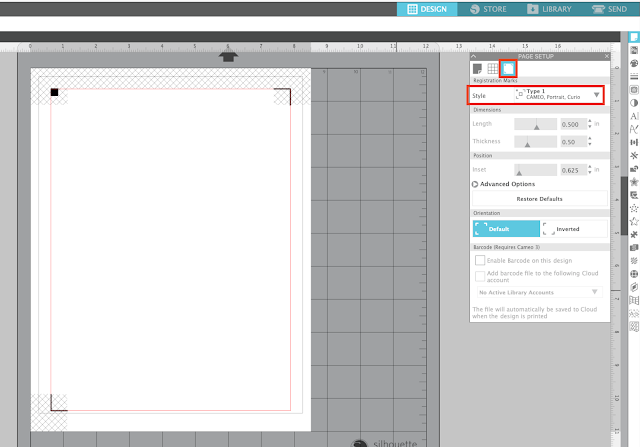
Start by setting up your work area for print and cut. Change the Page Setup so the Page Size is set to Printer and turn on the safe print border.
From the Registration tab, turn on the registration marks.
Now open or type out all of your designs and position them within the safe print.
I have this planner dingbat font which I absolutely love - and it makes this design process super easy! Instead of characters, each keystroke displays an inspirational quote.
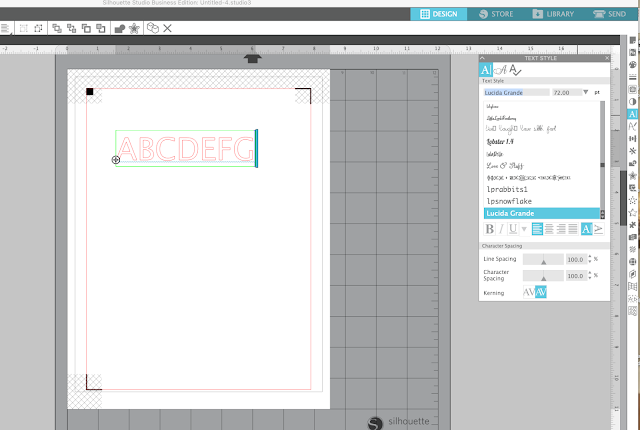
Just open the Text tool on the left side and start typing to get the dingbat designs.
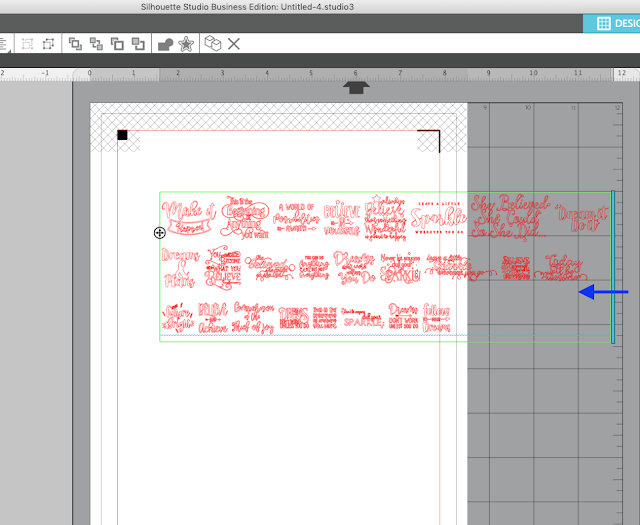
Since I want to use the whole set, I just typed out the entire alphabet in a single text box.
Then I can use the character and line spacing tools on the Text Style panel to put a little spacing between each design.
TIP: If you want to pick and choose which dingbats you want to use, the easiest way to access the them is through the glyph panel on the Text Style panel.
Once your text designs are in the work area, select them all. If you are using a dingbat font you can select the single box around all of them.
Fill the designs with a color and change the line color if you wish.
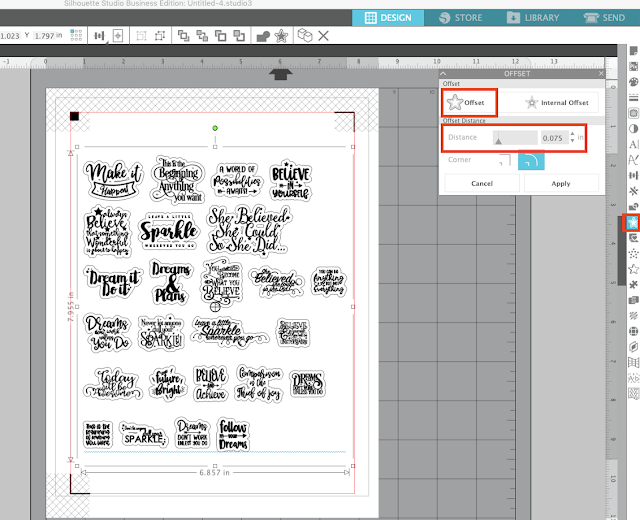
Open the Offset panel and click "Offset." This will put an offset cut line around all of the designs. I used the default distance, but you can adjust if you need to.
With everything still selected, move to the Send panel and click "Cut Edge."
This will change the cut settings so only the Offset line is set to cut.
Now you're ready to print and cut!
I am using Online Label's repositionable/removable sticker paper which is perfect for planners! I love that I can put the stickers down and then move them around if needed. And it's glossy - which I LOVE for professional looking stickers!
Grab a sheet of the printable sticker paper and put it your printer and click the "Printer" icon along the top tool bar in Silhouette Studio to print.
After the printing is complete, place the sticker sheet onto a Silhouette cutting mat and load it into the Silhouette CAMEO or Portrait.
From the Send panel in Studio change the material to Sticker Paper and tweak the cut settings to blade depth of 3, force 10 and a speed of 4.
Now you can fill your planner with your stickers ...
...and move them around thanks to the Online Labels removable sticker paper! It lifts right off the page without ripping the sticker or the paper!
And it keeps it's sticky so you can place the sticker somewhere else! Perfect for when appointments change or you need to move a sticker out of the way to write in some details.
Note: This post may contain affiliate links. By clicking on them and purchasing products through my links, I receive a small commission. That's what helps fund Silhouette School so I can keep buying new Silhouette-related products to show you how to get the most out of your machine!
Get Silhouette School lessons delivered to your email inbox! Select Once Daily or Weekly.


.png)


My 2 wont let me chose cut edge. Its wanting to cut everything. Anyhelp??
ReplyDeleteI'd make sure that your software is up to date!
Delete