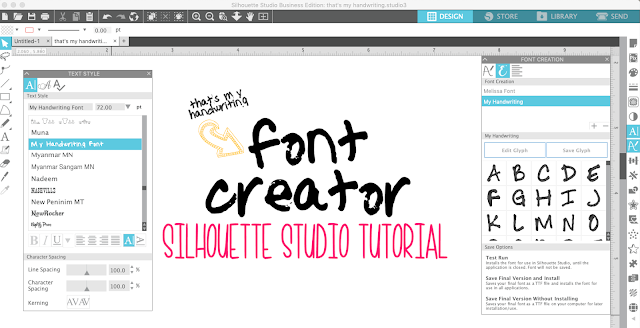
The Silhouette font creator is a new tool accessible to users who have both updated to Silhouette Studio V4.2 and who also have Business Edition.
This is a fun tool for novice font "designers", and I do use that term loosely, but it's not going to be for anyone serious about creating (or selling) fonts.
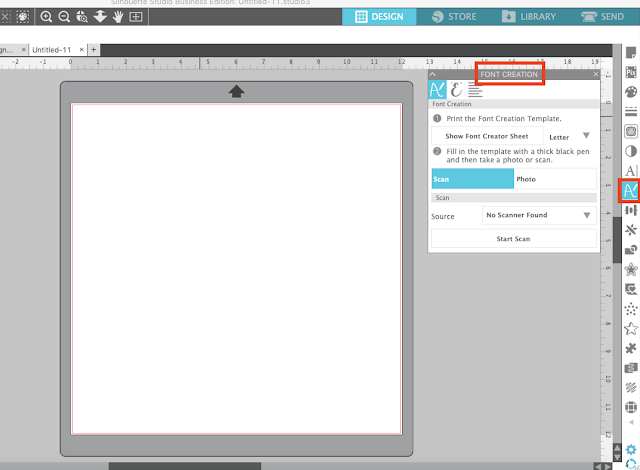
To begin, open Silhouette Studio and click the Font Creation tool on the right sidebar.
When the panel opens, select "Show Font Creator Sheet."
Use the Print tool along the top tool bar to print out the sheet on your home printer.
Use a dark-colored pen or marker (depending on how thick you want the characters) to write in each letter in the coordinating box on the sheet. Make sure the letter completely fits in the box and is not extending outside the box.
You do not need to fill in every box, but just know that your font will only contain those characters for the characters you write and draw in.
Now take a picture of the full sheet or scan it onto your computer.
On the Font Creation panel, select either Scan or Photo. I used the Photo import option and navigated to the photo of my font sheet on my hard drive.
This begins the import process. If you get a calibration error (as I did) you can just push right through it (which is what I did) by selecting "Continue without Calibration."
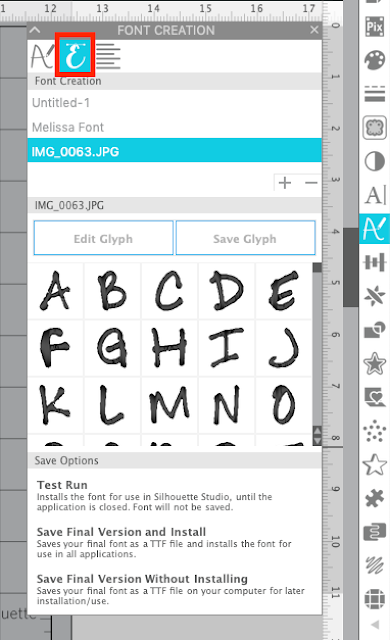
The image will begin loading and then your characters will show up in the second panel of the Font Creation panel.
If you want to make any adjustments to any of the characters, select the character and click "Edit Glyph." This will enlarge the character while also opening up the Point Editing panel.
For the G, for example, the top loop was hitting the area below so I used the knife tool to create a separation then deleted a few edit points to create more of a space. After editing the letter make sure you hit "Save Glyph" to save your changes.
For your first Silhouette font I would not worry too much about editing each letter. Just practice the Silhouette Studio font creation process. If you want to re-name your font, do so by right clicking on the default font name and selecting "Rename."
When you're ready, you have three options for saving your font:
- You can test the font by having it install only in Silhouette Studio for your current session
- You can save and install the font which will install it to all of your computer programs
- You can save the font, but not install it
If you choose to save and install the font to your computer you will have the opportunity to selection where you want it saved. The font will save as a TTF. You can then install it into your font program such as Font Book.
Back in Studio the font will appear in your Text Style list just like all your other fonts....and there you go! You've created your own font using your own handwriting.
Note: This post may contain affiliate links. By clicking on them and purchasing products through my links, I receive a small commission. That's what helps fund Silhouette School so I can keep buying new Silhouette-related products to show you how to get the most out of your machine!
Get Silhouette School lessons delivered to your email inbox! Select Once Daily or Weekly.


.png)


Would this feature work with cursive also? If so, what tips do you have for making fonts in cursive?
ReplyDeleteThanks!