Turns out of all the Silhouette tutorials on Silhouette School Blog I didn't have a beginner tutorial on glitter adhesive vinyl. You know like a basic "how to" with the best Silhouette cut settings for glitter vinyl, my favorite brand of glitter vinyl, tips for weeding it, and the best transfer tape for glitter vinyl. Until now...
Glitter Vinyl for Silhouette
My go-to glitter vinyl for Silhouette is Styletech. The tricky thing about Styletech is the backing is not branded and it's often not sold under its brand name, like Oracal is, so it can be more of a challenge to find.I love this glitter vinyl because it's permanent adhesive vinyl. It's also smooth - not textured - while being glittery so there's no worry about any glitter flaking off. Styletech glitter vinyl comes in a large selection of colors and is available by the sheet, roll or in glitter vinyl bundle packs.
Glitter Fills in Silhouette Studio
To see what your decal or design will look like cut in glitter vinyl, before you actually cut it, you can create glitter fills in Silhouette Studio!The trick is to take a picture of your glitter vinyl then import it into Silhouette Studio as a custom pattern in your Pattern Fills then use it to fill the design! If you need a step by step tutorial on making glitter fills in Silhouette Studio, check out this Silhouette tutorial.
Best Silhouette Cut Settings for Glitter Vinyl
Of course I would always recommend you do a test cut until you find the perfect cut settings for your machine and blade. Glitter vinyl cuts perfectly for me on with a blade depth of 2, speed of 5, force of 22, and a single pass.
If they work well for you can save them as a custom material cut setting in Silhouette Studio so you can quickly select them from your material list whenever you are cutting glitter vinyl.
Weeding Tips for Glitter Vinyl
To make weeding glitter vinyl easier and avoid waste, add a weeding box around your design in Silhouette Studio before you cut. You can use the Draw a Rectangle tool from the left sidebar of Silhouette Studio to easily draw out a rectangle around your design.
Creating a weeding box will not only make it easier to weed your design by limiting the amount of vinyl needed to be removed from around your design, it will also allow you to keep the full sheet of vinyl intact rather than cutting it off the full sheet.
Transfer Tape for Glitter Vinyl
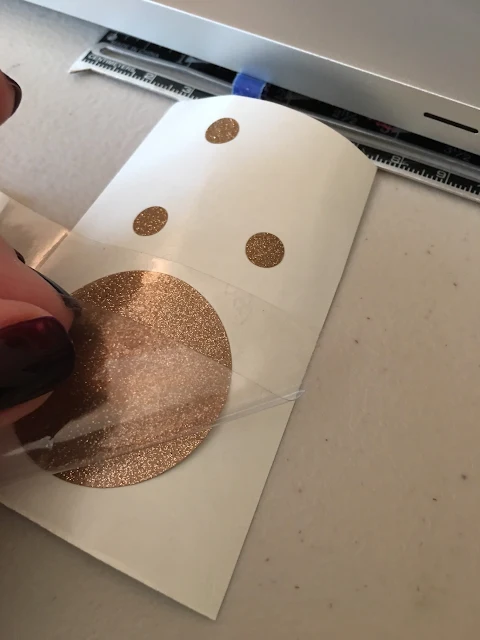
Because of its adhesive strength, it's best to use a high tack transfer tape with glitter vinyl. Even then it can sometimes present a bit of a challenge to pick up off the backing with the transfer tape!If you have trouble getting the transfer tape to pick up the vinyl decal off the backing, make sure you have burnished it well then flip the decal over and peel the vinyl backing away at an angle leaving the decal on the transfer tape. Removing the backing, instead of peeling up the vinyl with the transfer tape is often easier.
Now that know you know to perfectly cut, weed, and transfer glitter vinyl you will want to glitter all the things!! If you need to stock up check out the huge selection of glitter vinyl available in sheets, rolls, and bundle packs.
Note: This post may contain affiliate links. By clicking on them and purchasing products through my links, I receive a small commission. That's what helps fund Silhouette School so I can keep buying new Silhouette-related products to show you how to get the most out of your machine!
Get Silhouette School lessons delivered to your email inbox! Select Once Daily or Weekly.


.png)


No comments
Thanks for leaving a comment! We get several hundred comments a day. While we appreciate every single one of them it's nearly impossible to respond back to all of them, all the time. So... if you could help me by treating these comments like a forum where readers help readers.
In addition, don't forget to look for specific answers by using the Search Box on the blog. If you're still not having any luck, feel free to email me with your question.