 |
| This is a sponsored post but all opinions are my own |
I picked up three sublimation blanks from Pro World that I thought would make great holiday gifts - a double-sided ornament shape, a round metal key chain, and cork-backed coasters.
Creating Cut Lines for Sublimation and Vinyl Blanks in Silhouette Studio
The most common question I get from people is: "How do I get my design to fit perfectly on the blank"? The trick is to use the Pixscan mat so that you can bring the blank into Silhouette Studio at the exact shape and size of the physical blank.Then you can either trace it or use the drawing tools to create cut lines. Lucky for you I am providing you with free download templates for these three blanks. Just click here to download the free blank templates perfectly sized to fit these Pro World blanks!
That's what I did here...and once I got the cut lines to perfectly match you don't need the Pixscan mat anymore.
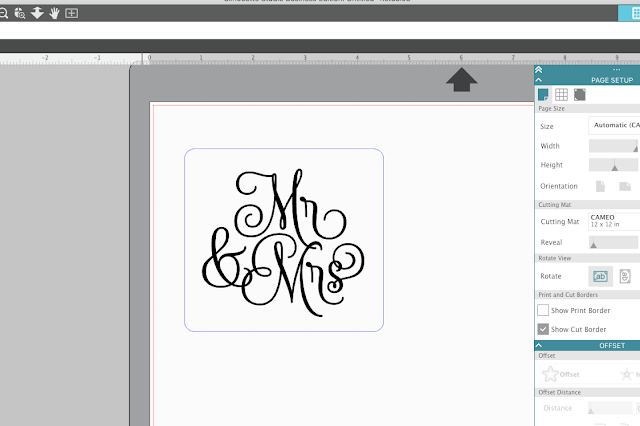
For sublimation you want to create a slight bleed area so your print goes fully edge to edge on the design. To create a bleed area use the Offset tool. The offset (I changed the line color to blue to make it easier for you to see) will be what you're going to use to design in.
If you're going to use the shape for vinyl you want to use the original size design (red line here) - not the offset so your vinyl isn't hanging over the edge of the blank.
Designing in Silhouette Studio for Sublimation and Vinyl Blanks
Now that you have your cut lines you can design within them knowing your design will be perfectly sized for your blank. For the ornament I simply filled the shape with a photo that I imported into my Patterns folder and accessible through the Fill Patterns panel.For the coaster and the keychain I started by filling the shape with a pattern in my Fill Patterns panel and then added a few other basic shapes and some text.
There are so many options just get creative. Keep in mind for sublimation designs you will need to mirror your design so it's not backwards when you flip it onto the blank. To do so, select the design in Studio > right click > Flip Horizontally.
I decided to actually use the same designs for sublimation and vinyl by printing the shape on sublimation paper and also on printable vinyl which is less expensive alternative to sublimation!
For the printable vinyl I used the original cut line (no offset) and set the page up as a print and cut (the designs should NOT be mirrored).
Of course if you wanted to add adhesive vinyl to your blank, you can use the template to size the vinyl so it fits or to actually cut the full shape of the bank in vinyl. There's no need to even fill it with a pattern or anything.
Printing to a Sublimation Printer from Silhouette Studio
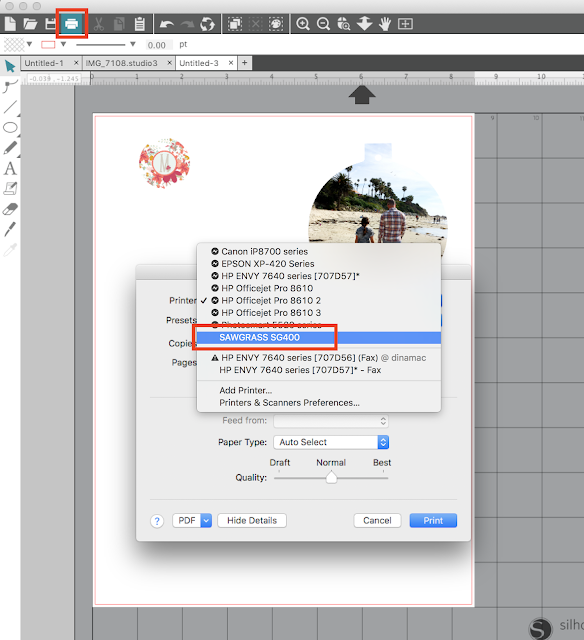
Printing to a sublimation printer is no different than printing to a regular inkjet or laser printer from Silhouette Studio. I have my Sawgrass SG400, also from Pro World, powered on and connected to my computer so when I open the Print tool in Silhouette Studio it's listed there as a printer option just like my other printers.If you need some additional help getting your sublimation printer set up, check out this beginner Sublimation and Silhouette tutorial.
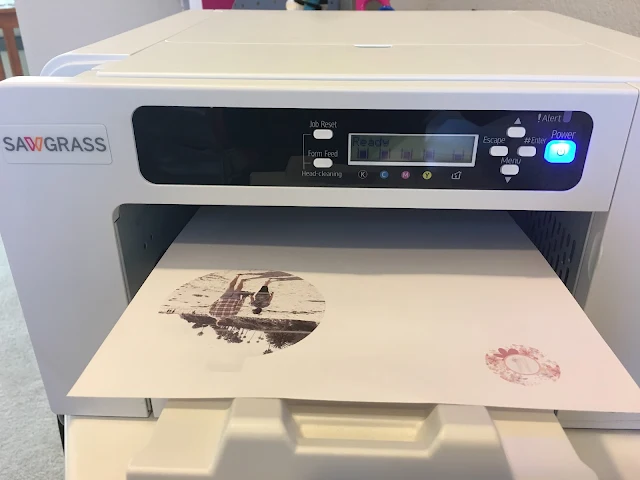
You can then move forward with printing. Be aware, it's common and expected that the sublimation print will appear slightly muted.
Many sublimation blanks have a clear film over them to protect against scratches and dust so remove any film.
Have your heat press warmed up to 400 degrees and set for 60 seconds. I'm using a 15 x 15 TransPro.
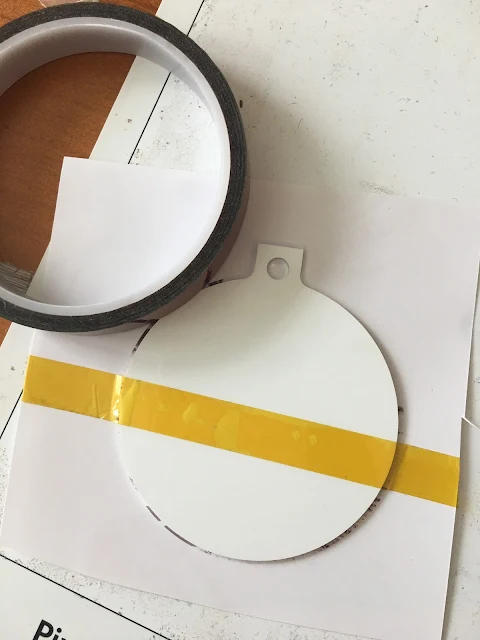
You do not need to cut the sublimation designs out with your Silhouette machine. Simply lay the blank - with the front side down onto the printed sheet - and use high temperature thermal tape to keep it in place.
See why the little bleed area is important?
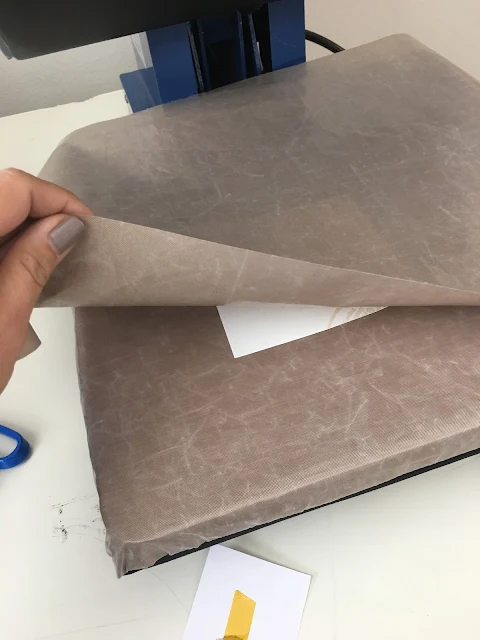
Place the whole thing on the heat press with the paper side up and cover with a teflon sheet while pressing.
After the 60 seconds of full pressure carefully remove the blank and remove the tape and paper being careful not to burn yourself. I love the Christmas ornament shape with the photo fill.
For the key chain you'll need to peel off the cover from the adhesive piece and place the little blank into the key chain.
That's it for sublimation! They give such professional results it's amazing!!
And here's one of the coasters!
Printable Vinyl on Sublimation Blanks
As I mentioned earlier in this tutorial if you are using printable vinyl instead of sublimation you can use the same designs and the same blanks! Just print the designs to your regular printer as print and cuts on printable vinyl.
With the Cut Edge option on in Silhouette Studio, you'll want to cut the designs out using your Silhouette CAMEO or Portrait.
Once cut, peel the printed up like a sticker and apply it to the blank!
As you can see printable vinyl (on the right below) is a great alternative to sublimation. Keep in mind printable vinyl sits on top of the surface as opposed to the sublimation ink which is released as a gas into the surface. Sublimation is more expensive, but you don't risk fading, peeling, and it's dishwasher and microwave safe (for things like mugs).
And finally you can also cut adhesive vinyl and apply to sublimation blanks the same way you would transfer vinyl to any other surface.
Check out how pretty the glitter vinyl looks on the white coasters!
Get Silhouette School lessons delivered to your email inbox! Select Once Daily or Weekly.






.png)


I really love those key chains - so pretty! I'm going to have to get some of those blanks to try out!
ReplyDelete