Stars are such a great but easy decoration for Christmas. You can use them as ornaments, on wreaths, as a garland. The possibilities are only as limited as your imagination. But first you need to know how to create my favorite 3D star shape.
As I was working on creating a home full of amazing paper Christmas decor, I realized, there is not a tool to make a star in Silhouette Design Studio. I love using 3D stars in my Christmas decor so I thought it would be great to share how to make these fun 3D stars.
After drawing the polygon, grab the slider on the inside of the polygon and drag it to the left to turn it into a triangle.
My triangle was very large, so I resized it to fit better on the page. Then it was time to turn that single triangle into a 6 point star (the easiest kind to turn 3D).
Copy and paste a second triangle. Line it up so it's on top of the first triangle.
Press O on your keyboard to reveal the center of rotation tool (the circle with the cross marks inside it). Drag it to move it to the center bottom of the triangle.
Grab the green rotation dot and rotate the triangle until the right corner of the rotating triangle touches the edge of the non-rotating triangle. This should also make the left corner of the non-rotating triangle touch the edge of the rotating triangle (kinda hard to explain, but see the picture for help).
Repeat until you have 6 triangles evenly rotated around the center point. It's starting to look like a star now.
Select all the triangles and open the Modify Panel. Select weld to combine them all into one 6 pointed star shape.
Now you could leave your star there, but we want to make it into a simple 3D shape.
To make your star ready to fold, you need to add dotted lines or score lines between all the points on the star.
Using the Line Tool, draw a line from one point to the point directly across from it. Repeat for all points. Then do the same for the valleys between the points.
Select all the lines and and from the Line Style panel (or quick access tool bar) change the line style to dotted. Or you can use the score option in the cut settings for this part if you want to use Score instead of cut dotted lines.
Now you can cut your stars out of any fun printed paper or you can create your own design by adding a printable decoration to the front. That is what I did. I opened a snowflake SVG and sized it to fit inside my star. But how beautiful would it be with this nativity SVG? To make it printable, I selected a fill for the design.
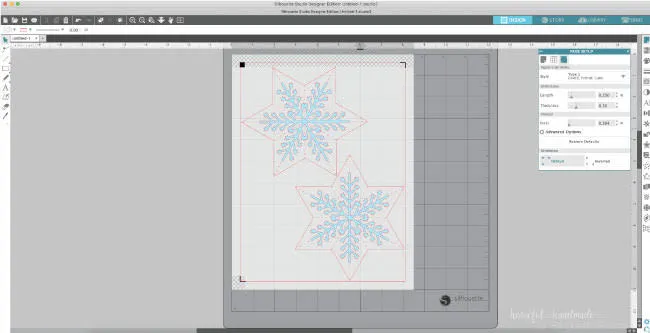
Then I added Registration marks and made 2 stars to fit inside the cuttable area. If you want more tips for using Print & Cut, check out this post.
Print your design on cardstock, but before you cut it out make sure to change the cut settings for the decoration on top of you star to No Cut.
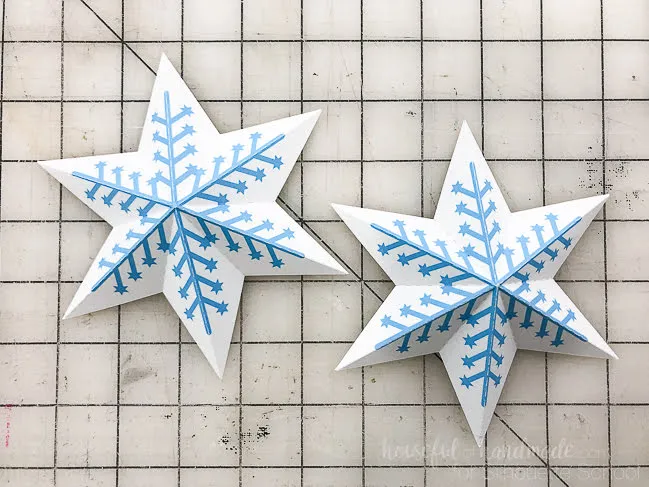
Then run it through your Silhouette to cut it out. To fold your new 3D star, fold along all the lines from point-to-point one way. Then fold the lines from valley-to-valley the other way.
Shape the star by pressing all the points together a little bit. Tweak any of the folds until your star looks the way you want.
Now you are ready to use them in your decorations. Glue a loop of twine or ribbon to the back of one point and hang them on your Christmas tree for a wonderful inexpensive Christmas ornaments. Or string a bunch of your new 3D stars together to make a wonderful paper garland. I even glued some back-to-back to make an even fancier garland. There are so many ways to use these beautiful 3D stars!
And if you love these 3D stars, you are going to love these other fun paper Christmas decor ideas:
- Paper Lantern Christmas Ornaments
- 3 Easy Paper Christmas Trees
- Gingerbread House Ornaments
- Christmas Reindeer Figurines
- DIY Paper Lanterns Decor
Note: This post may contain affiliate links. By clicking on them and purchasing products through my links, I receive a small commission. That's what helps fund Silhouette School so I can keep buying new Silhouette-related products to show you how to get the most out of your machine!
Get Silhouette School lessons delivered to your email inbox! Select Once Daily or Weekly.


.png)


No comments
Thanks for leaving a comment! We get several hundred comments a day. While we appreciate every single one of them it's nearly impossible to respond back to all of them, all the time. So... if you could help me by treating these comments like a forum where readers help readers.
In addition, don't forget to look for specific answers by using the Search Box on the blog. If you're still not having any luck, feel free to email me with your question.