 |
| This is a sponsored post but all opinions are my own. |
The added touch of a custom sticker sheet backing will take your sticker sets to the next level..no more boring white!
This is an intermediate to advanced Silhouette print and cut sticker tutorial that will assume you know the basics of printing and cutting and stickers. If you need a little more practice check out our beginner Silhouette tutorials here.
Turn Dingbat Fonts into Stickers!
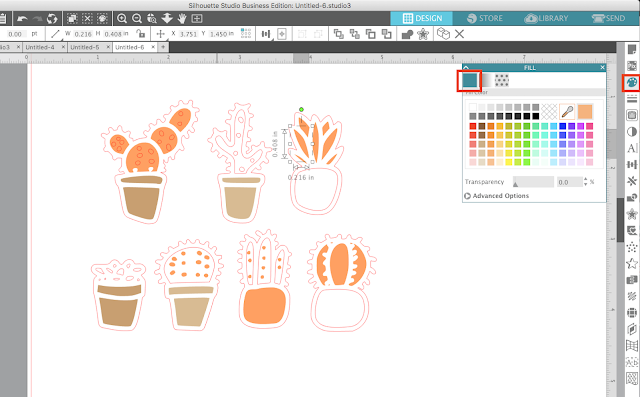
Start in Silhouette Studio by designing your sticker sets. I used a dingbat font called Thorny which includes all those adorable succulent and cactus designs.To fill them with color I just ungrouped and released each design's compound path and then filled each piece with the Fill color tool. Here's a Silhouette tutorial on that step of the process if you're unsure how fill dingbat fonts with color.
How to Create Sticker Sets in Silhouette Studio
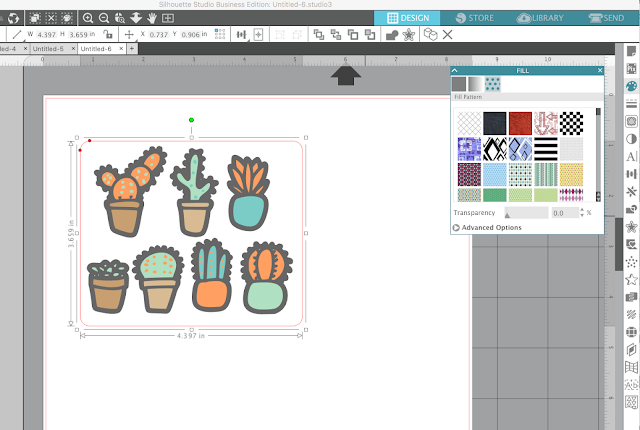
Once your sticker designs are ready, you can move on to the sticker sheet backing. I always use Online Labels sticker sheets. I love all of them, but the white gloss inkjet printable sheets are my favorite. Of course since the sheets are white the stickers will print in full color, but the backing sheet will remain white...UNLESS I customize it!!Here's what you're going to do. Use the Draw a Rectangle or Draw a Rounded Rectangle tool from the left sidebar of Silhouette Studio to draw a box around your sticker set.
That box is going to be the edge of your sticker sheet. Depending on the size of your sticker set it's helpful for either removing the registration marks from your printed sticker sheet or for creating mini sets.
Either way you don't have to leave it boring white!
Filling Sticker Sheet Backgrounds
Select the box itself > right click > Send to Back. You want to do this so that when you eventually fill the box you're not hiding your stickers!Now with the box still selected, open up the Fill Color tool from the right sidebar. The third tab is where your patterns are. If you have imported custom patterns into your Silhouette Studio pattern library they will be there below the default patterns.
Find the pattern you like and with the box around your stickers selected, click the pattern. It will now fill the box - giving you a patterned sticker sheet backing.
Customizing a Sticker Sheet Backing in Silhouette Studio
Now is where the fun begins!You can also use the Shader Effects tool to change the color of your fill pattern! Adjusting the Colorize, Contrast/Brightness, and Tint independently and in combination (click Apply in between changes) gives you almost endless color options! This is great if you have a pattern you want to use, but the color doesn't really go so well with the theme of your stickers.
You can now customize the backing by changing the scale, angle, or position of the pattern. Use the Advanced options in the Patterns fill tab to make these changes.
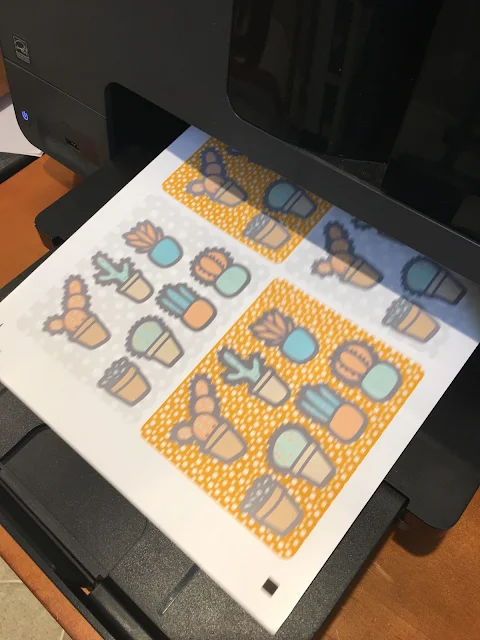
For my sets I used two different polka dot patterns with coordinating colors. The dots were scaled on slightly smaller and one larger on each set just for some contrast - but the stickers all remained the same.
Time to get creative!!
How to Print and Cut Sticker Sheet Sets in Silhouette Studio
The final step is printing and cutting your sticker sets. Since you'll want your stickers to kiss cut and your full sets to cut all the way through you can follow this Silhouette Studio tutorial for how to set up cutting for mini sticker sets! Here are the steps in a nutshell:- Turn on the print and cut registration marks
- Change the sticker cut lines to Cut Edge and assign to Tool 1/Red
- Select Sticker Paper, White as the material and use the default cut settings
- Change the sticker sheet edge to Cut and assign to Tool 2/Blue
- Select Clear Sticker Paper as the material and use the default cut settings (this gives deeper cut settings so cut through the backing too)
Place a sheet of Online Labels printable white sticker paper into your printer and from Studio click the printer icon to print. Isn't that high gloss awesome?!
Now place the printed sticker sheet onto your Silhouette Cutting mat. Make sure you have both tools in the carriage of your Silhouette CAMEO 3 and send your stickers to cut.
Aren't the custom sticker sheets with a patterned backing so fun?!
Free Sticker Sets
And now for those free sticker sets I promised you! You can download this adorable succulent sticker set now for free! Remember, these are for personal use only! We love them as planner stickers...if you love planner stickers too, you might want to check out Online Label's removable sticker sheets - they're great for moving stickers around in your planner..you know, when plans change!Note: This post may contain affiliate links. By clicking on them and purchasing products through my links, I receive a small commission. That's what helps fund Silhouette School so I can keep buying new Silhouette-related products to show you how to get the most out of your machine!
Get Silhouette School lessons delivered to your email inbox! Select Once Daily or Weekly.


.png)


Great Blog. Thank you for sharing such a good blog with useful information. I want to know more about stickers decal printing.
ReplyDeletestickers decal printing