Maybe you prefer to cut vinyl without a Silhouette cutting mat or maybe the material you're cutting is too long to fit on a cutting mat. Whatever the reason, both Silhouette Studio and your Silhouette CAMEO need to be set up correctly to cut without a mat.
This Silhouette tutorial will walk you through the three quick steps to successfully set up your software and machine to cut without a cutting mat.
Step 1: Change the Page Size
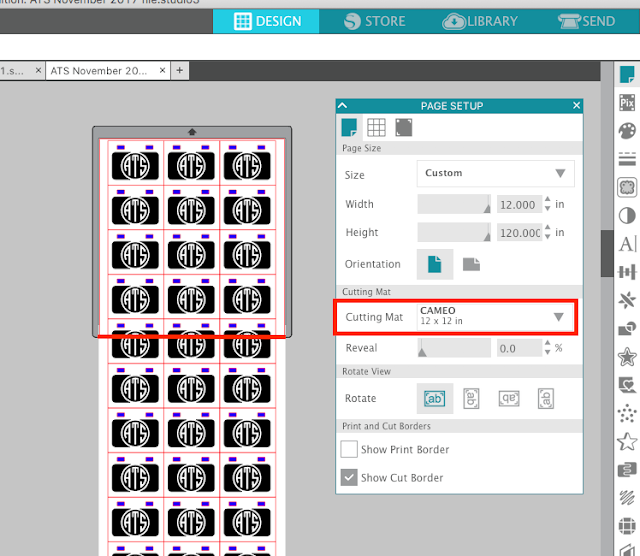
With your design in Silhouette Studio and sized, open the Page Setup panel from the right sidebar.Change the Page Size to match the size of your material. Remember you can only cut lined materials like vinyl, heat transfer vinyl, or stencil material without a cutting mat.
Keep in mind your material will still need to be wide enough to fit under the rollers so it can't be less than about 8" wide.
The Silhouette CAMEO and Portrait machines can cut up to 10' long so the height can be adjust up to 120".
If you stop here and try to cut, without going to the next step, your Silhouette cutting machine will only cut to the end of the selected cutting mat. By default that is the Silhouette CAMEO 12x12 mat.
Step 2: Change the Cutting Mat
Still in the Page SetUp Panel, but further down change the Cutting Mat selection to "None." You'll notice the virtual mat in the work area will disappear.
You'll want to pick "None" even if you are using the Silhouette Roll Feeder while cutting.
Step 3: Move the Right Roller
Before loading the material into the machine to begin cutting, you'll need to move the right roller. The default position of the right roller is positioned to the far right so it can roll over the right edge of the cutting mat. But when cutting without a cutting mat, you'll need to move the right roller in.Depending on the width of your material, there are two other roller positions so pick the one that will hold your material in place as close to the right edge of the material as possible.
To move the roller flip up the roller lever bar, twist the roller to unlock it and move it in until the teeth snap into the grooves on the roller bar. Then twist it to lock it and flip the lever again to put the roller bar back down. For a full step by step Silhouette tutorial with pictures on how to move the CAMEO 3 rollers, check out this tutorial.
Note: This post may contain affiliate links. By clicking on them and purchasing products through my links, I receive a small commission. That's what helps fund Silhouette School so I can keep buying new Silhouette-related products to show you how to get the most out of your machine!
Get Silhouette School lessons delivered to your email inbox! Select Once Daily or Weekly.


.png)


No comments
Thanks for leaving a comment! We get several hundred comments a day. While we appreciate every single one of them it's nearly impossible to respond back to all of them, all the time. So... if you could help me by treating these comments like a forum where readers help readers.
In addition, don't forget to look for specific answers by using the Search Box on the blog. If you're still not having any luck, feel free to email me with your question.