This is awesome for marketing and branding...and yes, for those of you wondering you can use the stamps to mark the back of your wood signs. And what's even better...I have 25% off code for you hat will work on not only the Silhouette Mint, but also all Mint Bundles and Mint accessories.
Alright so first things first - you need to turn your business logo into a cut file if it's not already.
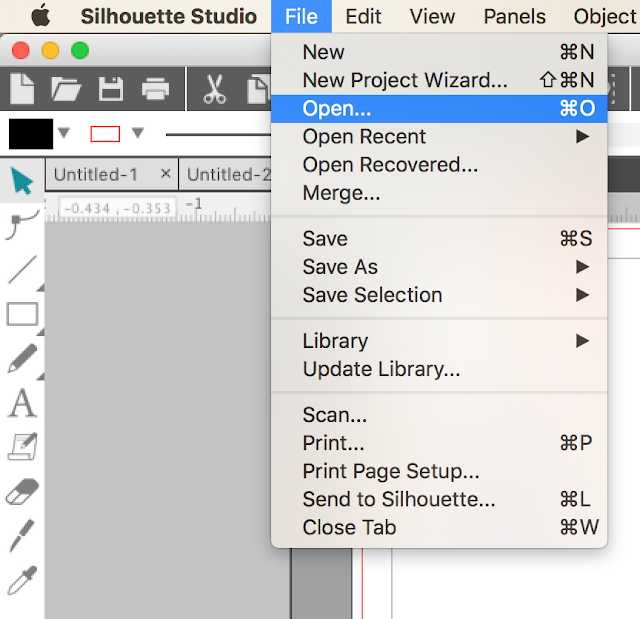
You can do that by importing it into Silhouette Studio. Go to File > Open and find your business logo on your computer. You can import JPEG, PNG, and PDF files.
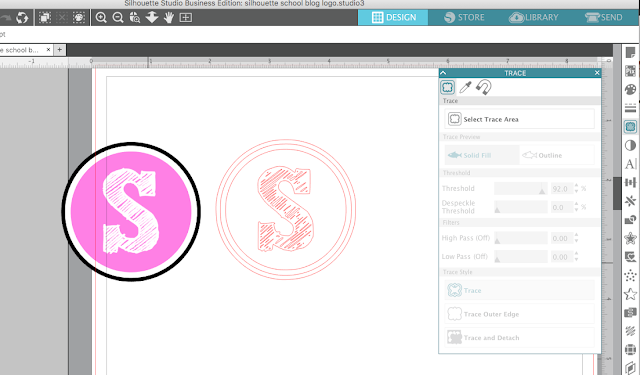
Now you'll need to trace the logo to create cut lines. Open the Trace panel and then click "Select Trace Area."
Use your mouse to draw out a selection trace box over your logo. The box will be gray until you release the mouse. Then the area of the logo will turn yellow.
You're looking to get solid yellow shading so adjust the Threshold if you need to - then click "Trace."
Use your mouse to pull the cut file away from the original image (you can delete the original logo now).
I would suggest you fill the logo cut file with solid black from the Fill tool along the Quick Access Tool bar.
Save the log now as a .studio file to your computer by going to File > Save As > Save to Hard Drive.
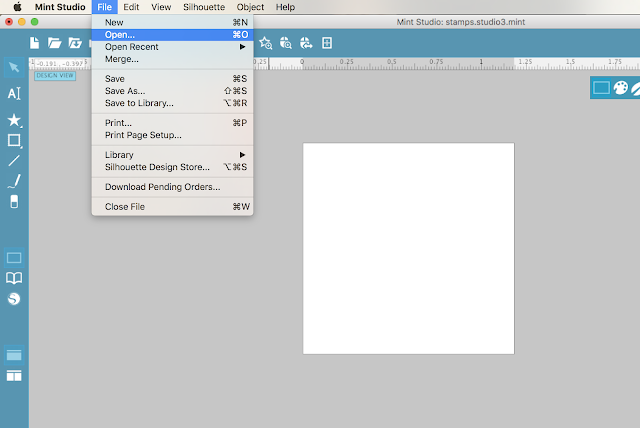
Now open up Silhouette Mint Studio. Import the .studio file by clicking File > Open and navigating to the file.
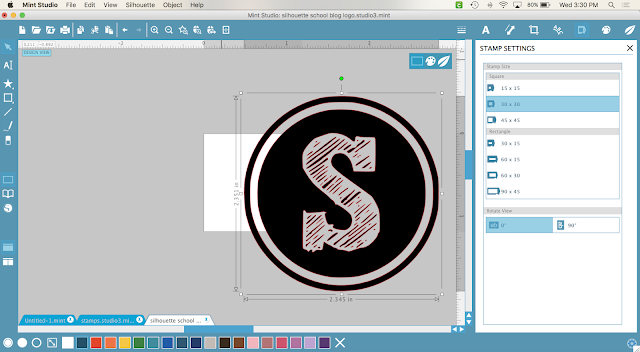
You'll likely need to re-size the design so select it and pull in one of the corner nodules.
From the Stamp Settings tab select the stamp size based on the stamp sheet you're using. You want to make sure these two match. I'm using a 30x30.
If you need to size the design any more - do so now and center it on the virtual stamp sheet.
Click the little leaf icon at the top of the software to move into the Send to Mint panel.
Your design will automatically be mirrored - this is what you want.
Power on your Silhouette Mint and plug it into your computer. Grab the stamp sheet.
Don't load it yet - click "Start Mint" in Silhouette Mint Studio first and wait for the software to tell you to insert stamp sheet.
Feed the stamp sheet into the Mint. The machine will grab it and start feeding it through.
In just about a minute the stamp will be spit out the other side.
Fold back the cardboard on the perforated line and then peel up the plastic so you can grab the rubber stamp.
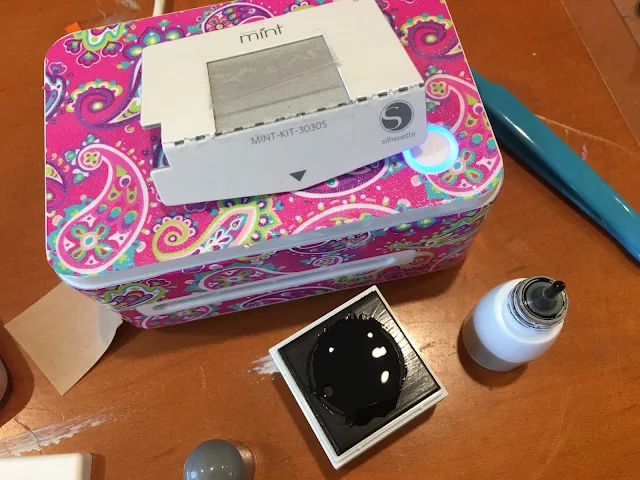
You can then place it on the adhesive side of a Mint stamp base.
Grab a bottle of Mint ink and cover your stamp. Wait about 10 minutes and then stamp off the excess.
Once the extra ink is removed you'll find yourself with a perfect custom stamp!
Since I get so many questions about using stamps on the back of wood signs - the answer is YES! Yes you can mark your wood signs with your custom stamp.
Now...for more good news.
Until Friday, August 3 ONLY you can get 25% off the Silhouette Mint, Mint bundles, and all Mint accessories including stamp kits and inks at Swing Design through my link and with the code SILHOUETTEMINT.
AND for a limited time you can download the Silhouette Mint Accessory template kit for free from So Fontsy. It includes SVG/PNG files for you to make the Silhouette Mint Wrap, a dust cover, and a ink and stamp sheet holder.
Note: This post may contain affiliate links. By clicking on them and purchasing products through my links, I receive a small commission. That's what helps fund Silhouette School so I can keep buying new Silhouette-related products to show you how to get the most out of your machine!
Get Silhouette School lessons delivered to your email inbox! Select Once Daily or Weekly.









.png)


I did separated the parts with Silhouette software..Thank you! :)
ReplyDelete