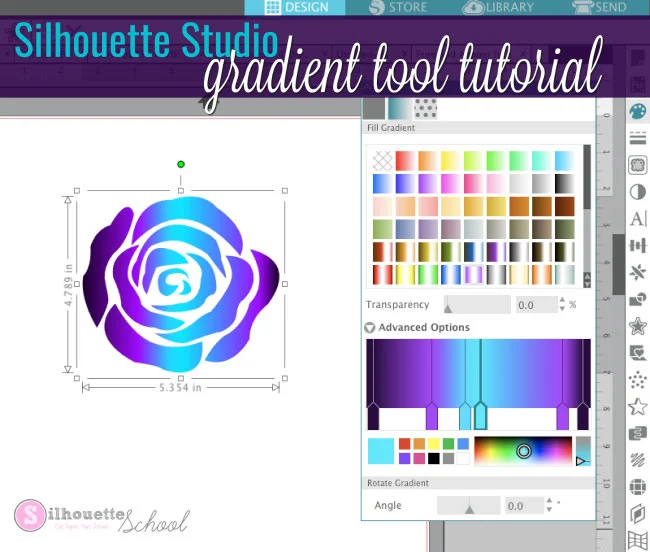
There are default quite a few gradient color options in Silhouette Studio, but you can also customize the gradient fills as well.
Silhouette Studio Gradient Fill Tool Tutorial
Gradient fills are useful for print and cut designs as well as printables created in Silhouette Studio.Start by opening your design in Silhouette Studio.
To add a gradient fill, open the Fill Color panel from the right sidebar.
Click the middle tab to open the Gradient Fill window.
You can select any of the default gradient fills. Easy peasy!
Compound Paths in Silhouette Studio
Now a couple things to point out. If the design is NOT a compound path, in other words the compound path is released, each piece of the design will be filled with a separate full gradient fill as shown in the above image.However, if the Silhouette design is a compound path, the gradient fill will be spread across the entire design as it is below. Can you see the difference?
Silhouette Studio Advanced Tool Options
If you want a custom gradient fill click the Advanced option. Don't be scared by all these flags (I don't know what they're really called so I'm calling them flags).If you just want to adjust the size or spacing of the gradient click on one of the flags and pull it in either direction.
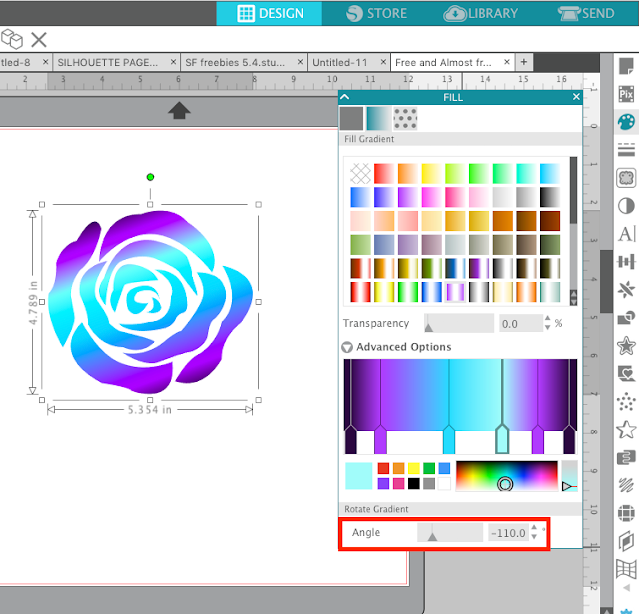
If you want to change the actual color of the gradient click a flag and then pick a different color from the color picker. You can see here that the original white flag on the left was changed to blue, while the right white flag remained white.
When the remaining white flag is changed to blue, you get an ombre effect in Silhouette Studio.
Also note that the angle of the gradient was rotated by moving the Angle bar.
The gradient tool is a great on for playing around with if you're a more advanced Silhouette Studio user. Try it out on one of your next Silhouette print and cut projects!
Note: This post may contain affiliate links. By clicking on them and purchasing products through my links, I receive a small commission. That's what helps fund Silhouette School so I can keep buying new Silhouette-related products to show you how to get the most out of your machine!
Get Silhouette School lessons delivered to your email inbox! Select Once Daily or Weekly.


.png)


No comments
Thanks for leaving a comment! We get several hundred comments a day. While we appreciate every single one of them it's nearly impossible to respond back to all of them, all the time. So... if you could help me by treating these comments like a forum where readers help readers.
In addition, don't forget to look for specific answers by using the Search Box on the blog. If you're still not having any luck, feel free to email me with your question.