This is ideal if you're making items in bulk, but still want to be able to personalize them a bit so they're not so...stock.
I recently picked up a couple of stock transfers from Pro World - where they have a huge selection - and figured I'd share some helpful hints on applying stock transfers and how to pair them with Heat Transfer Vinyl.
First go shopping!
I grabbed these girl and boy pirate transfers.
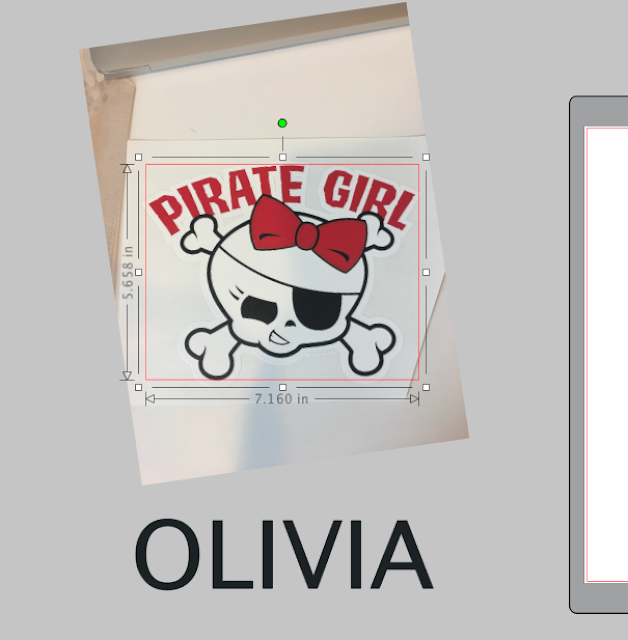
To customize these with a name you can go about this a few different ways. I like to 'see' what my finished product is going to look like before I fully commit whenever possible so I started by taking a picture of the stock transfer.
I emailed it to myself and then drag and dropped it right into Silhouette Studio.
Because the transfers are printed in reverse it's helpful to flip them in Silhouette Studio by selecting > right click > Flip Horizontal.
To make sure that the name I'm going to cut in HTV is appropriately sized, I need to first make sure the transfer is the same size in Silhouette Studio as it actually is.
First measure the actual transfer.
Then use the Draw a Box tool in Silhouette Studio to draw out a box that same size. It doesn't have to be exact...just make sure either the length or width is the same and then scale the photo of the transfer.
Now you can delete the sizing box (just don't change the size of the photo again). Next use the text tool to type out the name. Pick the font style from the Text Style tool. Base the size of the text off the size of the stock transfer.
When you have the text sized, you can delete the picture of the transfer. Then mirror the HTV design by right clicking > Flip Horizontal and place it on your virtual cutting mat.
If you are making a bunch of custom shirts with the same stock transfer, you can cut a bunch of names all at once and just base the sizing off the original text size.
From the Send panel change the material to Heat Transfer Vinyl Smooth and then cut the text on HTV with your Silhouette cutting machine.
You'll want to apply the transfer onto the surface first. These stock transfer from Pro World should be applied with a heat press (not an iron) at a temperature of 390 to 400 degrees for 10-12 seconds. I'm using my TransPro 15x15 heat press - also from Pro World.
To easily and quickly find center the stock transfer on the shirt - fold both the shirt and the transfer in half to get a crease line then line them up.
Place the stock transfer down on the shirt and apply heat and pressure for 10 seconds. You want to peel them immediately while still hot.
Cool your heat press down to 305.
Now position the HTV on the shirt.
Once the press has come down to temperature, cover the entire design with a teflon sheet. Then apply heat and pressure for about 10 seconds.
When the application is complete, peel the transfer sheet off of the HTV and you're finished! You're left with customize shirt created with a stock heat transfer!
I love that this can be done so quickly and you literally only had to cut one piece of HTV! Plus there's no layering involved!
Note: This post may contain affiliate links. By clicking on them and purchasing products through my links, I receive a small commission. That's what helps fund Silhouette School so I can keep buying new Silhouette-related products to show you how to get the most out of your machine!
Get Silhouette School lessons delivered to your email inbox! Select Once Daily or Weekly.


.png)


No comments
Thanks for leaving a comment! We get several hundred comments a day. While we appreciate every single one of them it's nearly impossible to respond back to all of them, all the time. So... if you could help me by treating these comments like a forum where readers help readers.
In addition, don't forget to look for specific answers by using the Search Box on the blog. If you're still not having any luck, feel free to email me with your question.