Silhouette School contributor Elly Mae from Silhouette Secrets+ is here today with a Silhouette tutorial on how to use the Silhouette Studio V4 Cut by Fill Color option so your layered designs are perfectly aligned.
The Cut by Fill Color tool can be found under the Send tab in the top right corner of the Silhouette Studio V4.
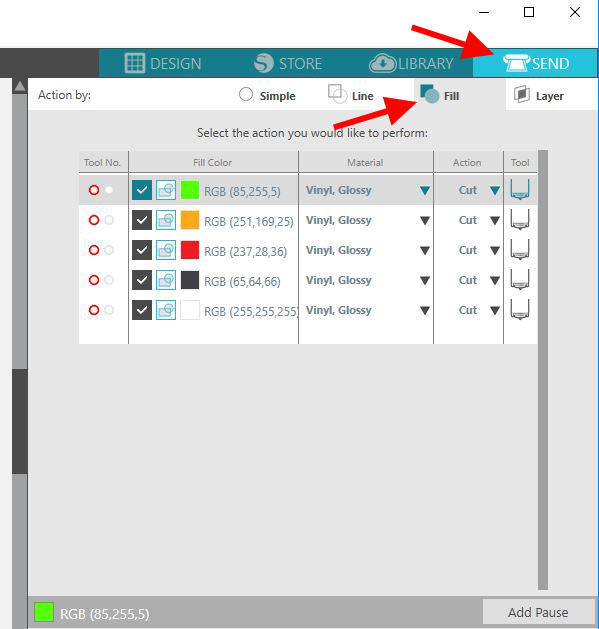
I'm working with this school bus design which you can grab right now in the School Is Cool bundle on So Fontsy.
Setting Up a Layered Vinyl Decal Design in Silhouette Studio
The nice thing about designs from So Fontsy is they're 100% cut friendly so they're all set up to cut! Because this design will be used as a multi-color layered vinyl decal, I am adding registration marks (those green rectangles) to the design mat to use as reference points to line this design up. For more information on how to create registration marks, check out Melissa's beginner Silhouette tutorial on how to layer vinyl.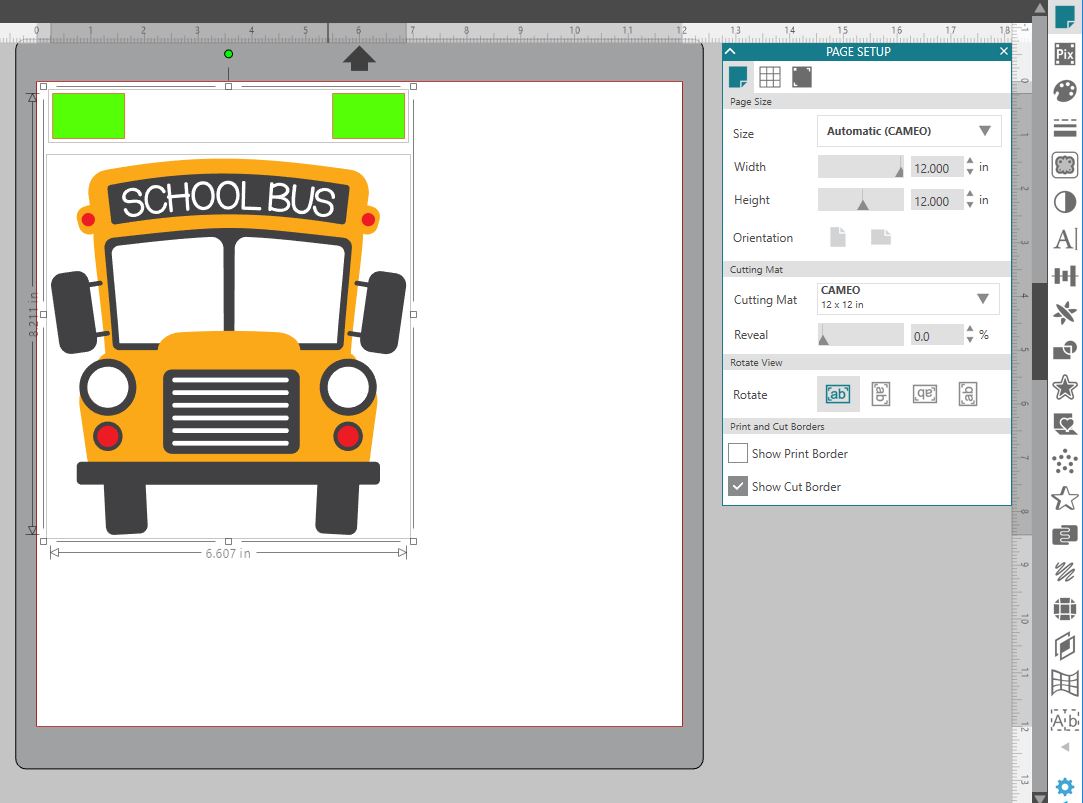
Now, click on the Send tab in the top right corner and this is where you tell the Silhouette design software what to cut with each pass.
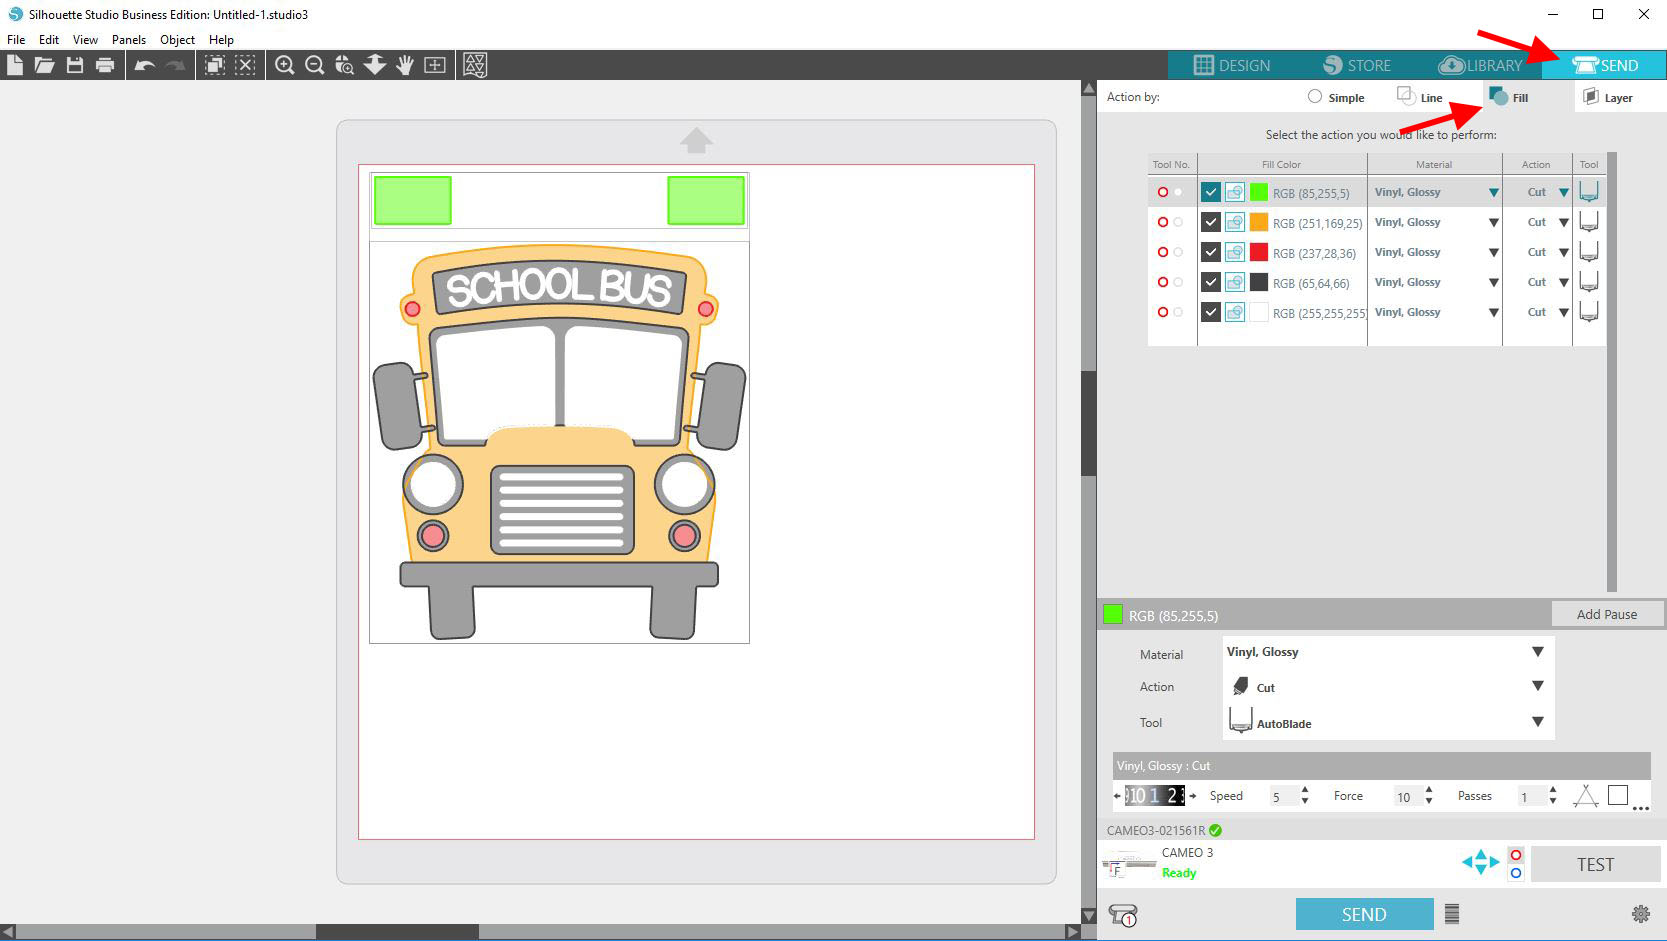
On the Fill option, you can see all the colors that are in the design and the cut lines will also show the same as the Fill color. To get each color of the design to cut with the registration marks, un-check the boxes under Fill Color of the colors that should not cut.
The registration marks/green box should remain checked for ALL cuts because you want registration marks on all pieces of the vinyl decal.
Keep the boxes checked for the 2 colors that should be cut. For this first cut, leave orange and green checked and un-check the rest of the colors. When you un-check the boxes, you will see the cut lines around that object turn off.
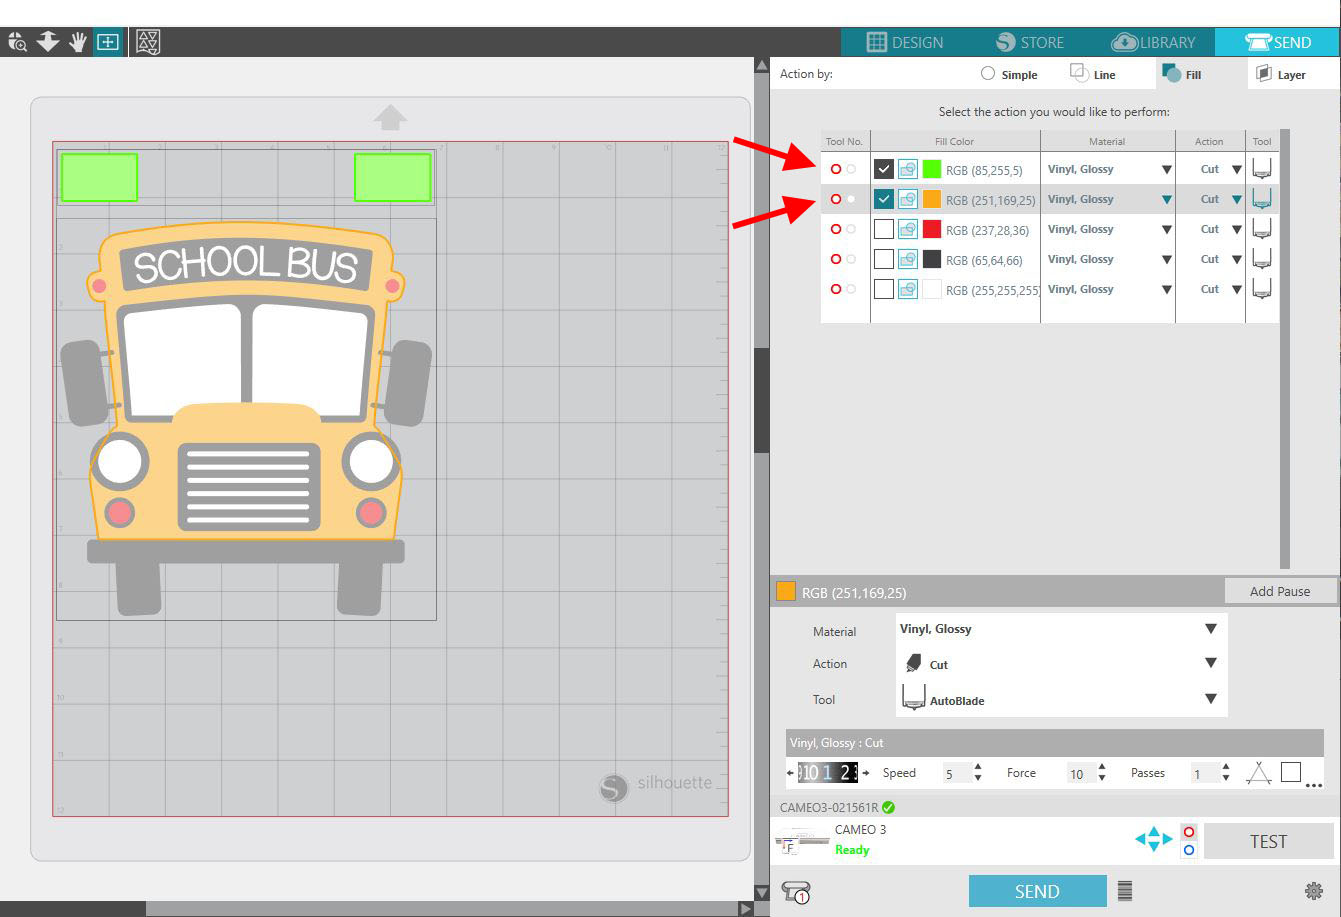
So above, you can see the bold yellow/orange edge of the bus and the bold green edge of the registration marks. These are the only 2 parts of the design that it will cut the first time I click on Send.
Place the color vinyl on the mat in the exact same place as it is on the design mat in the Silhouette Studio software. Next, verify and change the cut settings under Material, Action & Tool to the correct options. Make sure to do a test cut on the material and then when you are ready, click on the Send tab to cut the first color.
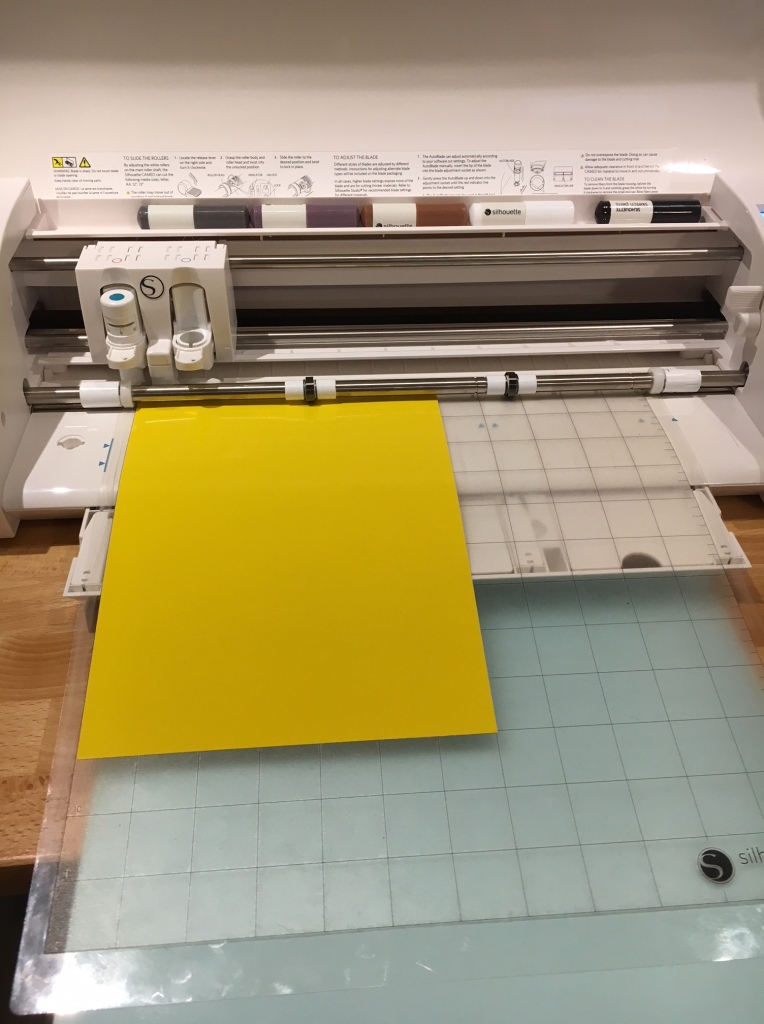
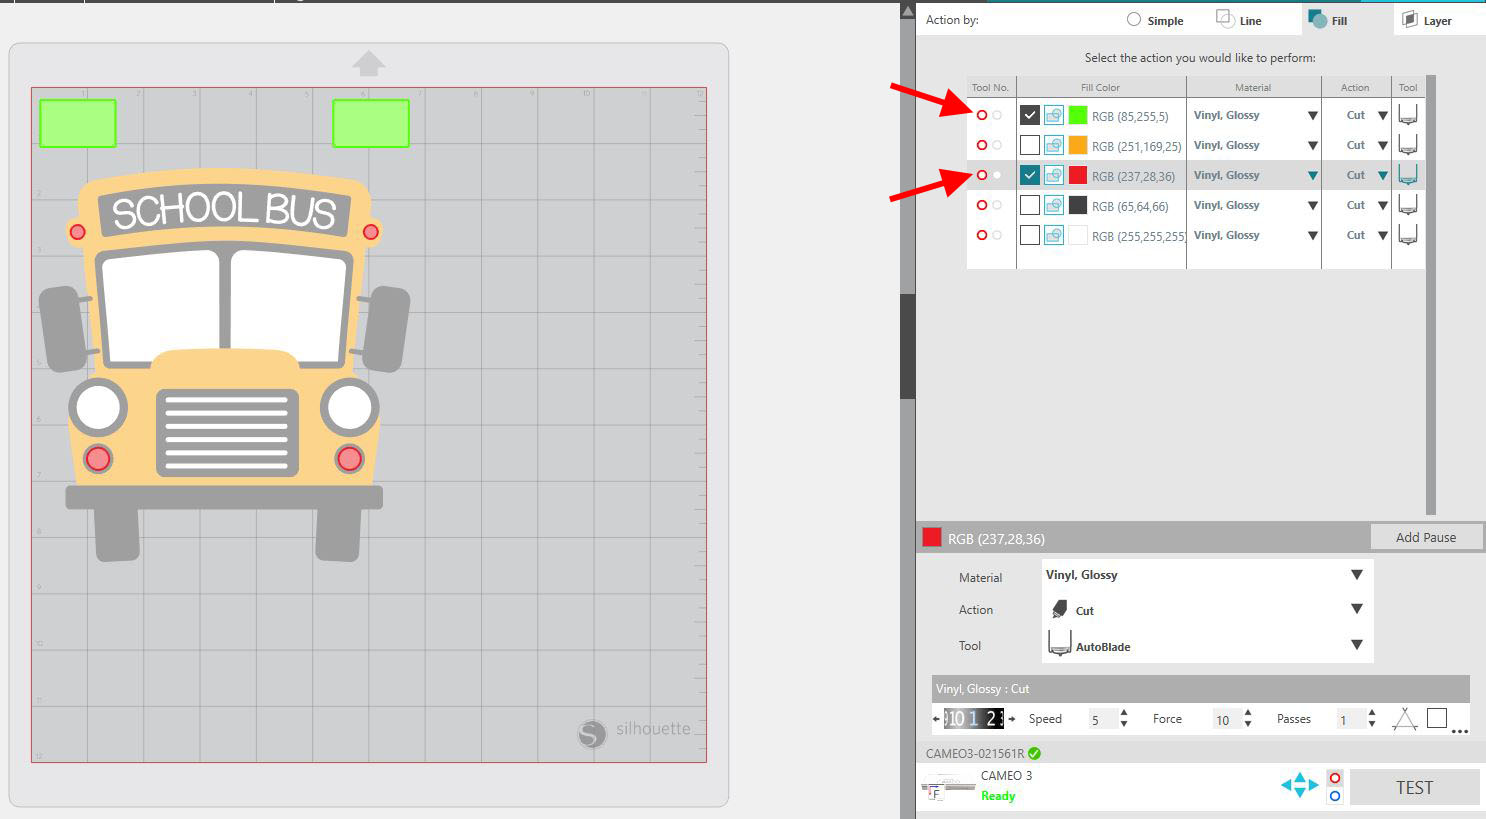
Once that is cut, place the next color on the cutting mat in the same place and un-check yellow/orange box and check the red box. The green box for the registration marks will remain checked for the entire cut process since we want it to cut with each of our vinyl layers.
This time only the green boxes and the red pieces will cut.
Now, you may be asking yourself "Doesn't this waste vinyl?" Yes and no.
If you are wanting the exact placement of something, I find that sometimes it is worth the extra vinyl to get that exact placement. Can you eyeball the red pieces on this school bus, yes, of course you can. But, if they get stuck down to the wrong spot it could mess up the entire design and you would have to re-cut all the colors again. It is really your choice on how you do this. You can also do a combination of both, cut the big pieces with the registration marks and then cut the smaller pieces and eyeball them.
For my example, I am showing all colors cut with registration marks and when I line it up, I know they will be in the right spot.
But, the size of your decal may also make all the difference too. A decal that is 7" x 9" is a larger piece of uncut vinyl vs a 3" x 3" decal. Every one will develop the process that works the best for them.

Next, un-check the red box and check the black box to cut.
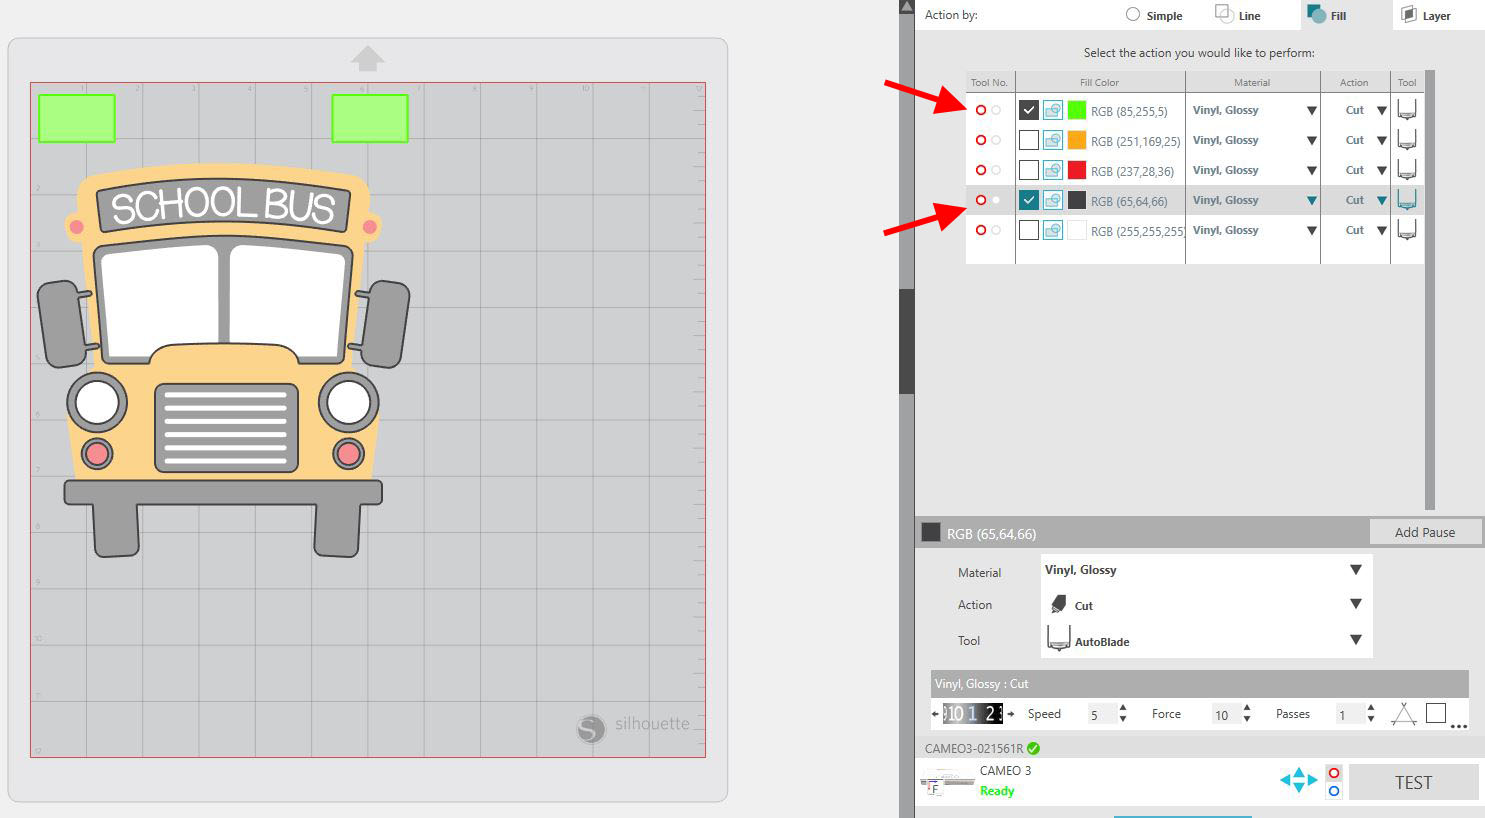
As you can see in the photo above, it has bold black lines around all the black shapes. This is a great feature for decals that have several details of the same color but are spread out over the design. Lining this design up all by eyeballing it, would be quite the project.
And for the final color, un-check black and check white.
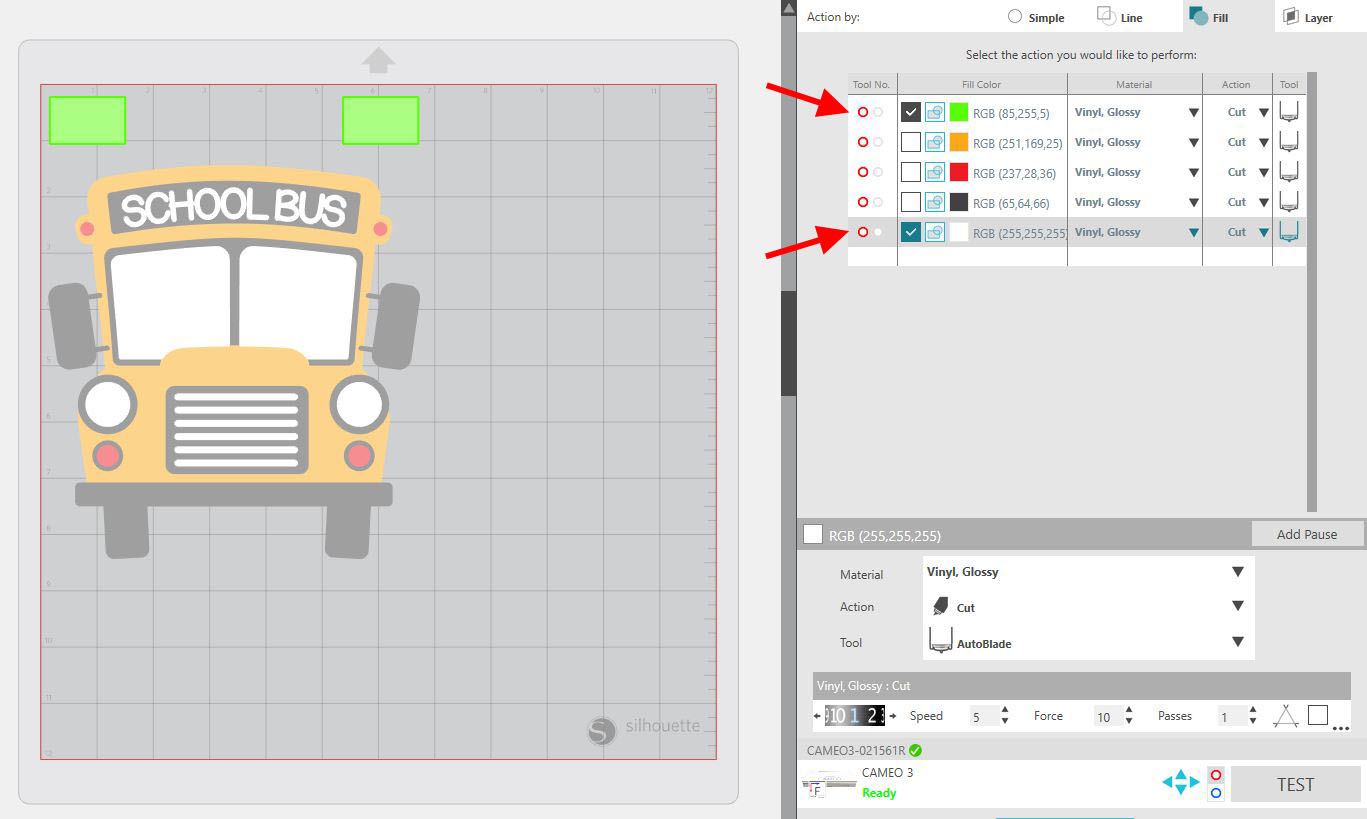
Something to note here is that the cut lines do show up as the fill color as I mentioned above, but the white is very hard to see, it is selected though.
Since each color under the Fill option can have a different cut setting you will notice if you have a Silhouette Cameo 3 and an Auto-blade, that it will Auto-adjust the blade between each color, even if the setting are all the same.
Once you have all of your vinyl cut for your layered decal, weed the colors and you're ready to layer using your registration marks. If you're looking for a multi color vinyl layer tutorial, pick up this Silhouette tutorial about half way through to learn how to make a vinyl decal with multiple colors.
Once you have all of your vinyl cut for your layered decal, weed the colors and you're ready to layer using your registration marks. If you're looking for a multi color vinyl layer tutorial, pick up this Silhouette tutorial about half way through to learn how to make a vinyl decal with multiple colors.
Now, by using the Cut by Fill Color you have a perfectly layered vinyl decal.

Check out how I used this technique to create a Bus Driver Appreciation gift on my blog here.
Note: This post may contain affiliate links. By clicking on them and purchasing products through my links, I receive a small commission. That's what helps fund Silhouette School so I can keep buying new Silhouette-related products to show you how to get the most out of your machine!
Get Silhouette School lessons delivered to your email inbox! Select Once Daily or Weekly.


.png)


No comments
Thanks for leaving a comment! We get several hundred comments a day. While we appreciate every single one of them it's nearly impossible to respond back to all of them, all the time. So... if you could help me by treating these comments like a forum where readers help readers.
In addition, don't forget to look for specific answers by using the Search Box on the blog. If you're still not having any luck, feel free to email me with your question.