 |
| This is a sponsored post, but all opinions are my own |
Unlike applying adhesive vinyl, sublimating on ceramic mugs makes them dishwasher and microwave safe since there's no risk of peeling. Sublimating also avoids layering and gives you the freedom to work with any design or photos no matter the color or shading.
I have a Sawgrass400 from Pro World which I've been using for several years. You can find set up and other intro to sublimation with Silhouette Studio type tutorials here.
Sublimating on ceramic mugs means you need a mug press or a designated convection oven. I'm going to go with the mug press since I can also add HTV to mugs with the mug press. I recently got the TransPro 3-in-1 Mug Press also from Pro World.
You can add a simple design to mugs or you can create a wrap. You can download this free mug wrap template which fits perfectly on the 11 oz sublimation mugs from Pro World.
For the mug wrap either design within the template or fill the template with a pattern or photo in Silhouette Studio. I added a photo to my Patterns folder in the Silhouette Studio library then used that pattern to fill the mug wrap template.
If you don't want a whole wrap, but instead want to sublimate just a design or text onto the mug, simply open the design in Silhouette Studio and fill with a color, colors, or pattern. I added a glitter fill to this design.
Once your design is ready, mirror it before printing. Select the design > right click > flip horizontally. Sublimation is like HTV in that it needs to be mirrored before printing because it's flipped onto the mug before pressing. (You do not need to add registration marks since with sublimation you don't need to actually use the Silhouette cutter, just the software.)
Click the print tool along the top tool bar and select the sublimation printer from your list of printers. Your image from Silhouette Studio will then be printed to your sublimation printer.
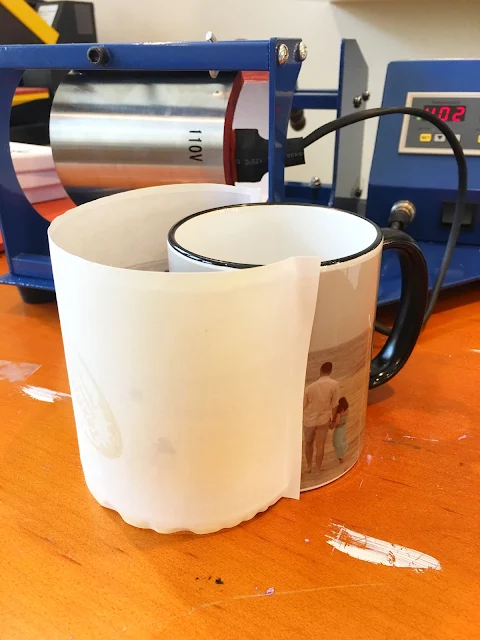
Trim down the print so it will fit around the mug and use high temperature thermal tape to hold the print in place. Be sure the tape is not covering the back side of any printed area or you will get tape marks when pressed.
For ceramic mugs, you want your mug heat press at 400 degrees and set it to 200 seconds on the timer. I'm using the TransPro 3-in-1 heat press which comes with three different mug attachments for different size and shape mugs.
Slide the mug into the mug press and pull the handle toward you to close it around the mug ensuring you have firm pressure. Click the timer button on the mug press to start the timer.
When the time is up, open the handle so you can slide the mug out. Be very careful as it's extremely hot.
Quickly remove the sublimation paper from around the mug.
Let the mug completely cool before handling it.
Here's how the mug with the design, rather than the full wrap, turned out!
Sublimating on ceramic mugs with a mug press is not only fast and easy, but it produces high quality professional products if you have the right equipment!
Get Silhouette School lessons delivered to your email inbox! Select Once Daily or Weekly.


.png)


this is super cool! I had no idea...oh the possibilities~!
ReplyDeleteCan you dye sub any ceramic mug or does it have to be a special one to accept the sublimation?
ReplyDeletecan u give more info about putting the design in, would you just put the deisgn in the wrap instead and size to suit or?
ReplyDeleteOne more time I'm thankful for your work! I needed to know this very info and you laid it out easily. Looking forward to making it happen!
ReplyDeleteI am trying to sublimate on a ceramic mug I got from Walmart and I’m trying to put paw prints from my sister in laws dog on there that we put on some paper I sent it to my email but it’s pdf file and won’t let me upload to silhouette what am I doing wrong?
ReplyDeleteHi there! You will need Designer Edition or higher to import a PDF. We suggest upgrading here: https://shrsl.com/2oerf.
DeleteHi! TY for this writeup. Can you sublimate without using a mug press and instead use a kiln?
ReplyDelete