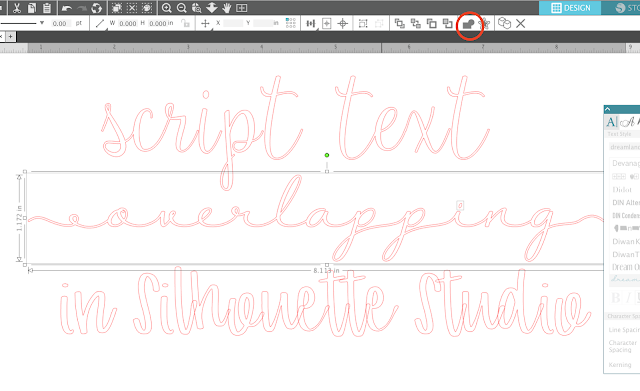
Since the characters in script fonts overlap, the overlapping areas of the letters will be cut out - unless you make one important change in Silhouette Studio.
Let's say you've just picked up the limited time Beautiful Script Font Bundle from So Fontsy and now you're wondering how to cut them...this beginner Silhouette Studio tutorial on cutting script fonts will explain!
Once you've downloaded the fonts to your computer, installed them, and re-started Silhouette Studio your new fonts will be listed in your Text Style list.
When you open the Text tool from the left sidebar and start typing with one of your script fonts you'll notice where the letters connect there are cut lines. But you don't want to cut your script fonts like this - you want them to cut as a single piece which means you want to weld.
After you've typed out your line of text, right click, and select Weld....
This will join the overlapping areas together so they don't cut out from each other.
You can also select the line of text and click on the Weld tool from the Quick Access Tool Bar. This will join the script text and remove any overlapping areas.
 A few things to keep in mind: after you weld you can not go back and change the font style or the text itself. You will also no longer be able to click the text to see what font you used. This is due to welding converting the text from a font to a shape.
Keep welding in your back pocket, but know there is another option for joining script text in Silhouette Studio that will allow you to change the font style and text while also cutting as a single line of text. Simply skip the welding step above and move to the Send panel.
Instead of "Cut" pick "Cut Edge" from the Send panel and any overlapping internal areas will not be cut! This is beneficial because the text remains text and the font style can be changed and you'll still be able to click on the text to see what font you used.
Now that you know the trick to cutting script fonts with Silhouette CAMEO or Portrait, grab the Beautiful Script Bundle from our sister site So Fontsy. You get the commercial use license with all 21 fonts...but hurry before it expires.
Note: This post may contain affiliate links. By clicking on them and purchasing products through my links, I receive a small commission. That's what helps fund Silhouette School so I can keep buying new Silhouette-related products to show you how to get the most out of your machine!
Get Silhouette School lessons delivered to your email inbox! Select Once Daily or Weekly.


.png)


I have been using Silhouette for 2.5 years and not ONCE did I EVER hear anything about the "Cut Edge" option in the SEND panel. This is a MAJOR game changer for me as many of the text elements I use are put on different sizes and types of surfaces. Being able to change the size of the font in a design will eliminate the need for multiple files containing the same designs. Once again THANK YOU!
ReplyDeleteDo you have any tips to prevent cardstock from ripping or snagging while cutting very thin fonts?
ReplyDeletegood!
ReplyDeleteThanks for this simple explanation - helped me understand the different options when cutting font.
ReplyDelete