The feature allows you to organize and categorize fonts - but only those purchased from the Silhouette Design Store.
To start organizing your fonts open your Silhouette Studio Library.
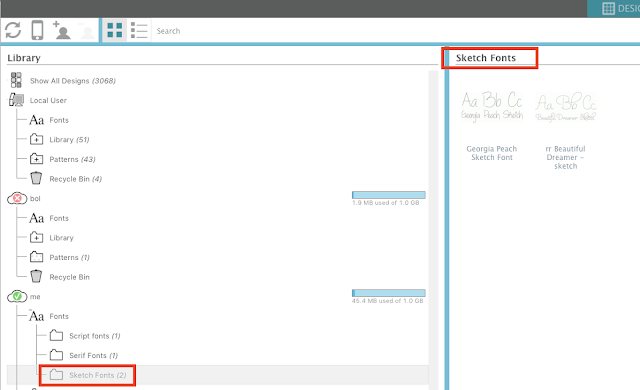
In the Cloud area, find the Fonts folder. When you click on this folder you'll get a preview of all of your Silhouette Design Store purchased fonts. Right now they're all mixed in with your other fonts - but you can group them however you want.
To do so you need to create sub folders.
Right click on the Fonts folder > Add Folder.
Rename the folder whatever you'd like. For instance, Sketch Fonts or Script Fonts. You can create as many sub folders as you want.
Now with the Fonts preview panel open, drag and drop the fonts you want to move into subfolders into those sub folders.
The sub folder should now reflect the number of fonts you pulled into it.

When you go back into the Design area and open the Text Style tool you'll notice the sub folders are represented by categories with the fonts you pulled into those sub folders grouped underneath.
Again, right now it's only possible to organize fonts purchased through the Silhouette Design Store making this feature very limited - but at least it's a start.
Note: This post may contain affiliate links. By clicking on them and purchasing products through my links, I receive a small commission. That's what helps fund Silhouette School so I can keep buying new Silhouette-related products to show you how to get the most out of your machine!
Get Silhouette School lessons delivered to your email inbox! Select Once Daily or Weekly.


.png)


No comments
Thanks for leaving a comment! We get several hundred comments a day. While we appreciate every single one of them it's nearly impossible to respond back to all of them, all the time. So... if you could help me by treating these comments like a forum where readers help readers.
In addition, don't forget to look for specific answers by using the Search Box on the blog. If you're still not having any luck, feel free to email me with your question.