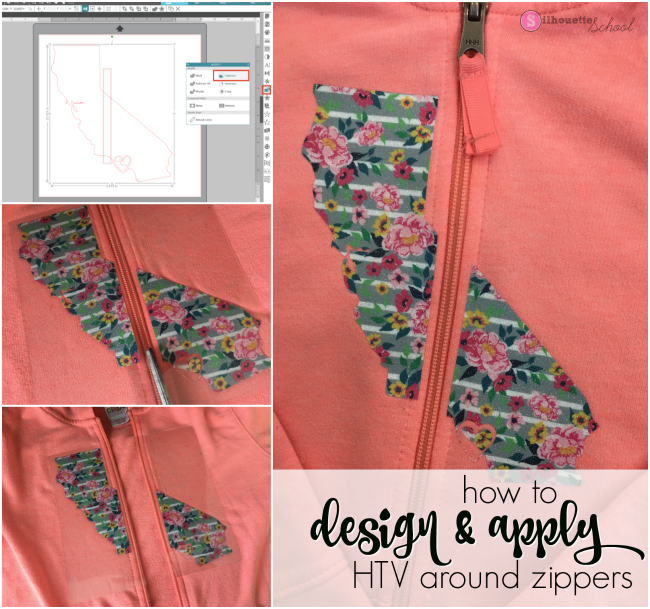
With a few tricks up your sleeve from this Silhouette HTV tutorial, you'll have no problem designing and applying around zippers.
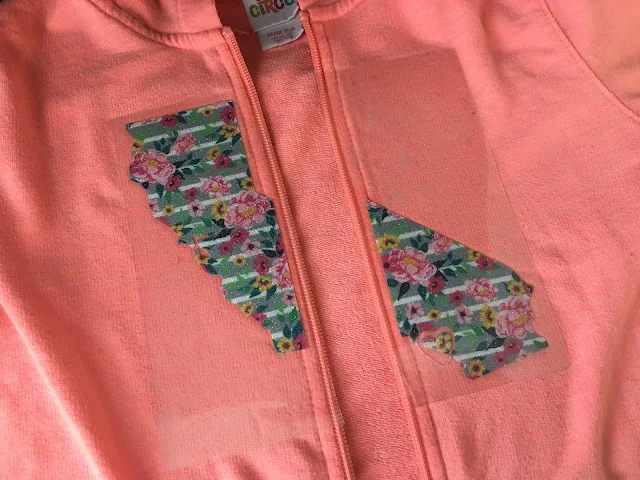
Start by opening or creating your design in Silhouette Studio as you normally would. I am cutting this California state shape with a heart to put on a zip up hoodie for my daughter.
Before you move into the Send panel to set up your cut settings, you want to split your design. If you just use the knife tool and cut the design in half it will look odd around the zipper because you're not taking into account the thickness of the zipper which will morph the HTV design when it's applied.
So instead, you want to cut out a larger section from the design to account for the zipper.
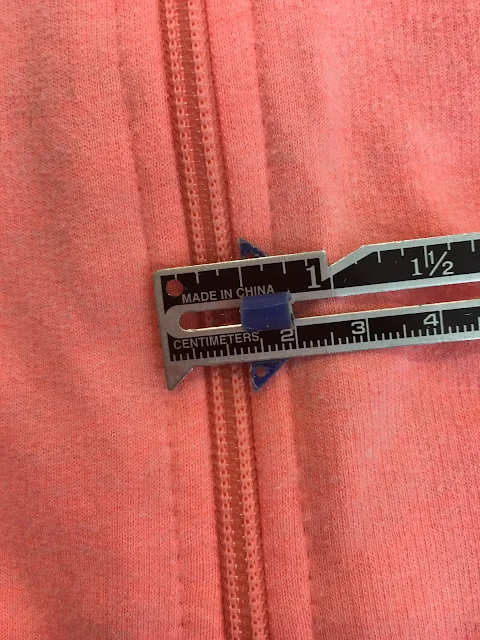
Grab your hoodie and measure the width of the zipper. I decided not to go right up to the full zipper closure, but you could get closer if you wanted to. Note the distance - for me that's about 0.5".
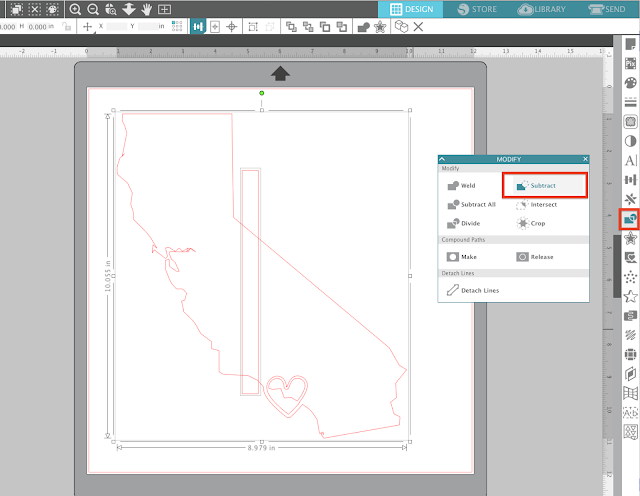
Now go back into Silhouette Studio and use the Draw a Box tool from the left sidebar to draw out a box that's 0.5" wide. The length just needs to cover the full length of the design.
Assuming you want the design centered over the zipper (also the center of the shirt), select both the rectangle and the design at the same time and from the Quick Access Toolbar click the "Align Center" option. You can also open the Transform panel and pick Horizontal Center. This will center the rectangle on the design.
Again select both the design shape and the rectangle and this time open the Modify panel and pick "Subtract".
This will remove the rectangle-size area from the design - this is where the zipper is going to run through. Immediately group the pieces of the design so they don't get nudged out of place. Select both areas of design > Right click > Group
Open the Send panel and select the appropriate material type based on whatever you're cutting.
Load up your material on your cutting mat and send the design to cut on your Silhouette cutting machine. Weed off the excess HTV.
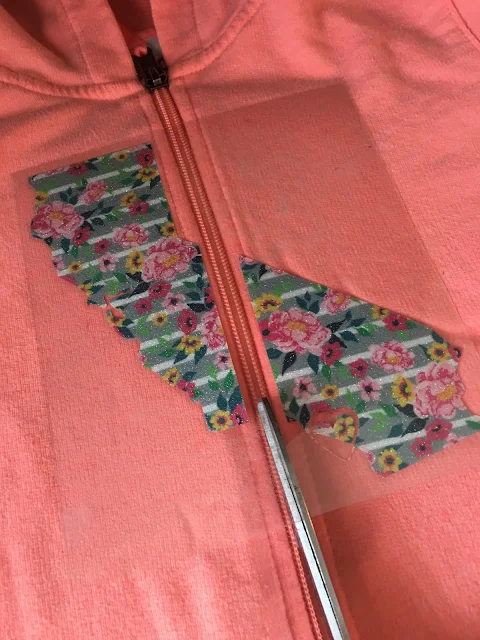
Zip the zipper on the shirt where the HTV is to be applied and then center the heat transfer vinyl on your shirt.
Carefully take a pair of scissors and clip the carrier sheet in half right along the zipper line to allow you to unzip the hoodie for pressing.
To ensure the design does not move, you may want to use some high temperature tape to keep it in place. Unzip the zipper.
Pressing the HTV around a zipper can be done with an iron, but it's much easier and you'll get a better press with a heat press.
Place a pressing pillow under your shirt so that the zipper area presses into it while still allowing you to get a full pressure press. Apply the heat and pressure from your iron or heat press to both halves of the HTV design at the same time.
When the time is up - peel off the carrier sheet and re-press the HTV from the inside.
And that's all there is to putting heat transfer vinyl on a zipper hoodie or another shirt that has a full front opening.
Note: This post may contain affiliate links. By clicking on them and purchasing products through my links, I receive a small commission. That's what helps fund Silhouette School so I can keep buying new Silhouette-related products to show you how to get the most out of your machine!
Get Silhouette School lessons delivered to your email inbox! Select Once Daily or Weekly.









.png)


No comments
Thanks for leaving a comment! We get several hundred comments a day. While we appreciate every single one of them it's nearly impossible to respond back to all of them, all the time. So... if you could help me by treating these comments like a forum where readers help readers.
In addition, don't forget to look for specific answers by using the Search Box on the blog. If you're still not having any luck, feel free to email me with your question.