There's pretty much no way to fix it other than to re-cut. BUT there is a way to avoid weeding the wrong area.
The trick is actually to use Silhouette Studio's Fill Tool. This is really helpful when you have a design that has a lot of cut lines, a lot of offsets or for stencils.
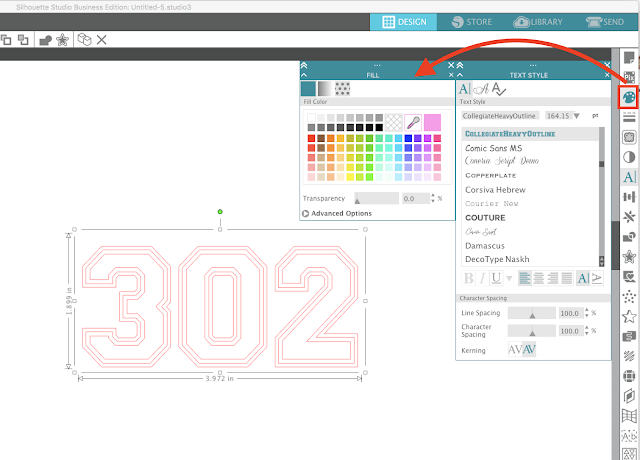
Let's say you are cutting this Collegiate Font on adhesive vinyl. Just by the style of the font in Silhouette Studio, you can see there are a whole bunch of cut lines. How are you supposed to know what it's 'supposed' to look like? This is where the fill tool comes in.
Open the Fill Color panel from the right sidebar.
Select the text and pick a color. I would suggest you pick the color that will match the color material you're cutting on. This is really important if you have a multi-color design.
Remember the color doesn't tell the software or the machine to cut on that specifically color, it's just a reminder and a visual for you.
Now go ahead and cut the design. After the design is cut you're ready to weed. If you have some type of a light pad - this is the Cricut Bright Pad - it's helpful for seeing the cut lines.
Keep Silhouette Studio open and nearby for reference.
You can see that any areas that are NOT filled with a solid color on your screen are the areas of the vinyl decal that should be weeded out.
Note: This post may contain affiliate links. By clicking on them and purchasing products through my links, I receive a small commission. That's what helps fund Silhouette School so I can keep buying new Silhouette-related products to show you how to get the most out of your machine!
Get Silhouette School lessons delivered to your email inbox! Select Once Daily or Weekly.


.png)


Great tip, thanks!!
ReplyDeleteGood tip on using the fill feature, and REALLY good tip re the light box!
ReplyDelete