BUT...looking at the shirt now - you'd never know! So today I'm going to share my secret weapon for removing HTV without leaving any adhesive behind.
So here's where my trouble started...clearly I did not see that I had a rogue piece of HTV on the carrier sheet when I pressed the teal heat transfer vinyl onto my shirt.
So that little piece ended up pressed onto my shirt too. It actually got pressed twice because it was still there when I added the glitter gold heat transfer vinyl.
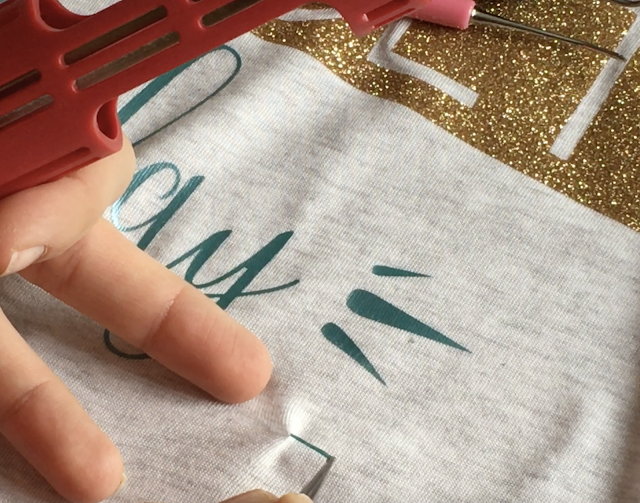
I wasn't too worried though...because I have a secret weapon for removing HTV mistakes. Meet my Mini Clover Iron.
This little iron is about the size of a curling iron, but the face of the iron itself is only an inch wide by an inch and a half long....super small! Being so small is super helpful as you can get into tight quarters without accidentally touching HTV that you want to actually keep on the shirt rather than remove.
The Mini Clover Iron also gets super hot. The key here is to heat the Mini Clover Iron up on the Mild setting. Low is too low and high is way too high. High is actually so hot that it will melt and smear the heat transfer vinyl piece you are trying to remove further into the shirt.
Okay so warm up the Mini Clover. Then with some sharp tweezers near by....hit the heat transfer vinyl mistake with the iron.
You want to make sure you are not holding the iron on the HTV for too long as it could melt it too much. You really want to kind of tap it on there for 5-8 seconds at a time and then remove...and check it. Be patient and don't let the iron sit on the HTV for too long at a time. It could take up to 2 minutes or longer for the vinyl to warm enough to start wrinkling...
As soon as the htv starts to wrinkle grab it with the tweezers and pull it off.
It took me about 2 minutes to get this piece of heat transfer vinyl warmed up to just the right temperature that it could easily be pulled off with the tweezers.
And here's my shirt! You can't even tell there was ever an HTV mistake!
Note: This post may contain affiliate links. By clicking on them and purchasing products through my links, I receive a small commission. That's what helps fund Silhouette School so I can keep buying new Silhouette-related products to show you how to get the most out of your machine!
Get Silhouette School lessons delivered to your email inbox! Select Once Daily or Weekly.


.png)


I've had success with removing mistake vinyl but what do you do about the residue left behind?
ReplyDeleteWhere can I purchase T-shirt’s like the one shown above were you were showing the removal technique with that lil iron. TIA
ReplyDeleteWhat about glue? I did a booboo that left an imprint of a scallop glue print. It's on the tail of the shirt, but its all the way across a toddlers size black shirt. Very visible.
ReplyDeleteThanks for this. Not that I ever make mistakes (yeah right, LOL!)
ReplyDeleteThis technique is so much healthier and more accurate than using one of those hideous aerosol sprays.
Thanks for the tip! Where did you get your shirt?
ReplyDeleteI love my little clover for just that reason and use it on small vinyl works
ReplyDeleteWould this work for removing a whole design? I just finished putting a design on a shirt and noticed that the whole thing is slightly crooked.
ReplyDeleteI know this post is 2 years old but I just bought my Silhouette. I made a mistake....a big one on some bridesmaids hat. I was so happy to find this I almost cried! In my efforts to find a way to get the vinyl on there (and subsequently back off) I was in search of something to "stuff" the hat with to hold it's shape....I tried a rolled up towel. It was okay...but then I looked over at my dog's treat metal container....it was the perfect size and shape. So I think I might be purchasing one for future mistakes, I mean projects!
ReplyDelete