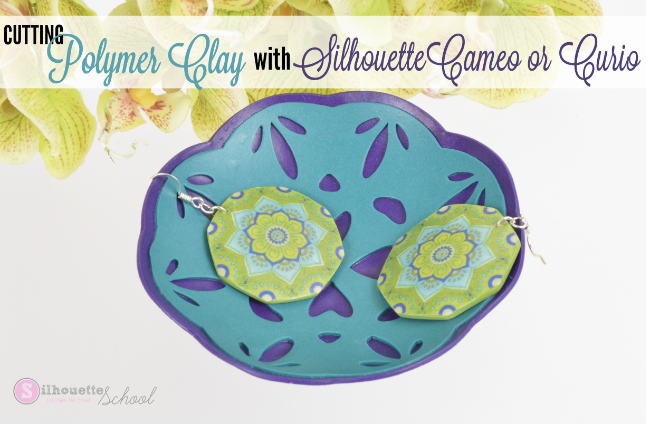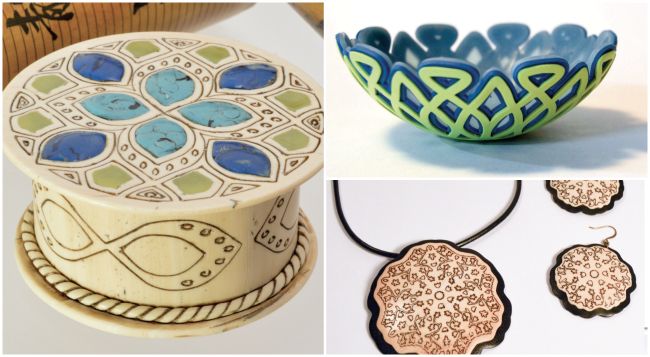
Mags Bowman is an expert in this little niche and she's here today to share with you pretty much everything you need to get started using your Silhouette Curio or Cameo to cut polymer clay.
Hello to all of the Silhouette School Blog readers. I am so excited that Melissa asked me
to do a guest post for you guys. I’m thrilled to introduce you to using polymer clay with your
Silhouette machines.
I prefer to use the Curio, but you can do this project with the Cameo 3. It is possible that you could do this project with the older Cameos and Portraits. You may have to make the clay a bit thinner to compensate for the lower clearance of those machines.
Polymer clay is a man-made clay and is totally unlike earthen clay except that it can be molded by your hands and then ‘fired’ to make hard. The clay comes in a multitude of colors which you can mix to create even more colors.
I don't want to take up all if Melissa’s gigabyte storage with all the things you can do with polymer. ;-) So you can find my lengthy dissertations on polymer on my blog.
I've been working with polymer clay for over 17 years. I started cutting polymer clay -about 5 years ago - with digital cutters for to help me with production work and to cut out shapes of my own
design. I have tested the machines tirelessly for several years and have great fun creating new projects to share with others. I have several classes on CraftCast.com that use the machines with
polymer clay.
You don’t need a lot of tools to get going with polymer clay. You need some cutting blades, a work surface, a way to roll out the clay, and an home oven to cure the clay. The most important tool needed - especially when using the cutters - is a manual pasta machine (or clay conditioning machine as they are now called). It helps you condition your clay more quickly and insures that you have a measurable and consistent sheet of clay to work with.
There are a few workarounds if you want to get started without a machine, but a machine can be bought for under $40 on Amazon or at the Big Box Craft Stores. (The quality isn't that good on these so if you get hooked you might want to upgrade to an Atlas or Marcato pasta machine.)
I’m going to get you started with a purchased cut file so that you can make this project quickly and
without any designing headaches. So head over to the Silhouette Design Store and purchase Design
ID#65620 by Lizzie Mayne. This Doily file is perfect for making this two layer trinket bowl. It’s perfect as a ring bowl, candy bowl, or….well…trinkets.
Supplies Needed
You’ll need two packages of polymer clay in your choice of colors. I’m using Soufflé Sea Glass and Royalty by Sculpey.
I like Soufflé because it has a suede like surface the cuts well and is lightweight after curing. Most of the brands will work fine with this project. The only brands I suggest you don’t use are Sculpey III, or the generic brands found at the Big Box stores. These are made for kid’s crafts
and are not good quality clays.
Recommended Tools for Polymer Clay and Silhouette CAMEO/Curio
- Silhouette Curio (preferred) or CAMEO machine
- Silhouette Studio (Free Standard Version) or Silhouette Studio Designer Edition
- Silhouette Curio Cutting Mat - should be a new mat that can be dedicated to polymer clay
- Silhouette Deep Cut Blade - should be a blade that can be dedicated to polymer clay.
- Clay Conditioning Machine, manual pasta machine, or lucite or plastic ruler with measuring slats
- Rubber or Lucite Brayer
- Ruler
- Polymer Clay Blade
- Ball Stylus tool
- Needle nose tweezers
- Exacto Knife
- Reynolds® Freezer Paper
- Clear peel and stick paper, like Con-Tact® paper or Duck® clear laminate paper
- Deli Patty Paper or Parchment Paper
- Plastic Deli Sheets
- Baking Form - Fat Daddio 5” Hemisphere pan or similar sized oven safe bowl
Preparing the Design in Silhouette Studio
Go to the Silhouette Design Store and select Doily Design ID #65620 by Lizzie Mayne. It will save in the Cloud folder of your Silhouette Studio library.Open the design in a work area in Silhouette Studio. Select the design and select SCALE to change the measurement to 3.5”.
Select OBJECT - UNGROUP - and RELEASE COMPOUND PATH so you can select the small cuts in the center of the design and delete. These bits are too small to cut cleanly at this size.
The cuts at the edge are too close to get a good cut without distorting the edge. So we are going to stretch the cut edge out by using the OFFSET tool. Select the outer edge only and click on the OFFSET button. The default offset is perfect for what we are doing. Now you can delete the original cut line. Select all the pieces again > right click > MAKE COMPOUND PATH. Your new design should measure 3.75”.
Next we need to create a backing layer for our bowl. Select the design and make another
OFFSET using the default measurement. That piece will be 4” round.
Preparing the Polymer Clay to Cut with Silhouette Curio or CAMEO
Condition your clay and roll out the doily layer to be about 0.8mm thick - position 6 or 7 on the pasta/clay conditioning machines. Roll out the backing layer to equal about 1.0mm thick - position 5 or 6 on the pasta/clay conditioning machines. Cut a 4.5” square of each color. Cut a 5” squareof the clear Con-Tact® paper and Reynolds Freezer paper.
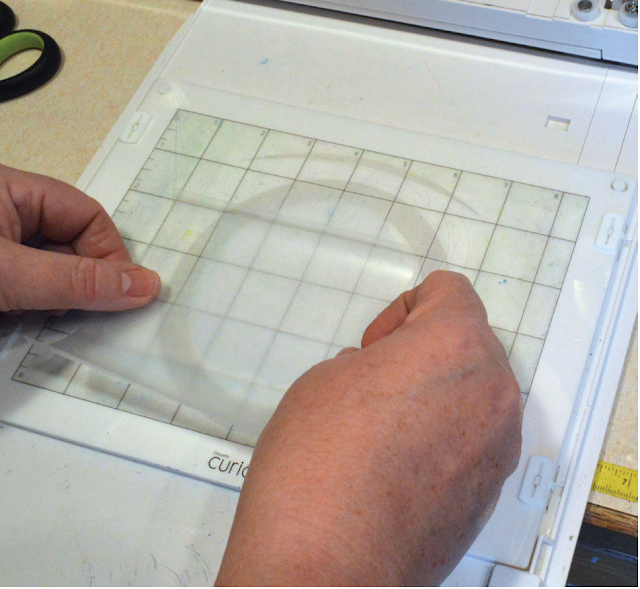
You NEVER want to place the polymer clay directly on the cutting mat. It’ll make a mess of your mat. I use clear Con-Tact® paper and Reynolds Freezer paper as carriers for my clay. It is VERY important to keep air bubbles out of your carrier and clay.
If the blade hits an air bubble it can pull up the clay and get stuck in the blade. So you want to squeegee the carrier smoothly to the mat.
Then place the clay on the carrier smoothing out the clay with your hands. Place a square of patty paper, or parchment paper, over the clay and roll with a rubber or lucite brayer to insure that the clay is well attached to the carrier.
Remove the paper and load the cutting mat into the Curio. You can place the clay anywhere on the mat, just make sure you position it in the same place in the Design software.
Silhouette Curio/CAMEO Cut Settings for Polymer Clay
Each cutting machine, each clay conditioning machine, every cutting mat and each package of clay is different. Settings may need to be adjusted each time you cut. ALWAYS test a sample before you cut. The perfect settings will give a clean cut through the clay, but not cut through the carrier paper or the mat. My settings are just a jumping off point. What works for you may be slightly different. And close to perfect is good enough, don’t be obsessive.For this project we are going to use the following Silhouette CAMEO/Curio Cut settings for both layers of Polymer Clay: Deep Cut Blade = #1, Speed = 5, and Thickness = 3
The Thickness setting is the first place I go to make an adjustment to the settings if the test cut isn’t
good. Also, check your blade after each cut and make sure there isn’t any clay jammed into the
housing. Grab any bits with your tweezers.
The big secret to cutting polymer clay with the Silhouette machines is pretty simple…unscrew the cap from the blade to open up the full length of the blade to the clay.
You can’t cut polymer clay thick enough to be sturdy with the cap on, even with the Deep Cut blade. The cap is convex and it presses against the clay while the blade is cutting. It makes a mess of the clay and can reseal the cut. The Deep Cut Blade is slightly better because the blue collar sits a bit higher than the white collar on the Ratchet Blade. It doesn’t make a big difference on thinner sheets of clay, but does on thicker ones.
Now we're ready to cut. Start with the background layer because it is an easy cut without any inner bits to cut out. Check your settings and send to cut. Once the cut is through you can peel up the carrier with the clay on top in - hopefully - one piece. Use your clay blade to slide in between the mat and the carrier if it needs some nudging. Weed the excess clay and put this layer aside.
The next layer is a bit tricker. Place the Con-Tact® paper on the mat - sticky side down - and apply the clay making sure there are no air bubbles.
This is the layer where this will really make a difference. Switch the layers on the Design mat and line up with the clay on the actual mat. Check your blade make sure there isn’t any clay jammed into the housing. Check your settings and send to cut.
Grab your tweezers and get eye level to the cutting mat. Be ready to hit the PAUSE button if the blade pulls up a piece of the polymer clay while cutting. Don't worry - your can pause and restart as much as needed with the Curio since the mat is attached to the platform.
Don’t get disappointed if the first…or third…cut isn't good. Just ball up the clay and start over. Some
days the machine just doesn’t want to cooperate. On those days I just turn it off and walk away.
So now you have your doily layer and the backing layer. We are ready to make the bowl. Peel off the
freezer paper from the backing layer and place the clay on a piece of patty paper or parchment paper.
This will allow you to move the piece around when trying to line up the doily layer.
Check the doily layer for any necessary touch ups. You can use an Exacto knife to clean up any
partial cuts and the ball stylus tool for reshaping any cut outs that got distorted.
Loose bits can be removed with your tweezers or the clay blade. Grab the doily layer by the Contact paper and turn it over so the sticky side of the Contact is face up. You can see through the Contact to help you place the doily layer over the backing. Most designs aren't perfectly symmetrical so you might have to rotate the backing layer to get it just right. Once you have found the sweet spot then you can place the doily layer to the backing layer.
Press to attach - from the center out to remove air bubbles (are you getting the fact that air bubbles are not our friends?) and then peel off the contact paper. Pat yourself on the back! You did it.
Now we are going to make it into a bowl by shaping it over a form that can withstand the heat of the
oven. I love these Fat Daddy hemisphere pans that come in a variety of sizes. They are a matte metal that doesn’t leave as much of a shine on the clay as glass or shiny metal will.
The 5” pan makes a great shape for this project. Center the clay with the doily layer towards the pan. Gently press the clay down to the pan starting from the middle and pressing out any air bubbles as you move to the rim. You may need to manipulate the edges to conform to the curvature of your form and to get it pressed flat to the bowl. Now you can texture the backing with sandpaper - or my favorite - stair tread safety tape. (The safety tape doesn’t shed it’s texture as much as sandpaper and lasts a lot longer.)
Curing & Finishing Polymer Clay
Now you are ready to cure your bowl. Set your oven to the suggested temperature from the package
of clay you are using. Make sure your oven is calibrated and heat it up for 30 minutes before placing
the clay in to cure. Place the clay in the oven and bake for 45 mins. See my tips for baking polymer clay in your home oven here. Once the clay has been cured and cooled down you can remove the
clay from the form.
I like to sand and polish my pieces. You can make your own choices based on the look you want. For more tips on finishing your polymer clay projects visit my blog. Also be sure to join my Facebook page for more tips on working with Polymer Clay and Silhouette!
Note: This post may contain affiliate links. By clicking on them and purchasing products through my links, I receive a small commission. That's what helps fund Silhouette School so I can keep buying new Silhouette-related products to show you how to get the most out of your machine!
Get Silhouette School lessons delivered to your email inbox! Select Once Daily or Weekly.


.png)


Would it help to chill the clay in the refrigerator Before cutting?
ReplyDeleteClaywork is my other love, but I only have the Cameo 2. Too bad, but this is still a really cool tutorial!
ReplyDelete