 |
| This is a sponsored post, but all opinions are my own. |
Alright so this is a multi-step process, but I promise you the results are amazing. The first thing you need to do is get yourself some of this Easyweed Adhesive. It's the easiest foil adhesive to cut with Silhouette CAMEO, but not the easiest stuff to find. The good news is Pro World has it (and the foil) and I suggest you grab it because it's multi-functional. In other words you can use it to paper, sticker paper, cardstock, wood, or fabric when applying foil - and it's the only way to apply foil to paper without a laser printer or to fabric at all.
So here's how you're going to go about making your own foil stickers with Silhouette CAMEO. Start by creating or opening a sticker set in Silhouette Studio. If you have my Ultimate Silhouette Guide to Print and Cut this set I'm working on is included.
Set the work area up just like any other print and cut by adding registration marks and setting your design to cut edge only.
Then print and cut your stickers just like any other print and cut on sticker paper. You could leave them like this of course, but why do that when you can bling them out with foil?!
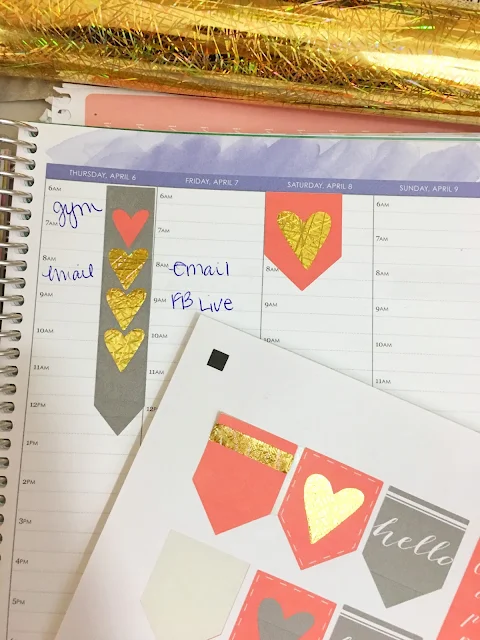
Set your sticker sheet to the side while you work on the foil elements. In Silhouette Studio decide which areas of the stickers you want to apply foil to. I decided I'd add some foil to some of the hearts, arrows, and some of the flags.
From the original sticker design, copy those elements only into a new work area. Don't resize them - you need them to fit on the stickers, remember.
BUT if you're trying to cover printed areas on the stickers with foil, I would suggest you give the foil elements a small offset to avoid any gaps. Select the designs and click the Offset Tool. Change the offset distance to .015. Now delete the original design and get ready to cut the offset.
TIP: The designs can be relatively close to each other when cut. In other words they don't need to be laid out exactly as the stickers were which would waste a lot of Easyweed Adhesive. Just be sure to leave enough space between each shape that you can cut the designs apart later.
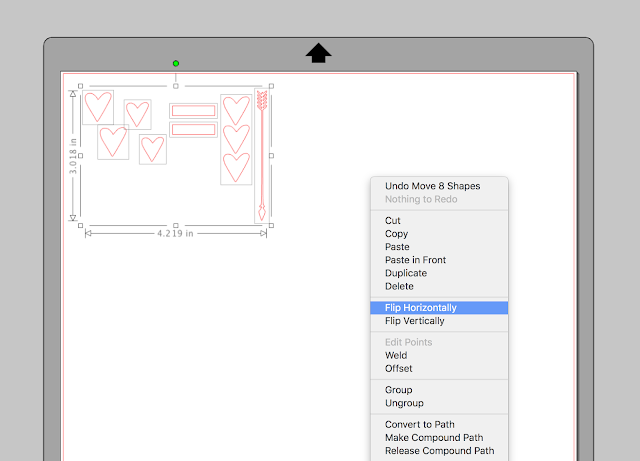
Siser Easyweed Adhesive is just like heat transfer vinyl so you need to mirror your design in Silhouette Studio. Select the designs to be foiled > right click > flip horizontally.

You don't actually cut the foil with your Silhouette cutting machine because it's too thin and doesn't have an adhesive on the back. This is why you need the Easyweed Adhesive.
So place a piece of the clear Easyweed Adhesive on your Silhouette cutting mat with the shiny side down. Again, just like Easyweed heat transfer vinyl!
From the Cut Settings window change the material type to heat transfer vinyl smooth. I found the best cut settings for this Easyweed Adhesive material from Pro World to be: Blade: 2, Thickness: 15, Speed: 8.
Do a quick test cut to make sure the settings work to cut through the adhesive - but not the clear carrier sheet. When your cut settings are set send the designs to cut.
When it's finished cutting, weed away the excess adhesive. This stuff is much easier to weed than other foil adhesives because it's thicker and doesn't tear nearly as easily. As you can see, with the right cut settings it weeds in one piece.
Now use a pair of scissors to carefully cut apart the adhesive designs.
Grab your sticker set and place the adhesive designs right on top of the areas where you want to add the foil. The carrier sheet should be on top.
You can add multiple adhesive designs at the same time, just make sure they're not overlapping in a way that a carrier sheet will get stuck under another piece of adhesive when you apply the heat.
Place the entire sheet on your heat press (or on a flat surface if you're using an iron).
Cover with a teflon sheet. Apply heat at 305 degrees for 15 seconds with medium pressure.
Remove the sticker sheet and peel the carrier sheets away while still warm. The Easyweed Adhesive will be left on the stickers.
I'm using the gold confetti foil from Pro World. It goes on really well and I never get any missing areas when I foil with it.
Place the sheet back on the heat press, re-cover with the teflon sheet and apply heat (305 again) and medium pressure for 20 seconds.
When the time is up...let the foil cool before carefully peeling away the foil sheet.
The areas where the adhesive was applied are now covered with foil.
I mean how cool is that!!!
Here's a quick video to show you how easy the process is!
The application method on fabric is the same as when applying the adhesive to paper.
This Easyweed Adhesive design was applied to a shirt and then covered with the Oil Slick foil - also from Pro World.
I mean how many other products can you say you used with such amazing results on both paper and fabric?!
Note: This post may contain affiliate links. By clicking on them and purchasing products through my links, I receive a small commission. That's what helps fund Silhouette School so I can keep buying new Silhouette-related products to show you how to get the most out of your machine!
Get Silhouette School lessons delivered to your email inbox! Select Once Daily or Weekly.


.png)


That looks fantastic.
ReplyDeleteI'd used the thermoweb hot melt adhesive before and the whole process put me right off using foil, it was horribly difficult to weed, prone to tearing and the end result was very patchy, it also failed after 1 gentle cold cycle in the washing machine.
That looks fantastic.
ReplyDeleteI'd used thermoweb hot melt adhesive and it had put me right off foils.
Difficult to weed, prone to tearing and patchy once applied, it also failed to last one cold delicate cycle in the washing machine, which reminds me need to review it on amazon
OMGEEEEEE! These are so darn cute! Looks like I'm going to be picking up some foil now!
ReplyDeleteThanks, Melissa!
Great Post! How does the foil on the shirt hold up with washing and drying, normal wear?
ReplyDeleteSo after foiling, you put them back into the cameo and cut them?
ReplyDeleteThanks, Leslie Ann
One more question, the heat press doesn't hurt or dissolve the glue on the sticker back?
ReplyDeleteThanks,
leslie ann
Sorry, but this was way too many steps to achieve what gold sticker paper (for the stickers) and gold metallic HTV (for the shirt) could do in 1/4 of the steps and 3/4 of the time and for a fraction of the price.
ReplyDeleteLove the foil! Can you make temporary foil tattoos using the Silhouette? When there is a will there is a way, right?
ReplyDeleteHi Melissa, I was wondering how well the Cameo would cut Siser foil adhesive and you answered my question beautifully. Great job! Did I notice some residue stuck to your heat press' upper platen. Try some thing like Goo Gone when cool. Thanks again.
ReplyDeleteI've been trying to figure how to do this with my planner stickers that already have designs on. If I want to add the foil can I also use the minc or a laminator instead of a heat press?
ReplyDeleteIf I have a Minc machine, can I use that instead of the heat press machine? I can't afford it right now.
ReplyDeleteI just love this idea! Do you have any idea if a home iron would work for this DIY foil stickers??
ReplyDelete