If you've met the Pixscan registration failure error I really hope you'll give your mat another chance because the Pixscan technology is jaw dropping!
1. Calibrate Your Camera for Silhouette Pixscan
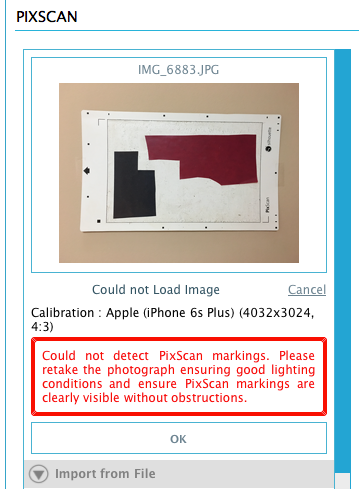
If you are getting a calibration error when you try to upload a Pixscan image into Silhouette Studio, you need to calibrate your phone or camera by using the Calibration test sheet. Here's a step by step tutorial on how to do the Silhouette Pixscan Camera Calibration.If you are not getting a calibration error, but instead are getting a Registration Failure error when your Pixscan image is loading in Silhouette Studio, it is due to the actual picture.
There are any number of issues that can cause this error. Here's what to check:
2. Make Sure Your Material is Within the Cut Border
Material placed on the Silhouette Pixscan mat should be completely inside the black border on the mat.3. Work on a Flat Surface
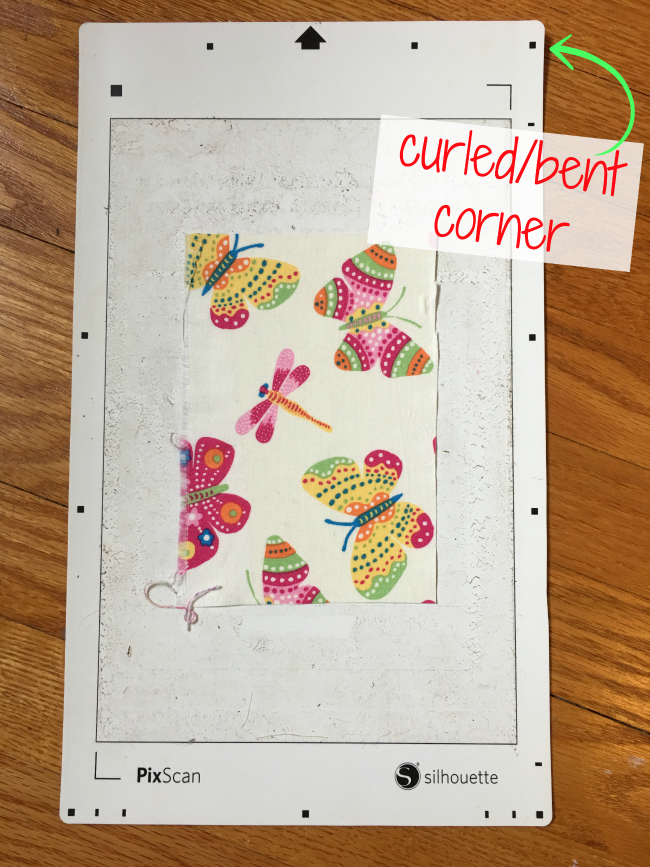
Place your Pixscan Mat on a flat surface to take the picture. It's best to place it on the floor or a table to ensure it's completely flat.4. Tape Down the Corners of your Pixscan Mat
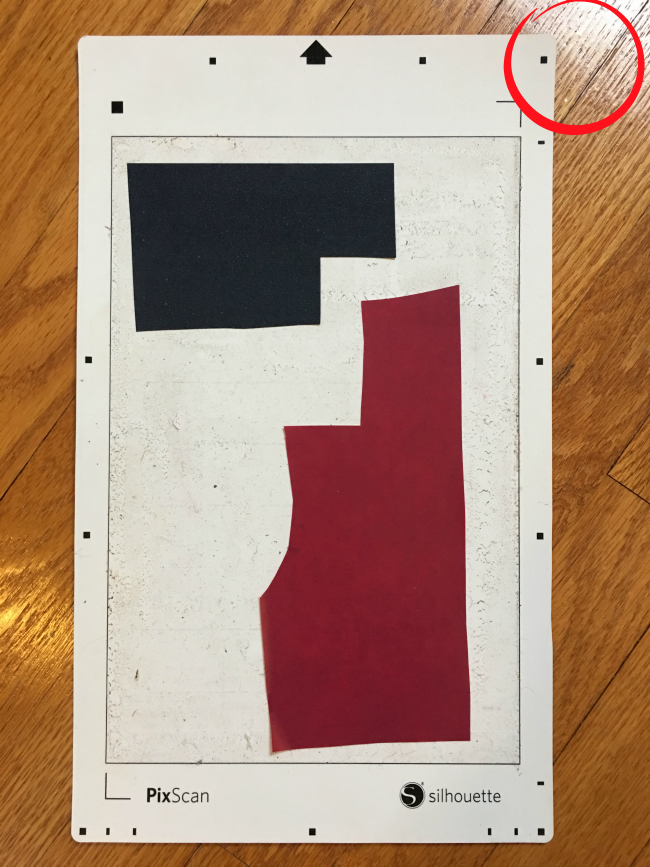
Even the slightest bend in the corners of your Pixscan mat can cause a registration failure. Basically if your mat is causing a shadow, it's not flat enough.
This was causing me issues until I taped down all four corners of my mat with clear scotch tape making sure NOT to cover any of the black registration marks on the mat. You may also want to tape down the edges of the mat to ensure it's completely flat
5. Have Good Lighting Free of Glares and Shadows
Take the photo of your Pixscan mat with plenty of light - preferably without the flash Make sure there are no shadows anywhere in the image which would make some areas darker than others. You also want to avoid any glares which might washout some of the registration marks.6. Take a Straight on Picture from Above
Take the picture of your Silhouette Pixscan Mat from above and as straight-on as possible making sure you have a good focus and straight angle.7. Capture the Entire Silhouette Pixscan Mat
The entire Pixscan mat should be captured in the picture and ideally you should get a little bit of the background.8. Don't Use Your Zoom
Don't use your camera's zoom when taking the picture of your Pixscan mat.9. Email the Image to Yourself at Full Size
Do not reduce the quality, size or resolution of the picture when you email it to yourself. It may take a few minutes for it to load into the Pixscan tool in Silhouette Studio, but a full size image is ideal.
Now that you know how to avoid the issues that can cause Silhouette Pixscan registration failure, you can start enjoying your Silhouette Pixscan mat with your CAMEO, Portrait or Curio. Check out all my Silhouette Pixscan tutorials here or grab my Pixscan mini guide!
Note: This post may contain affiliate links. By clicking on them and purchasing products through my links, I receive a small commission. That's what helps fund Silhouette School so I can keep buying new Silhouette-related products to show you how to get the most out of your machine!
Get Silhouette School lessons delivered to your email inbox! Select Once Daily or Weekly.


.png)


I have s pixscan mat- it looks different from yours it more square than rectangle. I have emailed silhouette America 3 times and have received no help. I can all the way to the end of my project and ready to cut and IF it starts to read the registration marks on the mat (get lots of registration marks not found error) when it gets to the bottom it just rolls right out the back. Is there a pixscan mat setting in Cameo 3 because on my cameo 3 automatically sets no "no mat" and when I scroll down there is no pixscan mat options (yes the pixscan mat is on my screen). I even purchased a second mat in case I had a defective one.
ReplyDeletedid you figure out how to fix the problem??? i have the same exact problem my sil 3 won't even let me add pixscan mat theres no option for it!
DeleteI have a cameo 3 and have the full size pixscan mat and have been trying for days to register my mat on the machine. It is doing the same thing every time. Just like yours, it is pushing the mat all the way through the machine and not stopping to read the bottom registration mark. I dont know what else to try. I have redone the pictures over and over for calibration as well as the mat with my project on it. How did you solve your problem as I am at my wits end. Youtube and the internet have not provided me with any solution to fix the issue. Please Help!
DeleteYou have saved my sanity! I could not understand why I could only get the pixscan mat to work 10% of the time. Taping it down for the photo was the key.
ReplyDeleteI have 2 different size PixScan mats. When calibration how do I know what paper size to use for each as they are listed as letter, ledger, A4 and A3. I know the one is letter size. the other mat's cutting size is 7.5" x 11.5".
ReplyDeleteThank you for the information.
What is your take on the PixScan app? I used my PixScan mat for the first time last night and thought the app would be easier! Well it worked for cleaning up the pic but after detecting the registration marks, my Cameo 3 would say job complete but it would not actually cut. I had to do the importing way to get it to work.
ReplyDeleteI finally got it to where I got a picture of the mat on my phone but now I dont know how to send it to me!!! I have 5 pictures on the bottom, first one is an arrow and the last one is where you send it to the silouette but no where does it say for me to email it to myself so I can get it on my computer. I am soooooo frustrated !!!!
ReplyDeleteHi! the only pixscan mat available in my area is the one for curio so I got it since it's 12 in x 8.5 as well. Do you have hacks on how to get it to work on portrait? 'i always get a "registration failed" everytime i send it to portrait. thank you!
ReplyDeletePixScan error "failed to detect registration marks" can be usually fixed by shining with the flashlight direct on the registration mark, as at the photo:
ReplyDeletehttps://lottacandoeverything.blogspot.com/2021/05/pixscan-mat-error-problem-solved.html
Hi it worked for me too on cameo2 Thankyou
Delete