 |
| This is a sponsored post but all opinions are my own. |
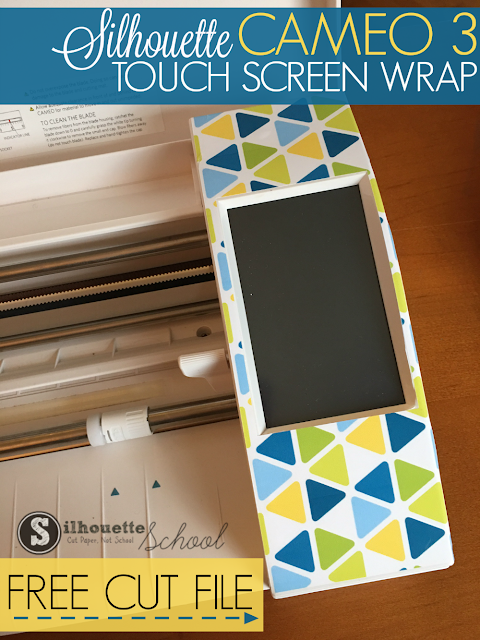
The control panel shape is perfectly sized so all you have to do is download it below and open in Silhouette Studio. Do not resize it at all or it won't fit around your Silhouette Cameo 3 touchscreen.
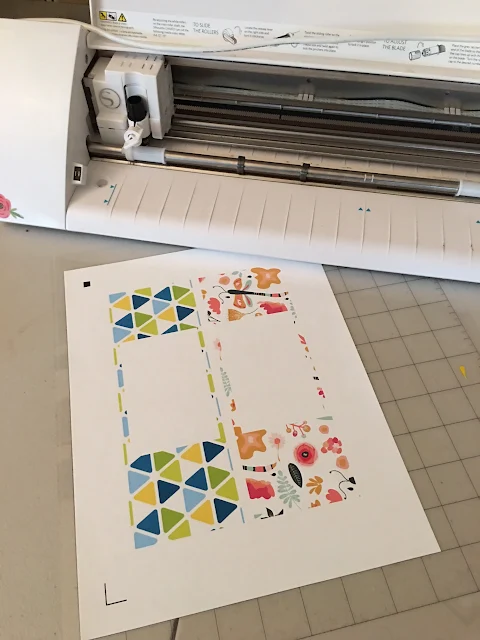
I decided I wanted to cut mine on removeable sticker paper from Online Labels. I love this stuff because you can easily remove the sticker after any length of time and there's NO sticky residue or paper left behind. Doing a print and cut on sticker paper is also great because you can fill the shape with whatever pattern you want!
Put the removable sticker paper into your printer so it prints on the sticker side (not the backing)! Then go ahead and do your print and cut!
Online Labels has recommended Silhouette cut settings for all of their products so I always refer to their list. For this removable printable sticker paper a blade depth of 3 with a thickness of 10 and a speed of 4 work perfectly to give you a kiss cut.
When it's finished cutting, remove the cutting mat with the sticker paper on it from the cutting machine. I treat this stuff almost like vinyl in both weeding and transferring.
The great thing about this Online Labels sticker paper is the quality - it can stand up to transfer tape - which is necessary to use when moving the sticker to the CAMEO. There's no way you'd be able to do this without transfer tape due to those thin areas on either side of the touch screen panel.

My best suggestion is to use clear Oracal transfer tape to pick up the sticker off the backing.
Use the sticker paper backing to cover the back of the sticker again with the exception of the top half inch or so. This will prevent the entire sticker skin from touching the cutting machine before you're ready to fully commit.
Line up the top border of the sticker with the top edge of the machine above the control panel. Once you get it lined up perfectly, fold the sticker piece back so you can remove the backing.
Now slowly lay the rest of the control panel shape down. Oracal's transfer tape makes it super easy to see exactly what you're doing since it's 100% clear.
Once the sticker is in place around the touch screen, burnish it with your finger or the Silhouette scraper and then peel away the transfer tape. I had one bubble on the bottom section, but was able to easily peel up the bottom part of the sticker and then re-stick it! That's the beauty of the repositionable sticker paper.
The other great thing about Online Label's removable sticker sheets are you can easily remove them...hence the name. This makes it super easy to swap out your Silhouette CAMEO 3 skin whenever you want. Just peel off the sticker and replace it with a new one....which is why you print and cut two on the sheet!

Alright now for what you came for the free Silhouette CAMEO 3 control panel shape...just click the link below to download it. Then open it in Silhouette Studio. Remember not to resize it!
If you'd like to share it, we'd love that! We just ask you share the drink link to this blog post and not the actual cut file or the link to Dropbox.
Download the Silhouette CAMEO 3 Touch Screen Wrap
Want to know everything there is to know about making stickers with Silhouette CAMEO? Check out my book The Ultimate Silhouette Sticker Guide.
Note: This post may contain affiliate links. By clicking on them and purchasing products through my links, I receive a small commission. That's what helps fund Silhouette School so I can keep buying new Silhouette-related products to show you how to get the most out of your machine!
Get Silhouette School lessons delivered to your email inbox! Select Once Daily or Weekly.


.png)


Can you make a template for the Cameo 3 for the blade holder.
ReplyDelete