In this tutorial I'll show you how to invert an image using the Image Effects tool to make tracing hard to trace images a whole lot easier.
So what is the Invert Effect and how do you use it? As I mentioned the Invert Effects is found under the Image Effects menu on the right side of Silhouette Studio.
How Does the Invert Option Help with Tracing in Silhouette Studio?
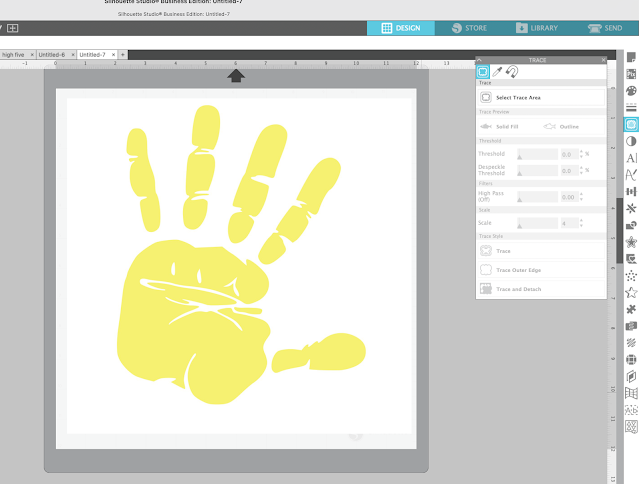
Let's take a look at a more difficult tracing project --- tracing with little contrast. Since tracing in Silhouette Studio works on contrast, when there's little contrast like in this example, it's difficult to get a good trace! The yellow and white don't offer much contrast for the tracing option to be successful.
Note: This post may contain affiliate links. By clicking on them and purchasing products through my links, I receive a small commission. That's what helps fund Silhouette School so I can keep buying new Silhouette-related products to show you how to get the most out of your machine!
With careful tuning of the tracing features, tracing is still possible. However, since there's not much contrast and you'll need to adjust scale and threshold significantly, the trace may not produce clean or crisp lines.
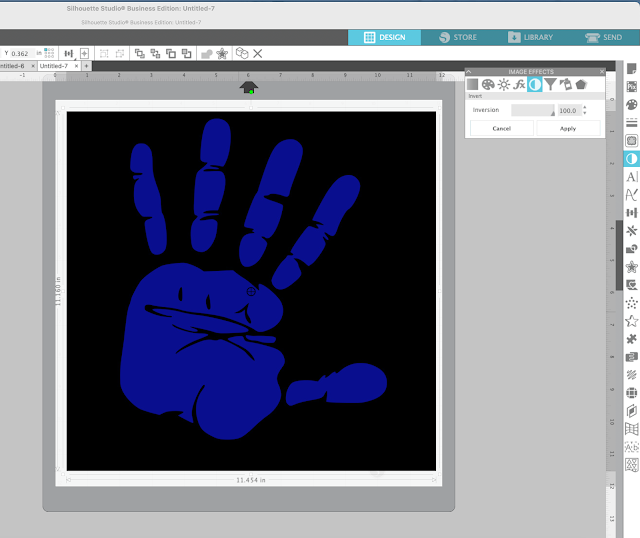
This is where the Invert function comes in. With the photo selected, open the Image Effects tool on the right sidebar and choose Invert. Move the Inversion bar all the way to 100%.
In this example, the white background turned black and the yellow hand print turned blue. Keep in mind that the colors will vary during the Inversion process, but typically light colors turn dark and vice-versa.
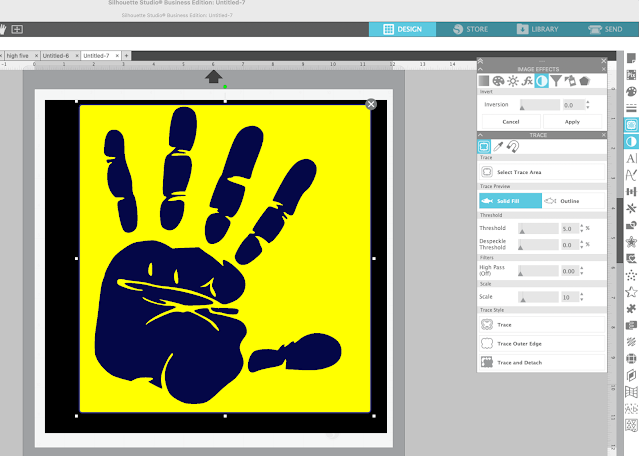
Now when you attempt to trace the photo, with the new darker colors, it becomes a piece of cake.
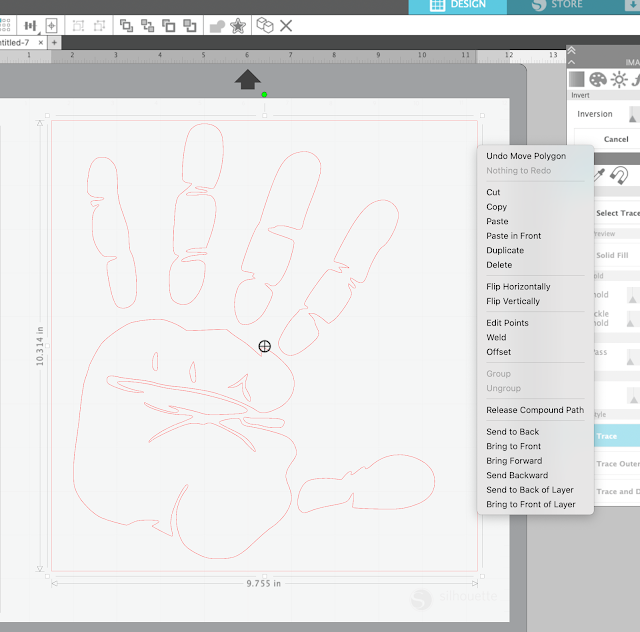
After tracing, move the original image away to reveal the cut line.
When your image traces the outside (background), all you have to do is Release Compound Path, Ungroup, and remove the outside box.
Here's an example of what the final image will look like:
So while the Invert tool won't be the answer to all of your tracing problems, it's a good tool to have and a good function to play with for future use. Give it a try for yourself!
Get Silhouette School lessons delivered to your email inbox! Select Once Daily or Weekly.


.png)


Wow cool thanks for sharing 😊
ReplyDeleteI have a photo of a white coffee mug on a white background. I tried to use this lesson to remove the white background by inverting, tracing and detaching but it did not work at all. But at least I know about the invert button now! I was using another program to invert my hard to trace items but it seems this may be easier. Hopefully I can get it to work on something else. Thank you for the lesson!
ReplyDeleteThank you Melissa! For months I have been trying to trace one of my (deceased) mother's recipe cards that was terribly faded. I just tried this technique that you posted AND IT WORKED!!! I am forever grateful! :) DeeDee
ReplyDeleteAmazing as usual! Just what I needed. Thank you so much Melissa. I got the Cameo on a whim for cutting stencils in a foreign alphabet but it's mind boggling what can be done with it.
ReplyDeletethank you! I am new to silhouette studio and was having difficulties capturing all of a design with the tracer, inverting the image fixed it right up!
ReplyDelete