Now if you'll excuse me - I have been a bad blogger. Since I didn't plan on using the baby shower wreath as a tutorial I didn't take any pictures of the process so I had to go make a new set of medallions just for this tutorial. That'll teach me!
There are a few things to remember when cutting DIY paper medallions:
- The first is the wider the strip of paper cut, the bigger the medallion will be
- The further apart the perforated lines in Silhouette Studio, the bigger the folds on your medallion
- You will also need to some good double sided tape (I like to use the .25" Sticky Thumb double sided clear tape) and a glue gun to keep your medallions together
- I suggest you use Silhouette chipboard for the middle circles to hold your medallions together

Alright once you have your paper (if you want to create custom paper for your medallions you can follow this Silhouette School tutorial on designing custom printed paper) and supplies all ready you want to open up Silhouette Studio.
You can create your own paper medallion cut file by drawing a big rectangle and then placing perforated lines every half inch or so....ooooorrrrr you can take the easy route and use the free paper medallion cut file I gave away on the blog last week. (To adjust the diameter of the medallions just move the vertical cut lines in Silhouette Studio.)
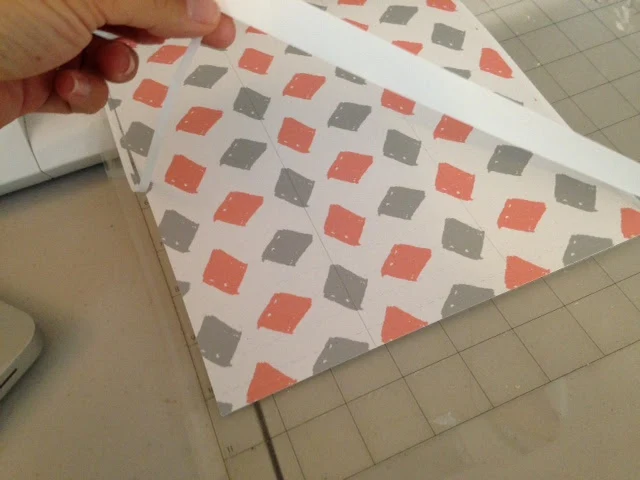
TIP: If you position the cut line at the border of the print line you will trim off the white border of the paper while cutting.
In Silhouette Studio open the Design Page settings and match the page size to the size of the paper you are cutting. If you are cutting an 8.5 x 11" piece of printed paper you will want to make sure adjust the page size to match. If you are cutting on a 12x12 piece of patterned paper, you can add an extra column of perforated lines.
In the Cut Settings window, confirm that the cut lines are turned on. Further down the page pick your material from the list: Cardstock or patterned paper most likely. Be sure to adjust your blade to match the blade depth.
After the cutting machine has cut the paper, remove the strips from the cutting mat. You will need about 3 strips for each medallion - so repeat the cutting process for as many medallions as you want to make.
For the center circles, which will hold the paper medallions together - as well as any center embellishments - I would suggest you use chipboard. Cut as many 1-1.5" chipboard or cardstock (if you're in a pinch) circles with your Silhouette cutting machine as you will need - one for each medallion. I use the Silhouette Chipboard and cut with the default settings in Silhouette Studio (double cut).
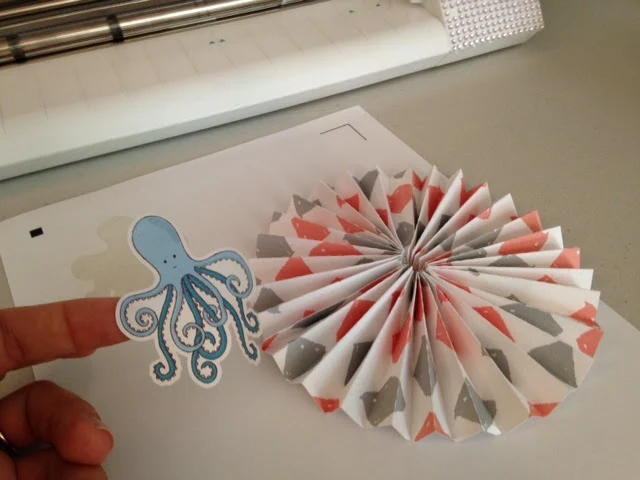
 If you are going to put shaped stickers on the front center of some of my medallions, I would suggest you cut chipboard die cuts to match. The stickers will then be applied over the chipboard shapes and then they will be glued to the front of the medallion. The stickers don't stick well to the medallions without the backing.
 Now you are ready to start folding and putting your medallions together. Use the perforated lines to fold up your paper like an accordion.

Use double-sided tape on one end to attach three folded strips together.


On the bottom fold, place a piece of double-sided tape and carefully circle the paper around so you attach it to the other end forming a circle.
Warm up your glue gun and have your center circle nearby as you scrunch (for lack of a better term) your folded circle into a nice, neat medallion with the center touching.
TIP: You may find it easiest to work with the medallion upside down.
Place a big glob of hot glue on the chipboard circle and place it on the medallions right at the center so it holds it all together. Hold the center circle in place for a minute or two as the glue sets and dries.

Repeat...repeat....repeat...repeat...until you have enough medallions to form your wreath.
The final step is to print and cut stickers with your Silhouette CAMEO to add to the center of some of the medallions.
Then place the stickers right on the same shape chipboard piece and glue the chipboard shape to the front of the medallions.

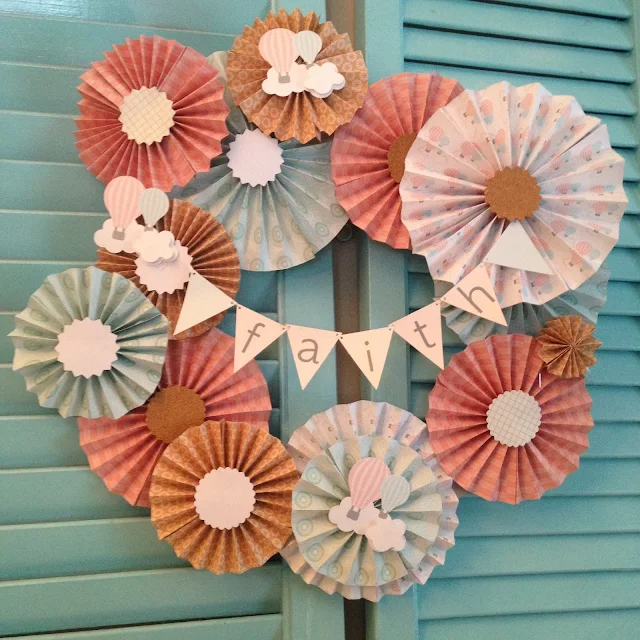
Now...back to the wreath I made for my sister's baby shower. I used a large chipboard board wreath form that I purchased and hot glued all of the medallions on it to make my paper wreath.
And here's how the paper medallion wreath all came together.

Note: This post may contain affiliate links. By clicking on them and purchasing products through my links, I receive a small commission. That's what helps fund Silhouette School so I can keep buying new Silhouette-related products to show you how to get the most out of your machine!
Get Silhouette School lessons delivered to your email inbox! Select Once Daily or Weekly.


.png)


The link to the free cut file above isn't working (showing a 404 error). http://www.silhouetteschoolblog.com/2016/10/diy-paper-medallions-silhouette-cameo-tutorial_7.html
ReplyDeletedownload the cut file from this page (scroll down to see the links to V2 or V3)
Deletehttp://www.silhouetteschoolblog.com/2016/10/diy-paper-medallions-silhouette-cameo-tutorial7.html
the link for the medallion isn't working
ReplyDeleteHey Melissa, several years ago I bought Tim Holtz rosette dies to make his Quirky Turkeys (google it) and he has a video on how he glues the rosettes--it's so super simple. With a glue gun put a blob of hot glue down on a no stick mat (it's now basically a glue dot) then with the medallion (rosette) over the top of the blob of glue push down and hold.
ReplyDeletedownload the cut file from this page (scroll down to see the links to V2 or V3)
ReplyDeletehttp://www.silhouetteschoolblog.com/2016/10/diy-paper-medallions-silhouette-cameo-tutorial7.html