It's a rare occasion when you come across one of those Silhouette CAMEO projects that essentially combines all the basics...I didn't even realize this one did just that, until I was basically done and started writing this tutorial! That's when it hit me that if there was ever a single paper-based project to combine all the beginner Silhouette CAMEO tutorials - this is it!
Working your way through creating your own custom stationary set gives you the opportunity to really touch on so many of the most popular ways to use a Silhouette cutting machine and Silhouette Studio - in their most basic form! This one project manages to touch on the basics of tracing, offset, adding new fonts, accessing special font characters, designing, Pixscan, print and cut, stickers, sketch pens, adding new fonts to Silhouette Studio, importing patterns and even using and importing elements of graphic design packs from places like The Hungry JPEG.
Throughout this tutorial I will point you to other beginner Silhouette tutorials so you can refresh or learn more about the technique - and at the very end you will find a full list of all 13 Silhouette tutorials touched we on!
Every
month when the new bundle from The Hungry JPEG comes out I hear from
readers who say they're so tempted to grab the deal, but what.oh.what
Silhouette project can they actually make with all those graphics and
designs? And how?! Sometimes the possibilities are just so limitless
it's hard to focus...so today I'm hoping to give you a few Silhouette
CAMEO project ideas all wrapped into one tutorial as we make DIY custom
stationary! I'm working with the Garden set which is just one of many beautiful sets from The Hungry JPEG's September Bundle. The sets are great because if you struggle with coordinating pieces - all the work is done for you! This set includes not only digital patterns which can be added as custom patterns to your Silhouette Studio My Patterns folder (if you have Designer Edition), but also coordinating smaller designs!
The first thing you want to do is purchase the commercial graphic bundle and then find a set you want to work with. I like to focus in on one set in the bundle to start, otherwise it's easy to get overwhelmed with all the goodies in these huge bundles.
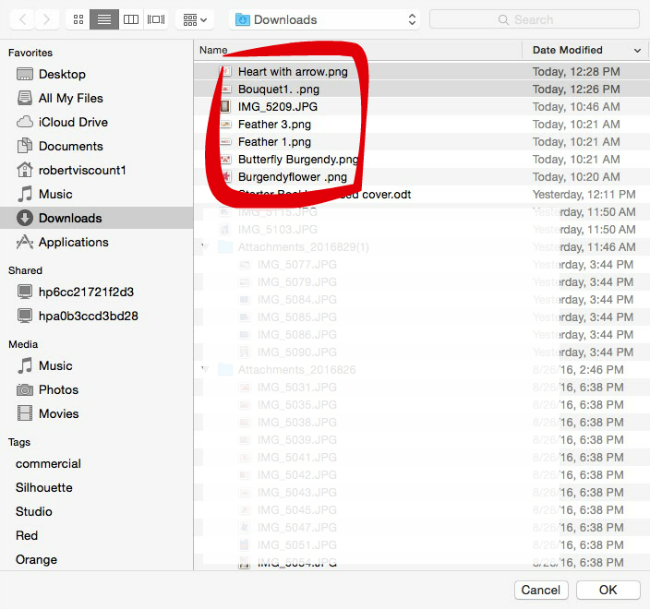
Go through the folders and download only the individual elements you want to work with. I picked three different digital patterns and then a few coordinating elements for each. I downloaded each onto my computer.

For the graphics you'll want to download the PNG files if they are available. You can also work with JPEGs if necessary. I would suggest you save them to your desktop so they're easy to find.

Next open up Silhouette Studio.
If you have Silhouette Studio Designer Edition you can drag and drop the seamless pattern files from your desktop right to the My Patterns folder in your library. These now act like custom pattern fills and will be accessible in Silhouette Studio through the Fill Patterns tool along the top tool bar.
To open the JPEG or PNG design elements into Silhouette Studio click File > Open and navigate to the first design that you downloaded. To open another design element in the same work area, use the Merge option by clicking File > Merge and navigate to the second PNG file. Repeat as needed.
The next step to working with the PNGs is tracing and detaching the design from it's background so you can add cut lines. I went into great detail on how and why you want to use the Trace and Detach function in this Silhouette tutorial so I won't rehash it all again, but just know that you will need to use that tool to access the designs.

Once you have all of your designs and patterns and elements in Silhouette Studio you can start creating your custom stationary set.
My set is going to include an envelope liner, stickers for the envelope front and the seal, and custom note cards - all of which will be print and cuts and all of which will coordinate beautifully thanks to this beautiful set.
We're going to start with the envelope stickers since we just traced them! Now all you have to do is size the designs, add registration marks to the work area, and fill the page with designs so you get a full sheet of stickers! Print and cut the stickers on sticker paper! I have lots of Silhouette CAMEO sticker tutorials, as well as an ebook on making custom stickers with Silhouette if you need any help along the way!
Now let's move to the envelope liner. Remember that DIY envelope liner template tutorial I shared a few weeks ago? This is why! If you have already created the template you can simply open the envelope liner template from your Silhouette Studio library and fill it with your custom pattern by selecting the envelope and clicking "Fill Patterns." Scroll down the patterns window and click the custom digital pattern you added to your My Patterns folder a few steps back.
Remember not to resize the liner template...just add registration marks and you're good to print and cut on sticker paper to create your envelope liner. If you need a refresher on how to design and cut your own envelope liner templates with Silhouette you can read the full tutorial here.
Finally, let's make the custom note cards! If you don't have a card shape in your library you can easily make one.
- Measure the size of your envelope...double the height since the card will be folded over.
- Use the Draw a Box tool to Draw a Rectangle.
- From the Scale tool enter the dimensions and your card will be resized. (1)
- Use the Draw a Line tool to draw a straight line for the fold.
- From the Line Style window change the line to a perforated cut line. (2)
- Select both the line and the card shape open the Align Tool > Align Vertically > Align Center. (3) This will put the fold line straight down the middle of the card.
Now you can fill the card with the same pattern as the envelope liner or a coordinating color. You can make the pattern somewhat transparent (Click Fill Pattern > Advanced > Transparency) (4) and add text over top or leave it blank and add some stickers and sketched text to the front. I download and installed the font Kaiyila into Silhouette Studio - also from the September Bundle - to use for 'thanks'. And yes..the 't' and 's' are special characters from the font that I accessed in Silhouette Studio.
I print and cut the card on cardstock for one of the note cards....
On the other, instead of printing 'thanks' I used the Silhouette sketch pen to sketch the text....but I filled in the text in Silhouette Studio to give it an filled look.
Here's my full coordinating set of custom stationary made 100% with my Silhouette CAMEO!
And here are a few closer pictures so you can see the details..
Isn't it amazing what you can create when you combine all the skills you've already learned...
Putting this beautiful set all together we used sketch pens, stickers, print and cut, Pixscan for the envelope liners, importing custom patterns, tracing, adding new fonts to Silhouette Studio, and so much more!

Here is a full list of Silhouette CAMEO tutorials you can refer back to when making your set of custom stationary!
- Opening Graphic Design Packs, JPEGS, and PNGS in Silhouette Studio
- How to add custom pattern fills to Silhouette Studio
- Using the Silhouette Studio Trace and Detach Tool
- How to open multiple designs in the same Silhouette Studio work area
- Installing new fonts in Silhouette Studio
- Opening special character fonts in Silhouette Studio
- One click trick for adding registration marks
- Making Stickers with Silhouette CAMEO for beginners
- Custom size envelope liner templates with Silhouette CAMEO
- Mastering the Align Tool in Silhouette Studio
- Silhouette CAMEO Print and Cut Tutorial for beginners
- Silhouette Sketch Pen Tutorial for Beginners
- Filling in Sketched Text in Silhouette Studio
And just remember, like always, all of the designs and fonts come with the commercial license.
Still need more convincing? Here's a look at what else The September bundle has to offer!
Note: This post may contain affiliate links. By clicking on them and purchasing products through my links, I receive a small commission. That's what helps fund Silhouette School so I can keep buying new Silhouette-related products to show you how to get the most out of your machine!
Get Silhouette School lessons delivered to your email inbox! Select Once Daily or Weekly.


.png)


What a great tutorial for a super cute stationery set! (Stationery is spelled with an e!) :-)
ReplyDeleteOh good lord the typo queen strikes again!
DeleteHaha I was just about to mention the stationary/stationery thing. An easy way to remember it is to think of a parked cAR being stationARy, and writing a lettER uses stationERy.
DeleteGREAT Tutorial, thank you
ReplyDeleteThis is going to be a really stupid question. I am new to this, just bought a Silhouette Cameo 2. When you created the stationary and you say print and cut, do you print from you computer printer? How do you do multiple colors on one project if you just use sketch pens?
ReplyDeleteIt's not a stupid question. I'm a complete newbie and I came here to find the same answer. Did you ever figure it out?
DeleteThis is such a fantastic tutorial! I wish I had about a month to lock myself away and just play with this machine and all the lessons you have given us. Every time I read your instructions I just say "wow, she is so smart".
ReplyDeleteThis comment has been removed by the author.
ReplyDelete