 |
| This is a sponsored post, but as always, all opinions are my own. |
Spikers come 'blank' in 26 colors so they're perfect for customizing with vinyl. You can add a design on just one side or you can do what I did and make a wrap that goes all the way around.
Now because the top and bottom of the cup part are not exactly the same diameter I had to create a special template for the wraps. And because I love you all so much - and because I just know you're gonna buy up these Spikers in bulk (they are available in wholesale, after all!) - I figured I'd help you all out and share the beach spiker template and two wrap designs I created for free!
You're welcome!
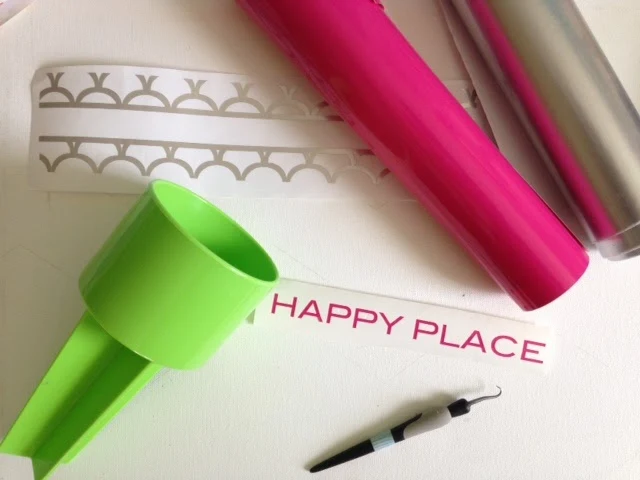
The first design is a split scallop design with "Happy Place" in a second color vinyl. Go ahead and download the cut file (below) and open it in Silhouette Studio. DO NOT RESIZE the file as it's sized to perfectly fit the Spiker. Just get on with the cutting!

Take the transfer tape with the vinyl on it and position it over the Happy Place vinyl design. Burnish the vinyl and then peel the transfer tape up. You should now have both parts of the design on one piece of transfer tape.
With the sticky side of the transfer tape up, place that vinyl backing piece (shiny side down onto the adhesive side of the vinyl) you saved from the scallops, over about 90% of the design. Just leave a small part of the vinyl exposed.
The exposed area is where you are going to start wrapping the vinyl wrap around the Spiker. The backing helps to make sure the rest of the design doesn't stick too early!
Slowly....pull the vinyl backing away as you continue to wrap the vinyl design around the Spiker. Pay close attention to where the top and bottom edge of the design hit the Spiker. Just take your time and it will go on straight and without any bubbles.
Once you've completely wrapped the vinyl design around the Spiker, begin peeling away the transfer tape, burnishing the vinyl onto the plastic Spiker as you go.
And that's all there is to it! Of course you can change the text in the middle to a name or another phrase. Just get creative!
The second design I'm sharing is a whale wrap which is more forgiving while applying the wrap to the Spiker since you don't need to be as exact about lining up the top and bottom.
Again, cut both portions of the design on two different color vinyls, layer them together, and then apply.
And just to get your creative juices flowing...here are a few other ways I've customized Beach Spikers with vinyl. They make awesome gifts for teachers, bachelor and bachelorette parties, party favorites, and even just a little treat for yourself.
Thanks for coming to class today at Silhouette School. If you like what you see, I'd love for you to pin it!

Get Silhouette School lessons delivered to your email inbox! Select Once Daily or Weekly.


.png)


Love love love!
ReplyDeleteThank you!
ReplyDeleteThank you
ReplyDeleteLove these! Thanks!!
ReplyDeleteCan you only purchase from Spiker if you have a Tax Id#?
ReplyDeleteI have the same question!! Any where we can buy them and not have a company?
DeleteI have always gone direct to the Beach Spiker company. They were great.
DeleteYou can call me at Spiker directly: 800-790-5409 and I'm happy to answer any questions. :)
ReplyDeleteI can't get the template to download-- been trying for a week! I go to dropbox, attempt to download and it says that the dropbox site is temporarily unavailable. Anyone else having this issue? I am wanting this design for my spikers for our beach trip this next weekend! :(
ReplyDeleteClick on the "Download" button (left) and save the file to a folder on your computer. You can then use Studio or Design Studio to bring the file into the software.
DeleteI have a question! I see the blank template you made but it is bigger than my 12 inch mat. Is that how it's supposed to be?
ReplyDeleteThat silver vinyl is so metallic-what brand is it?
ReplyDelete