Today I'm going to show you how to put rhinestones around a design - which is the easiest method.
Since I like to take baby steps so you don't get overwhelmed, I'll follow up later this month with the next step which is basically layering rhinestones on htv without actually layering. So tricky!
Alright first - you'll need to have Silhouette Studio Designer Edition to use this technique - but believe me, Designer Edition is worth it for soooo many reasons!
Open up your design or type out your text if you are using a text-based design. (I'm using two different designs here so you can see how this work on both text and a shape.) Whatever you're working on, just know that this is the part of the design that is going to be cut on htv.
When I design I prefer to fill in the shapes or text with the color htv I will be cutting on so my design really comes to life. Use the Fill Color and Line Color tools to do so.
Now you want to make an offset around the edge of your design so group the pieces together if necessary. Select the design > click the Offset tool along the top toolbar > offset.
Adjust the offset distance if you need to. Don't forget offsets automatically weld so don't worry if they're overlapping right now.
Select the offset only and go to the Rhinestone tool - along along the top tool bar. You'll need to have Designer Edition or you would have a rhinestone tool option. From the Rhinestone window click "Edge." The offset cut line has now changed to a line of rhinestones.
How you space the rhinestones is all personal preference. For the text design I want them more spread out so I used the Rhinestone Spacing bar to separate them. For the heart, I wanted them as an outline so I did not adjust the spacing.
If you'd like to add more rhinestones further away from the design to form a sort of spray, keep the original rhinestone layer selected (I filled with green below so you could more easily see) and click the Offset tool again. Repeat the offset process.
This time the offset will automatically change to rhinestones rather than a cut line. Again you may opt to change the offset distance and/or space the rhinestones.
You can see that as you space the second offset rhinestones out (in orange) they become fewer and fewer.
Once your design is to your liking, size it. Now group together all of the rhinestone offset layers.
From here on out do not re-size either part of the design unless you re-size them at the same time.
Move the HTV layer away from the rhinestone layer as you prepare to cut. Mirror the HTV layer only! Do NOT mirror the rhinestone layer.
Cut the HTV portion of the design on heat transfer vinyl. Weed the HTV design and set it aside.
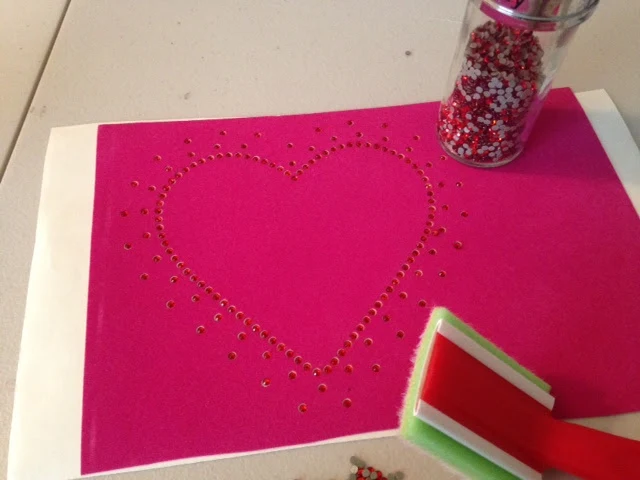
Adjust the cut settings and the blade to cut the rhinestone design on sticky rhinestone flock (clearly I added a slight 'spray' to my heard design the same way I did with the text design). If you need a refresher on cutting rhinestone designs check out this Silhouette rhinestone for beginners tutorial.
Fill the rhinestone template with rhinestones.
Place the rhinestone transfer material on top to pick the the rhinestones up. Now you should have your rhinestones and your htv all ready to press onto your shirt or bag or wherever.

Put the rhinestone to the side for a minute and start by pressing the HTV onto the shirt. It's crucial that you press the HTV design on first. If you press the rhinestones on first, you will not get a good press on the htv because the rhinestones will create a small gap between the top of your heat press or iron and the shirt.
Once the HTV is adhered, remove the carrier sheet. Position the rhinestones into place around the HTV and press them on.
Flip the shirt inside out and press again from the backside.
Admire your handy work! Aren't rhinestone and HTV designs just awesome?!
Note: This post may contain affiliate links. By clicking on them and purchasing products through my links, I receive a small commission. That's what helps fund Silhouette School so I can keep buying new Silhouette-related products to show you how to get the most out of your machine!
Thanks for coming to class today at Silhouette School. If you like what you see, I'd love for you to pin it!

Get Silhouette School lessons delivered to your email inbox! Select Once Daily or Weekly.


.png)


This is an awesome tutorial!! I was just today wondering how to do this. I did rhinestones for the first time this past week and it was so much fun. I got my stuff from The Rhinestone World like you suggested. I actually ordered the kit specifically for the Cameo.
ReplyDeletegood one.
ReplyDeleteWith the help of that Tutorial, we can learn to make the Design and Press Rhinestones and HTV Decals which is looking awesome. So many resturants like to use such Press Rhinestones because it have great attraction for the customer. Well! I have a site superiorpaper.net where i found such more designs which may helpful for the others.
ReplyDeleteGreat post here. I've been doing some research to start utilizing rhinestones at our store, Thank you for this guideline.
ReplyDelete