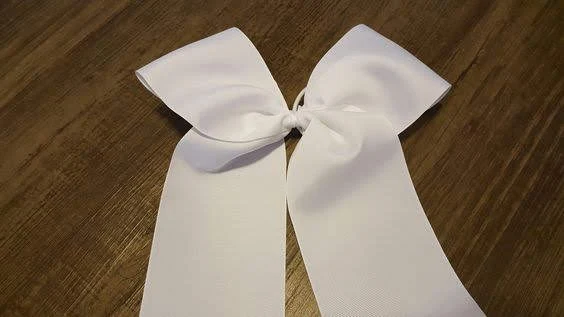
I feel like I want to steer my daughter into cheerleading just so I can put glitter HTV on everything. I'm kidding, I'm kidding... kinda. In reality though I hear from a lot of moms who want to make custom bows for their girls...not only do they want to know how to decorate ribbon with HTV, but they want to know how to tie the perfect bow.
Today I'm handing it over to the ribbon and bow tying expert, Silhouette School weekly contributor, Becky from My Paper Craze to explain.
Decorative ribbons are great for the any time of year - not only for gifts and decor but also as hair and outfit accessories! Previously on Silhouette School, we showed you how to decorate ribbon with HTV and then how to set up custom designs for your ribbons in Silhouette Studio, both by making a monogram cheer bow and we received a lot of great feedback. One common question is: "How do I make one of those cheer bows?" Today, we have the answer for you!
Let me give you a quick disclaimer about these no sew cheer bows: I make them for personal use or to give to friends, I do not sell them. Given the going price for a cheer bow, most cheer moms expect very high quality. While these cheer bows have held up well for me, my toddler does not actually cheer. So just keep that in mind. I don't want anyone to be disillusioned that easy = quality.
I keep a stash of 4" grosgrain ribbon at home, so that is what we are using again today. The first step is to determine how much ribbon you will need. The most I use is about 35", but I tend to go a little smaller because my daughter is only 2. Remember, you can always trim excess ribbon off after you are done, but you can't add more to it once it's cut. You don't even really have to cut it until the end.
You'll also need a smaller, thinner flexible piece of ribbon that will tie around the middle and a color-coordinated hair tie.
Cross your ribbon, as I did above, so you have an even loop on each side and even tails (the loose end that hangs down). After it all looks even, take your fingers and pinch it in the middle of the ribbon, right where each side crosses in the middle. I am right handed, which means that I pinch with my left hand so that my right hand is free.
You'll continue to bunch in your left hand so that you have a nice, gathered center. If you were sewing, which we are NOT, you would run a threaded needle through the gathered center several times to secure it. But remember, we are not doing that because this is a no sew bow that's quick and easy version. So here's the completely gathered version.
Now slide the edge of the smaller, thinner ribbon between your thumb and the larger ribbon and wrap it around so that both ends are sticking out the back, then (magically) tie the ends with one hand. You may need a little help at first, but you'll get the hang of it after enough bows.
Tie the ends as tight around the middle of the ribbon as possible to keep it cinched. Also, if you happen to tie the middle off center, you can use your fingers to slide it a little to one side or another.
For a true cheer bow, you'll want to grab an elastic band and slide it through the excess tie ribbon (in the photo it's the sheer white - the one that is tied around the middle). You'll tie the elastic hair band onto the back side of the cheer bow and knot it similar to the way you cinched the ribbon together.
Now just trim the tie ribbon so it's not peeking out. If you want a little extra security, a dab of hot glue will go a long way. If you are going to attach a barrette or alligator clip instead of the elastic, I would strongly suggest the hot glue to attach.
Now all you have to do is to trim your tails and seal them with heat, such as a lighter. Be easy with the heat, you don't want to singe (or worse, burn!) the ends of your hair bow!
Note: This post may contain affiliate links. By clicking on them and purchasing products through my links, I receive a small commission. That's what helps fund Silhouette School so I can keep buying new Silhouette-related products to show you how to get the most out of your machine!
Thanks for coming to class today at Silhouette School. If you like what you see, I'd love for you to pin it!

Get Silhouette School lessons delivered to your email inbox! Select Once Daily or Weekly.


.png)


I use a zip tie to cinch, and then hot glue a pretty ribbon around it. :)
ReplyDelete