Now, I've made my love for using dingbat fonts in Silhouette Studio no secret. Dingbat fonts are the fonts that use images instead of characters for each key stroke. They're a great source of cut files because you simply download and install the font, open Silhouette Studio, and start typing and you instantly have yourself a cut-able shape. But did you know you can go one step further and use dingbat fonts as print and cut files, too?!
Here's how you're going to do it!
First download the dingbat font you want to work with. I'm going with Mellow Fonts 1 for this Silhouette Studio Tutorial. It's a freebie on DaFont.com. If you're unsure how to download and open in new fonts in Silhouette Studio, here's a refresher.
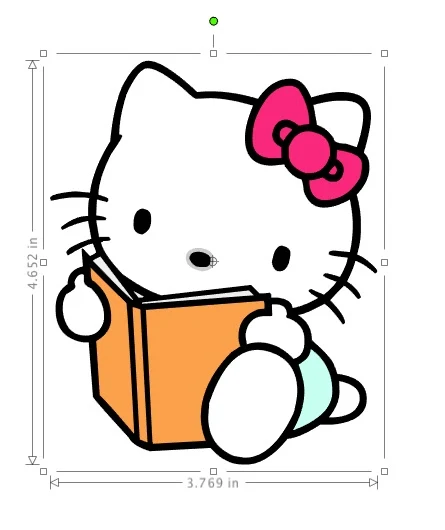
In Silhouette Studio, select the Text tool > pick the dingbat font you want to use from your font style list and then type out your font. Find the dingbat you want to work with and delete all the other characters.
Enlarge the dingbat font design so you can more easily work with it.
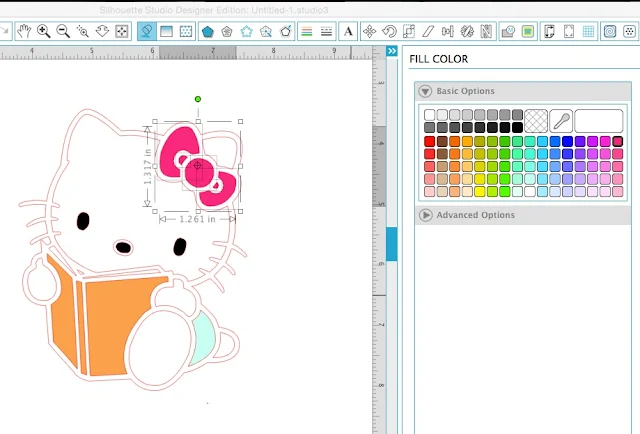
Now you need to get access to all of those little sections so you can fill them in with color! So select the design > right click > release compound path > ungroup. This will give you access to select individual sections of the design.
Select the first section and then open up your Fill Color tool (blue along top tool bar below). You can select multiple sections to be filled with the same color by selecting on and holding down shift while clicking on more sections. With sections selected, pick a color from the color options. Note: Any sections you want 'white' must be 'filled with white'.

Once all sections are filled in with color you're going to want to get rid of the red lines. To do this, select the entire design. Open up the Line Color window and pick "Transparent." This will remove all of the red outlines.
With the entire design still selected, right click > group to group the design back together. The single selection box indicates the design is grouped.
Now open up the Cut Style window. You'll notice your design has cut lines all over it.
For a print and cut, you only want the outer edge to cut so change the Cut Style to 'Cut Edge'.
I actually made a few copies and changed the colors in each one. Then I cut a set of bookworm Hello Kitty stickers...so stinkin' cute!

PS If you're interested in learning lots more about how to make stickers with your Silhouette, my latest ebook, The Ultimate Silhouette Sticker Guide is a must read.
If you're not a sticker love, fear not! I also used these dingbats to cut a few bookmarks for my daughter who loves to read...plus I kinda felt like isn't this little Hello Kitty bookworm was just screaming to be turned into a bookmark? To create the bookmark, I added a rectangle and a few extra cut lines so it could tab around the page.
I simply print and cut them on my Silhouette and they were ready to go!
Note: This post may contain affiliate links. By clicking on them and purchasing products through my links, I receive a small commission. That's what helps fund Silhouette School so I can keep buying new Silhouette-related products to show you how to get the most out of your machine!
Thanks for coming to class today at Silhouette School. If you like what you see, I'd love for you to pin it!

Get Silhouette School lessons delivered to your email inbox! Select Once Daily or Weekly.


.png)


Thank you! This is such great information!!!
ReplyDeleteLove it! Oh, the ideas!
ReplyDeletewhat am I doing wrong. When I go to get rid of my red lines all my colour disappears...
ReplyDeleteMuy agradecida por toda su ayuda. Por favor poner el Traductor de Idiomas. Muchas gracias.
ReplyDeletehow cute to make a lovely sticker of the Dingbat. I'm just wonder what kind of printer do you use?
ReplyDeleteAll the children like these type of stickers because they show some sort of innocence in dissertation writing service and gives them a new hope of life to enjoy everyday as a new day and enjoy the every moment of their lives.
ReplyDeleteYour solution is very amazing. I can learn more from this post. Nice share !. Please read my post at here: http://babystrollercarseatcombo.com/
ReplyDeleteLove this idea and would love to make them but could you explain the extra cut line when you combine it with a bookmark to attach to the page? What did you do to create that?
ReplyDelete