Awhile back I asked you all what type of large vinyl decal I should put up to demo this tutorial and it was a pretty evenly split between a tree and a monogram. I'm gonna be honest here - I am not a huge fan of wall decals. BUT for the good of the blog and all you fine, people I decided I'd go with the monogram in my daughter's room.
To start open up Silhouette Studio. At this point just work on the 12x12 virtual mat, don't worry about making this thing ginormous - yet. If you don't already have a design for your wall decal, create it or open it from the library or purchase from the Silhouette Design Store.
I used my little trick on making polka dot shapes to create the outer circle.
The single letter monogram in the middle is Times New Roman. The overlaid full name is in Samantha font with a glyph on the O and the a. Check out this tutorial on how to use the beautiful and always popular Samantha font in Silhouette Studio.
Use the Fill tool (in blue along the top tool bar below) to fill in each piece of the design with the vinyl color it will be cut on. This will simply help later in grouping layers together. With this design, as you can see, I only have two layers - white and pink.
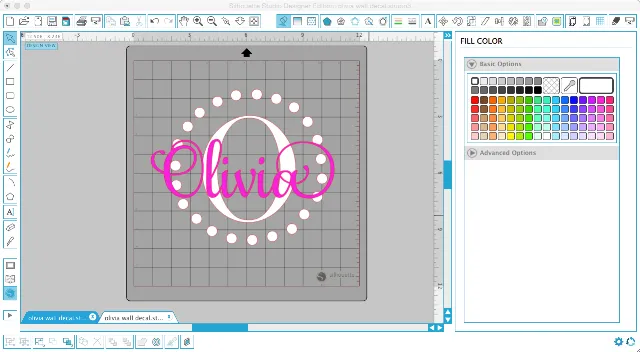
OPTIONAL: This step is optional and I honestly didn't do it for this project because I actually think it complicates things (especially cutting) when your design is this large - but if you feel more comfortable, add the layering registration marks. You'd use them the same way you would on a smaller vinyl layering project. Read up on it here. If your design is rather simple, like mine, I'm sure you will have no problem 'eyeballing' the placement especially with special hinge method we are going to use to put this thing on the wall.Alright once you have your design all ready and just how you like it - we can make it super-sized. I would suggest, before you size it, that you group the entire design just so nothing gets nudged out of place.
Select the entire design and then click the Scale tool (in blue along the top tool bar below). Enter the dimensions for the wall decal. For the wall where I was placing this decal, I needed the design to be about 26 wide. To keep the design in proportion, keep "lock aspect" box checked.
Use the zoom out tool to zoom way out so you can see your full design. Also, upgroup the entire design, re-group by color and move the pink layer out of the way for now.
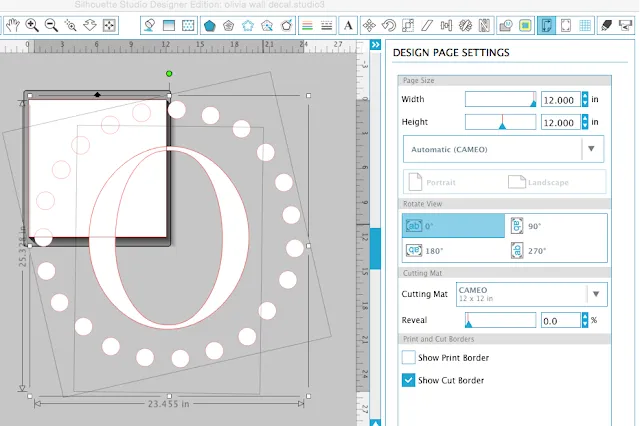
Clearly you can't cut 24" wide even on the CAMEO - which is where you need to get creative.
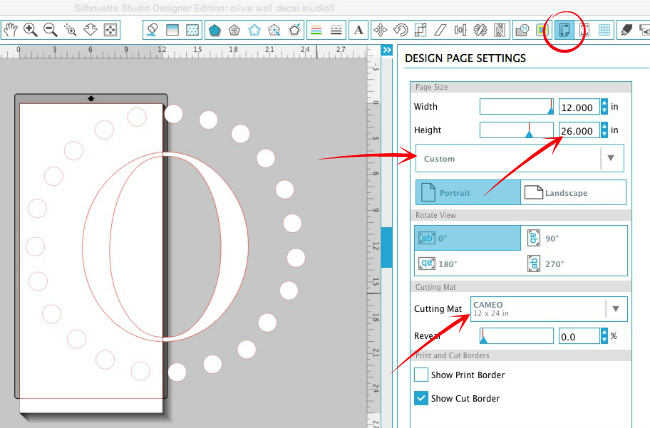
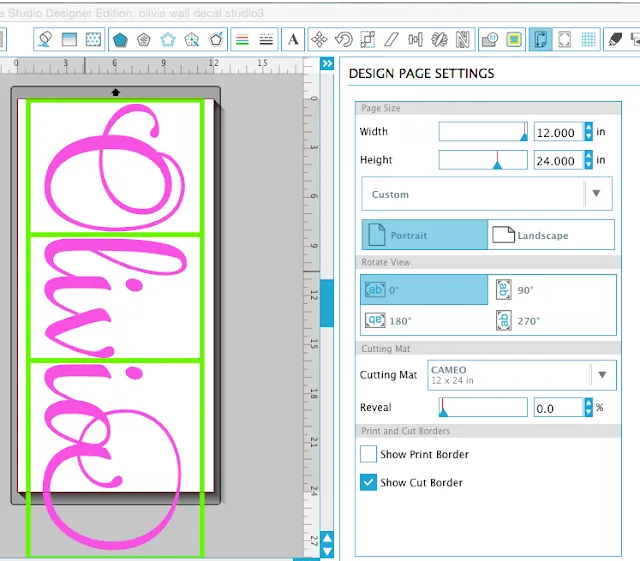
Before we can go any further, let's set up the mat correctly. From the Page Settings window adjust the height on the material size to at least 2" longer than length of the design. So for me I entered the height as 26" even though my design is only 24" top to bottom. Keep the width at 12".
You also need to adjust the Cutting Mat to the correct size. If you can fit your vinyl on the 12x24" cutting mat, I would suggest you do that. Otherwise use the Silhouette Roll Feeder and pick 'No Mat' from the drop down list. My least favorite option is always to cut without a mat or the roll feeder because the vinyl can easily slip and the risk you take in wasting that much vinyl is pretty decent.
To get around this, line the very left edge of the design up with the left edge of the virtual cutting mat. Make sure it's not hanging off the left side of the mat at all. Mine is not fully against the left edge because I did not want to splice the dots if I didn't have to.
Now click the knife tool (in blue along the left sidebar above) and along the right edge of the mat start at the top of the design + hold down shift + slice straight down to the bottom of the design. If you don't have Silhouette Studio Designer you won't have quite as many knife options as you see here. If you do have DE make sure you have 'Solid' selected in the "Treat Shapes as" pane.
Immediately group the elements of each half.
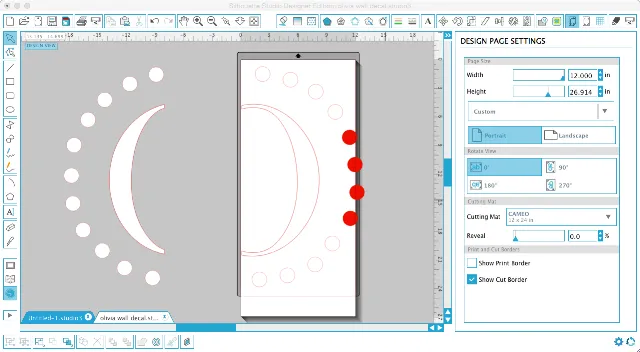
You now should have a piece that's 12x24 and another white piece that's about 12x14".
Move the 12x14" piece over onto the mat. You'll see that only 4 of the polka dots indicated in red are being cut off.
So what I did in this case is actually replicate the four dots by selecting them > right click > copy/paste. I'm actually going to cut the four that are being slightly cut off so that I can then easily replace them with the full size duplicates and I'll know exactly where they should be placed. Am I making any sense?
If this type of workaround doesn't work for your design, create another slice with the knife.
Load up the mat or Silhouette Roll Feeder and send the first half of the design to cut on Silhouette. Weed it and place aside. Repeat with the other half of the design.
Now go back to Silhouette Studio to cut the second section - the pink overlay. Turned sideways, my 'Olivia' fit nicely on the 12" wide mat and would not have required ANY splicing except for the fact that it was 26" long and I only had a 12x24" piece of pink 631/indoor/removable vinyl from my friends over at Expressions Vinyl.
Sooooo....in this case I looked for obvious places too create sections. There are natural spaces between the O and the LIV and LIV and the IA.
I simply ungrouped the full design and grouped the smaller sections. I was then able to twist and turn my design (use the Nesting Tool if you have Designer Edition) and was easily able to fit the three pieces on the 12x24" mat. The nice thing about this part of the design is that due to the natural breaks, I can cut it in sections without actually splicing the vinyl.
Again adjust the Page Settings if you need to and then send your design to cut - in this case I could use the 12x24" CAMEO cutting mat. Weed it.
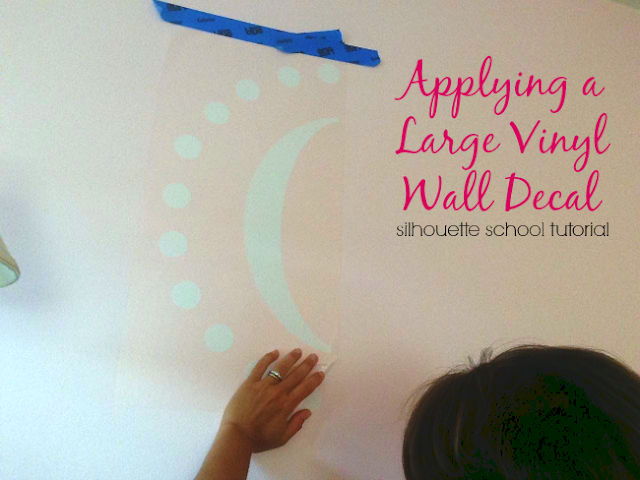
Now you're ready to re-assemble the design and apply it to the wall. That's Part 2 of the Cutting and Applying Large Vinyl Decals with Silhouette which you can find here!
Note: This post may contain affiliate links. By clicking on them and purchasing products through my links, I receive a small commission. That's what helps fund Silhouette School so I can keep buying new Silhouette-related products to show you how to get the most out of your machine!
Thanks for coming to class today at Silhouette School. If you like what you see, I'd love for you to pin it!

Get Silhouette School lessons delivered to your email inbox! Select Once Daily or Weekly.









.png)


Love this tutorial! I'm new to all of this and your site has been so helpful.
ReplyDeleteI'm stuck on the grouping of two different designs... I'm able to get the knife and divide my design, but how do I group the pieces separately so I can move them around? Thanks!
Definitely bookmarking this one! Thanks Melissa!
ReplyDeleteVery detailed instructions, thank you
ReplyDeleteIt was really awesome to know that my personal design decal can be put on plastic model. Now I can easily put my design anywhere.
ReplyDeleteAwesome instructions, question? Can I cut a large decal with my 12 by 12 mat even if its going to go past the 12" length? My vinyl doesnt stay put at the 9" roller so I find I have to use the matt but I don't want to do four separate pieces for a calendar outline.
ReplyDeleteHow do you position this when you send it to the cameo? When i select the cut settings, it shows the cameo on the far left of the design, but because of the placement of my design, I need it on the right in order to make the best use of my vinyl and i can't reverse it.
ReplyDeleteVery detailed instructions, I think easy cut software from http://www.easycutstudio.com also is a great software for cut large vinyl decals. thank you
ReplyDelete