To use the rhinestone feature you will, of course, need Silhouette Studio Designer Edition. However, you can follow this tutorial on making polka dot shapes and get the same end result if you don't have DE.
The first thing you want to do to make a String Art Pattern in Silhouette Studio is to find a design. State string art is really popular and if you use the StateFace font it makes it super fast. I decided on a camera shape I had in my library from this commercial vector pack I purchased awhile back from Mighty Deals. I probably wouldn't pick this design next time, but ya live and learn.
After you have your shape opened up in Studio, size it so it fits on the piece of wood that you are going to hammer the nails into. I am using a 12x12 piece of wood that I spray painted. I always spray paint wood because I don't like brush strokes. (The color is Rust-Oleum's Sun Gloss Yellow)

In Studio, I sized the camera to about 8" across. Once it's sized, select it and click the Rhinestone tool (icon highlighted in blue along the top tool bar).
The Rhinestone window will come up on the right side and you want to pick "Edge." This will turn the cut lines into little circles.
I used the 10ss size holes, but it really doesn't matter. These are just going to be the guide for where to put the nails so they're evenly spaced. I spaced out the rhinestones slightly using the spacing bar - turns out it wasn't enough but more on that in a minute.
The last thing you want to do is draw a box around your design using the Draw a Box tool on the left sidebar. This just helps remove the vinyl from the backing leaving the little circles behind.
Now you're ready to cut your design on vinyl or contact paper. For projects like this where I'm not really using the vinyl as vinyl, but more as a guide or stencil I pick the ugliest color I have on hand. No offense to the vinyl...
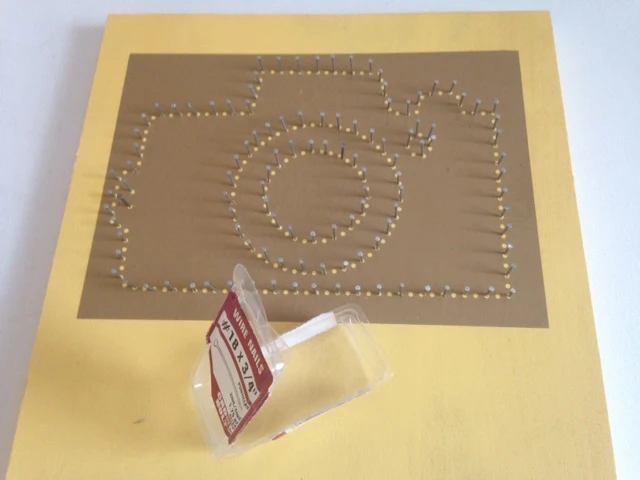
The nice thing about thhis project is you don't even need to weed...just peel up the design from the corner of the square and leave as many dots behind as you can. Then place the vinyl on the piece of wood.
Now you can start hammering in the nails. My original plan was to drive a nail into the wood in every circle, but I quickly realized they would be too close together so I did every other hole. Next time I'll space the holes a little further out in Silhouette Studio.
The string art gods were with me on this project...I literally had the EXACT number of nails that I needed.
Once you have all the nails into the board, remove the vinyl.
Now is where you need your string. I had no white string handy and really didn't want to go back to the craft store...soooooo I raided my daughter's friendship bracelet kit (shhh...what 6 year old girl uses white anyway?) and found some white string. It's the same type of string that I remember mom referring to as DMC when she did cross stitch back when I was a little girl. (Yup, just goggled it, it's still a thing that's sold at craft and hobby stores.)
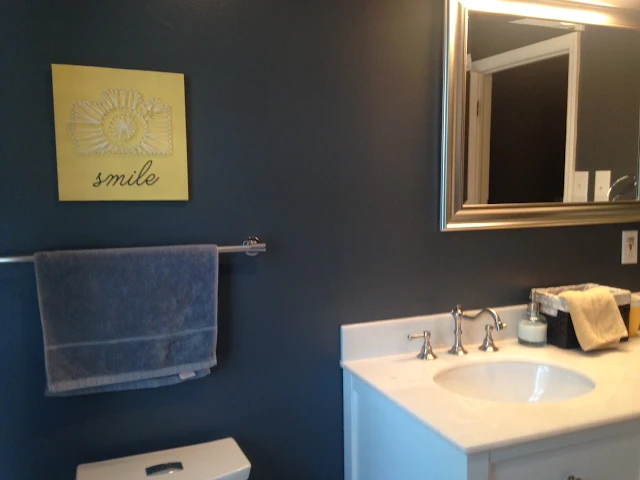
Anyway get your string and tie the end of it around one of the nails to begin. Then you just start wrapping the string around the nails. The first time I did it I got all done and hated it. The little inner circle at the top right and the area on the left were just bothering me. Plus I didn't like that there was not a string border all the way around the camera. So I took the string all the way off and started over.
This is the more the look I was going for...
I'm still not thrilled with it, but I think that's more due to the design I picked than my nail hammering and string wrapping skills.
Oh and as you can see, I added some dark gray vinyl to the bottom of the board to match the walls in the kids' bathroom where this is now hanging.
Note: This post may contain affiliate links. By clicking on them and purchasing products through my links, I receive a small commission. That's what helps fund Silhouette School so I can keep buying new Silhouette-related products to show you how to get the most out of your machine!
Thanks for coming to class today at Silhouette School. If you like what you see, I'd love for you to pin it!

Get Silhouette School lessons delivered to your email inbox! Select Once Daily or Weekly.


.png)


Great! I never would have thought of this.
ReplyDeleteI did a string art project once. Here's what I learned: 1. You probably should've used the nails in every hole. The more nails, the more full it looks. 2. Because the nails are so close together, it's really hard to get your fingers in between to hook the string. So I used this lady's idea (http://beautifullycontained.blogspot.com/2012/02/heart-string-art.html) of hollowing a mechanical pencil and putting the string through. It worked so well! It kind of felt like I was drawing. I used the Silhouette to cut out my design, but never thought about the rhinestone setting. That's genius! It would've made it a lot easier!
ReplyDeleteAwesome idea....
ReplyDeleteNEVER would have thought to do this with a Silhouette! Coolness.
ReplyDeleteOh my goodness, this would work great for quilling as well. put the pattern down with pre marked holes, put in pins in the exact same place each time and being able to use the pattern over and over again with the same results would be amazing. Thank you
ReplyDeleteSo cute!
ReplyDeleteWhat a great idea. I am not sure if it works also with normal paper instead of vinyl? So only print the dots out of silhouette studio and hammering the nails in the printed dots ...
ReplyDeleteVery nice! You say you aren't completely thrilled- can I recommend throwing a lot more yarn at it? The best string art I've seen has a very dense amount of yarn- you only wrapped each nail to one or two other nails. Wrap them to 4 or 5, 6 or 8- way more.
ReplyDelete