I
may be known to raid the Goodwill pile to feed my crafting/blogging
habit. No need to get rid of perfectly good cotton shirts that I can
practice on, right? Or better yet, turn into a cover up!
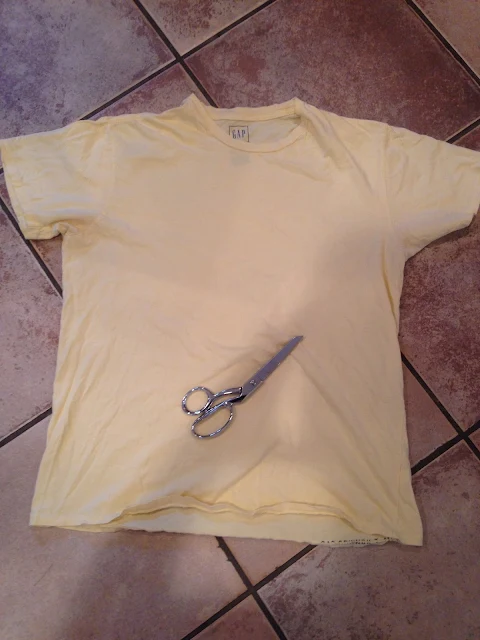
A few weeks ago I grabbed a yellow t-shirt that my husband no longer wanted/needed/wore. I had no idea what I would do with it until about 10:30 one night as I was lying in bed and from that moment on the idea plagued me until I carried it out. Does that happen to anyone else?
I was going to turn that t-shirt into a beach cover up for my daughter. I started by laying the shirt on the floor nice and flat and cutting off the sleeves right inside the sleeve seam.
Then I folded the shirt in half and from the shoulder neck opening cut diagonally down. When the shirt was unfolded, both the front and back were v-necks.
Here's how it looked once I unfolded it.
This is when my six year old walked in and decided to hijack the project. It was actually a good one for her to start with since she's been asking me to teach all I know about the Silhouette. This could take awhile. ;)
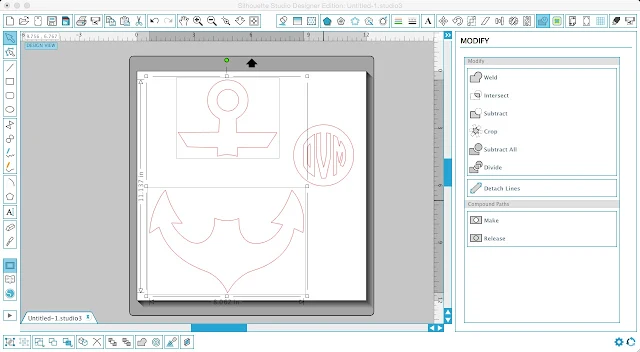
She decided she wanted an anchor with her initials so we found an anchor design through a Google image search, imported it into Silhouette Studio by dragging and dropping and traced it. If you need a refresher on how to trace JPEG's in Silhouette Studio, check out this tutorial.
The anchor obviously doesn't have the circle monogram in the center so we needed to add that. To do this, start by designing your own three letter circle monogram using this tutorial. (Or cheat and use one of the many monogram generators you can find online or in the app store.)
When you've got your monogram, draw a circle around it using the Draw an Ellipse tool (circled). Select the circle you just drew and make an offset.
Drag the offset circle only on top of the anchor. Select the offset and the anchor and from the Modify window (in blue along the top tool bar) click "subtract".
After you subtract you'll be left with this:
Now move the circle monogram into place and group it together with the anchor.
NOTE: If you're cutting on heat transfer vinyl, don't forget to mirror the image.
I cut the design in sapphire blue glitter heat transfer vinyl from Expressions Vinyl and my daughter actually weeded it and placed it on the center of the shirt.
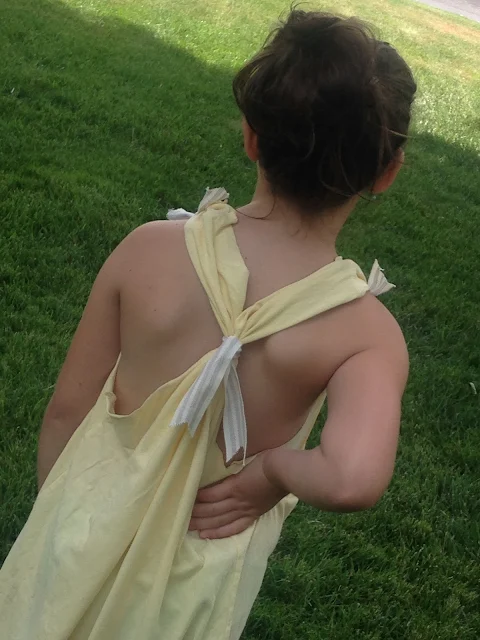
I then pressed the design onto the shirt with my heat press. My daughter peeled off the clear backing and then we finished the shirt up with three ribbon ties.
Two ties are used to cinch each of the front shoulder sleeves together. I just did a simple knot, but you can make a bow if you have enough ribbon.
And that's all there is to it! Throw this cute beach cover up dress over a bathing suit and head to the beach, the pool or the lake.
And because I'm all about the glitter HTV...here's a close up!
Note: This post may contain affiliate links. By clicking on them and purchasing products through my links, I receive a small commission. That's what helps fund Silhouette School so I can keep buying new Silhouette-related products to show you how to get the most out of your machine!
Thanks for coming to class today at Silhouette School. If you like what you see, I'd love for you to pin it!

Get Silhouette School lessons delivered to your email inbox! Select Once Daily or Weekly.


.png)


No comments
Thanks for leaving a comment! We get several hundred comments a day. While we appreciate every single one of them it's nearly impossible to respond back to all of them, all the time. So... if you could help me by treating these comments like a forum where readers help readers.
In addition, don't forget to look for specific answers by using the Search Box on the blog. If you're still not having any luck, feel free to email me with your question.