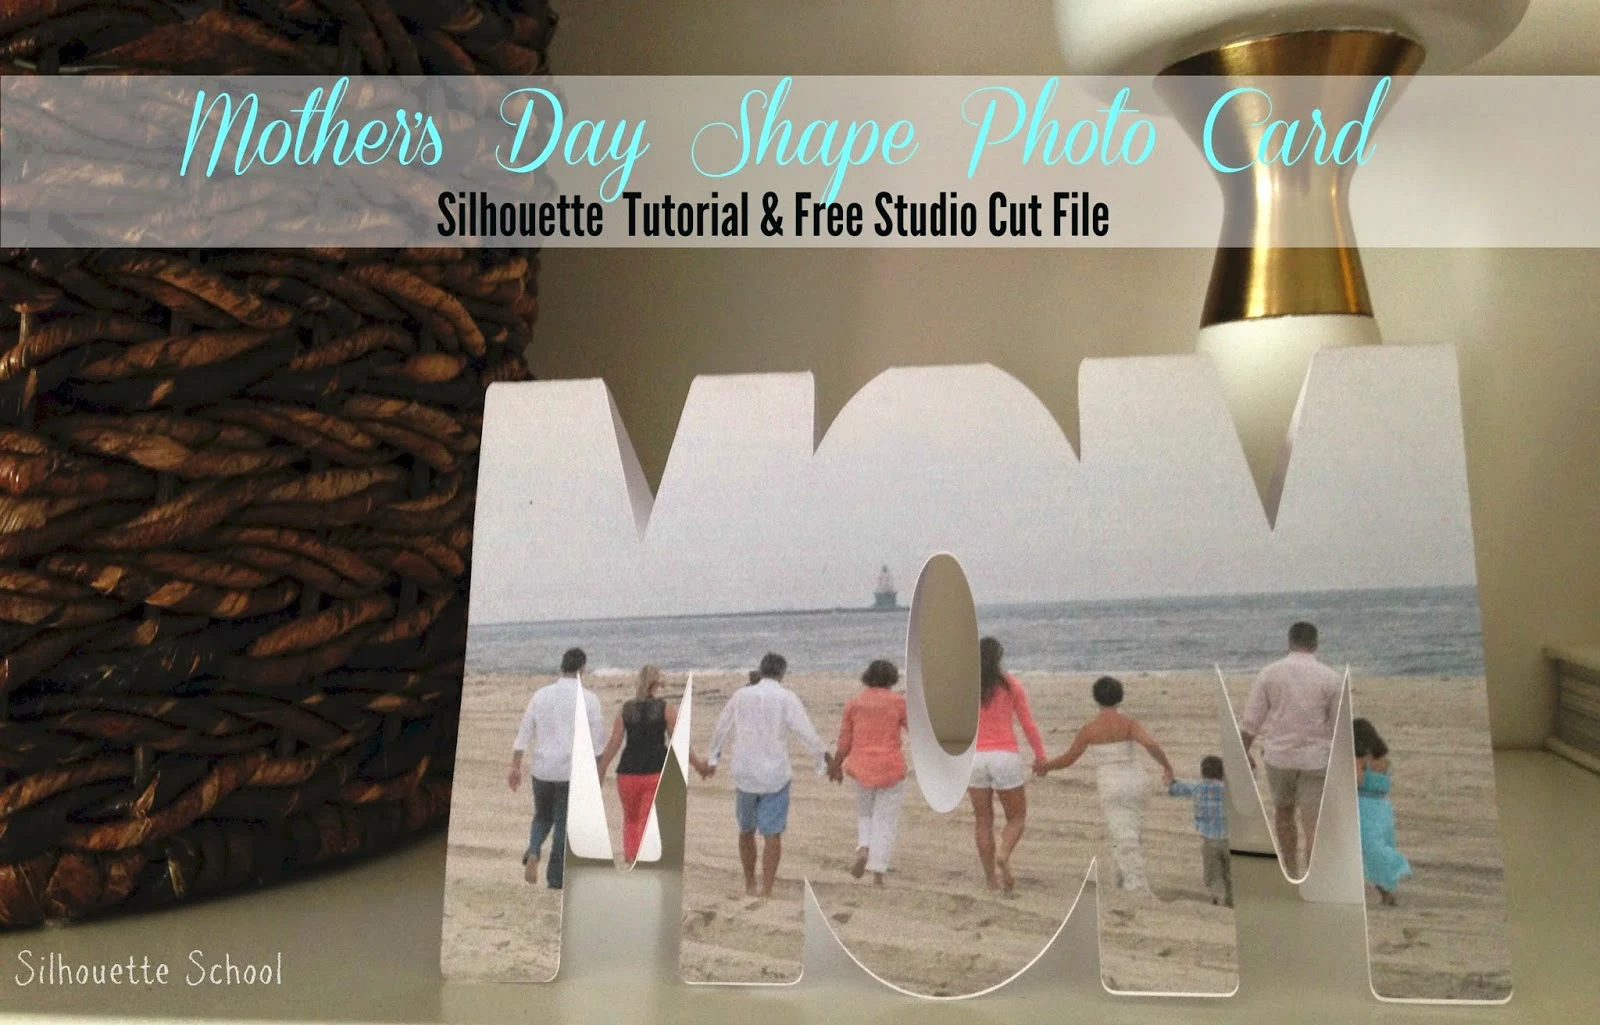
 Last year for Father's Day I shared a free Father's Day Photo Mat Template Studio file on the blog and it was hugely popular. So I thought this year, I'd modify it slightly for Mother's Day. One thing lead to another and I came up with this Mother Day Photo Shape Card...pretty cute right? Also not really a slight modification but ya know...when the wheels starts turning you just go with it even it's totally different than what you originally planned.
This card is pretty easy to do - if you have Silhouette Studio Designer Edition (totally worth it if you can find it around $30.)
The free Studio file (the link is below) can be used a few different ways. You can use it to make a card or you can use just half of it to make print and cut or just a print.
The first thing you want to do is open up Silhouette Studio and drag and drop a photo from your desk top into the My Patterns folder. If you don't have the Silhouette Studio Designer Edition software, you won't be able to add your own patterns to the My Patterns folder. Click here if you need a refresher on adding your own patterns to the My Patterns folder.
Alright now open up a new work area. Download and open up the MOM file. Please remember, as all my free cut files are, it's for personal use only which means it can't be sold or used on products that are sold in any way.
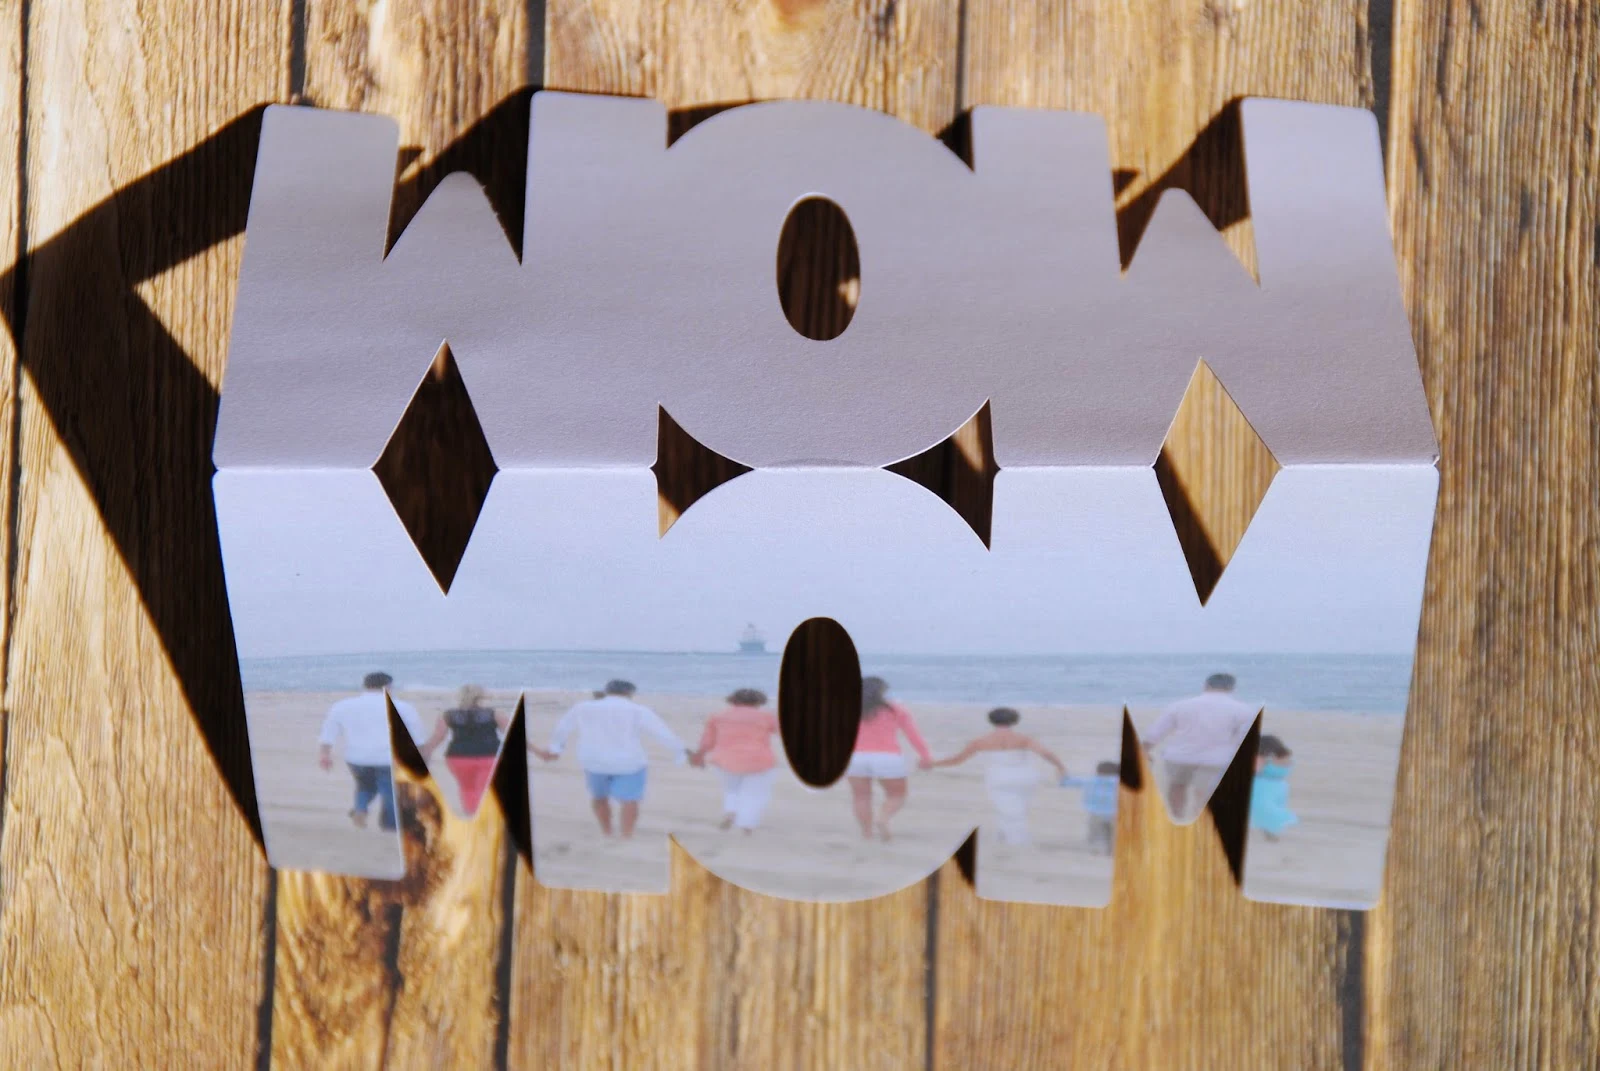
Once you have the MOM file open, you'll see there's a MOM and then there's a MOM that's mirrored up. BUT they're not welded together. If you are not making a card and just want to fill MOM with the photo then you can go ahead and delete the upside down MOM. If you are making the card, then keep it as I have shown here.
It's very important, for the card, to keep the MOMs together. The reason they are not welded together yet is because if you weld them before you print the photo, when you add the photo you will end up filling the entire design - and it will print that way. We only want the photo in the MOM on the front (correctly oriented MOM). So don't group them, but keep them exactly where they are...
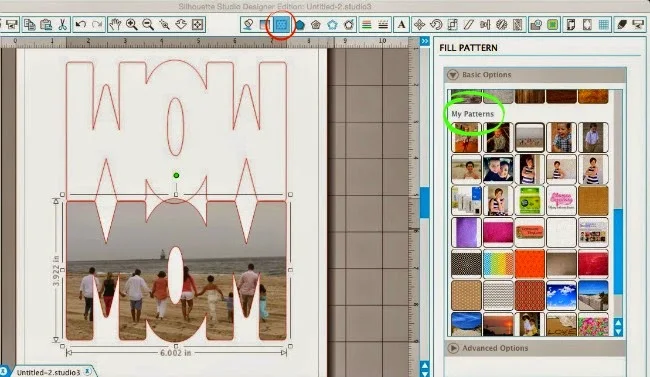
Alright select the front of the card (bottom MOM) and click the Fill Patterns Tool. Scroll down to the My Patterns sections and click the photo you added to the My Patterns folder. The photo will fill the selected shape.
Select both the photo and the MOM cut design and from the Modify window > Crop. Then move the upside down MOM into place. Let them overlap, but don't weld yet.
Now everyone - DE or not - should be at the same point.
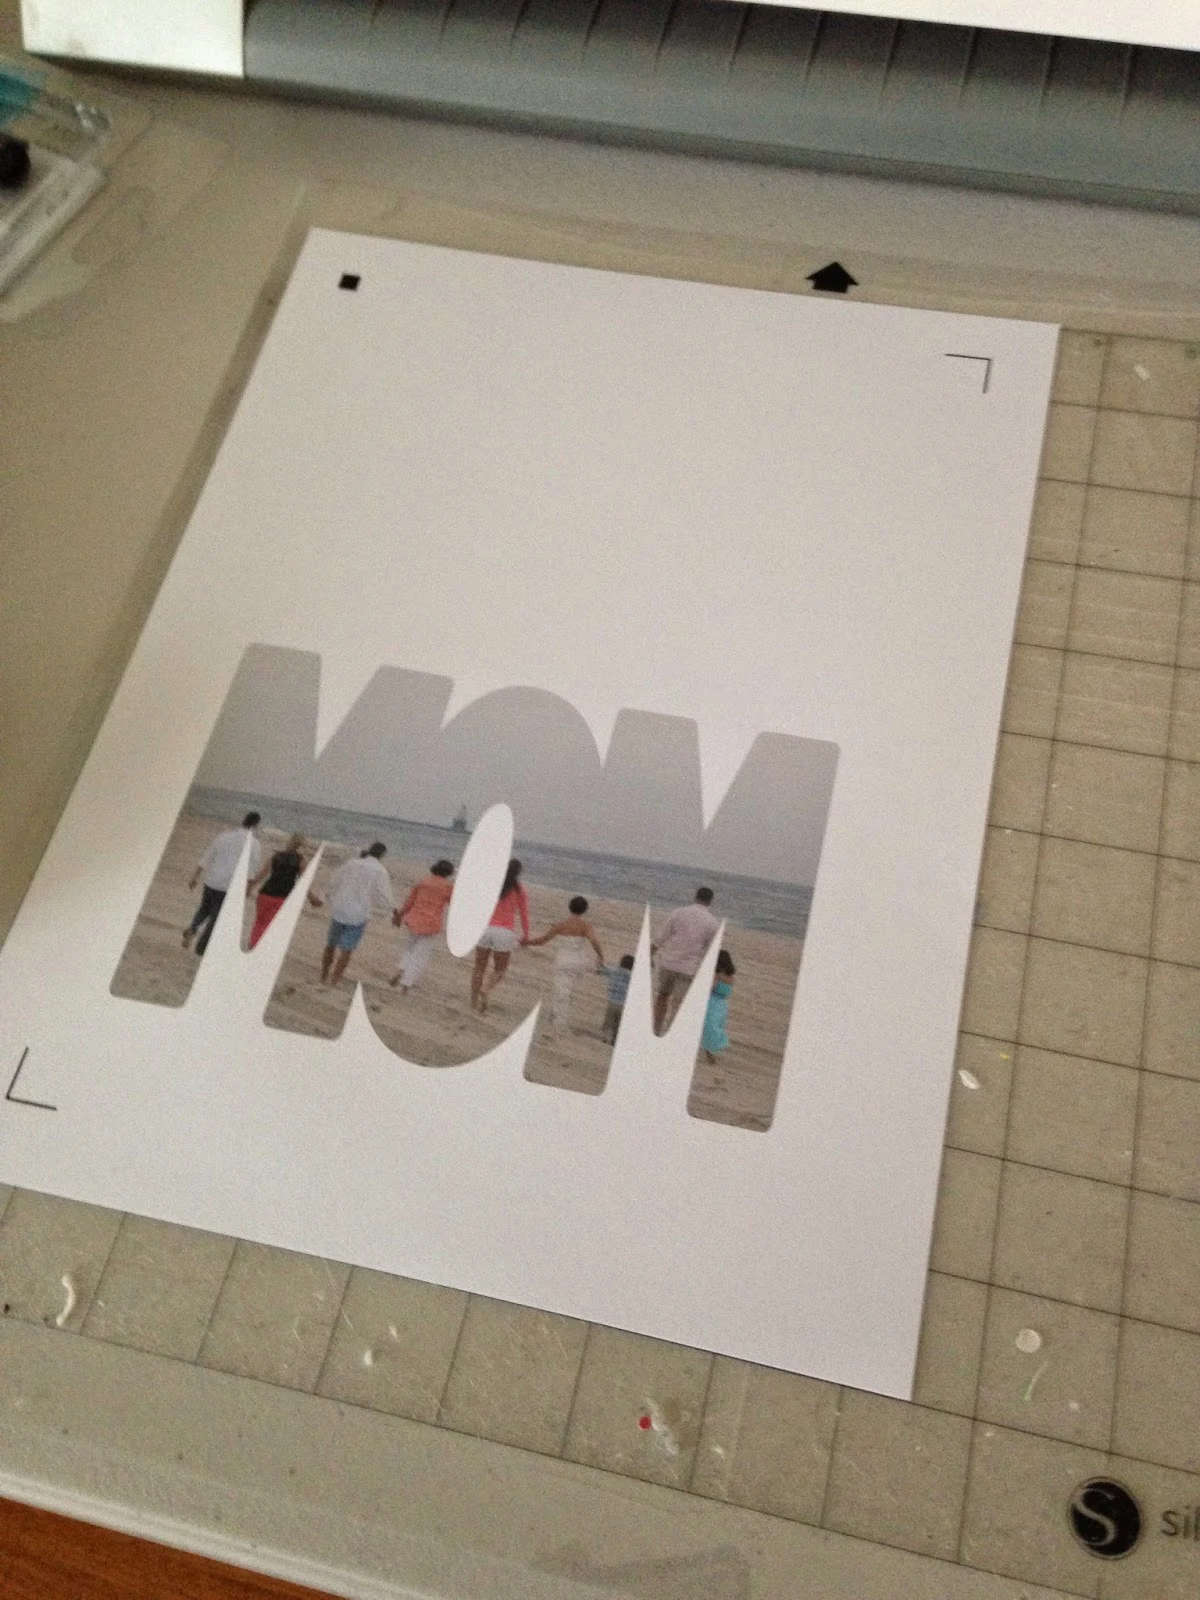
Add the registration marks and print.
AFTER you print - and only after you print - go back into Silhouette Studio and select both of the MOM's and weld them together. Select shapes > Right click > weld. Be careful not to shift anything!
Also, don't worry that the photo now stretches into both MOMs, we're only worried about the cut line right now. If it makes you feel better, you can go to the Fill Color tool and select white. But again, it doesn't matter.
Load the paper that you've printed, onto the mat and from the Cut Style window choose your material (I printed on card stock), adjust the blade if necessary and then load the mat into the machine and send to cut.
The Silhouette will look for the registration marks and then go back to cut out the design.
When it's finished remove the cut card and carefully fold it along the top area where it was "welded."

That's it! You've made a unique card for photo shape card for mom!
Here's the Father's Day card again too. It's easy to enough to use this one for Mother's Day. Simply download the file here then swap out the 'DADDY' for Mommy by deleting that text box and re-typing.
Note: This post may contain affiliate links. By clicking on them and purchasing products through my links, I receive a small commission. That's what helps fund Silhouette School so I can keep buying new Silhouette-related products to show you how to get the most out of your machine!
Thanks for coming to class today at Silhouette School. If you like what you see, I'd love for you to pin it!


.png)


woooow, great tuti as always, thaks
ReplyDeleteThank you. So adorable!
ReplyDeleteDid this since so many in group picture i used. I made the hole in the o smaller so i could get all of the faces in. Thank you so much. Also used just the picture part on a magnet.
ReplyDeleteI'd love to get some help....(I'm a very new silhouette owner) i followed the steps and it cut out the mom card but the image that I inserted was off. I tried a few things to try to correct it and just got too frustrated. If you could email me privately I can send you a picture of the way the card came out. I used it anyway being last minute and all but I'd like to make a new one the correct way. thanks. capps_2003@yahoo.com
ReplyDeleteValerie
Melissa, you suggested at the end that a different word could replace the Mom or Daddy. However, I can figure out what the font is to type a new word with similar height and weight. Can you tell us what it is? Thanks.
ReplyDeleteThis is very nice blog and informative. I have searched many sites but was not able to get information same as your site. I really like the ideas and very intersting to read so much and Please Update and i would love to read more from your site
ReplyDeleteThanks
happymothersdayimages2016.com
Best Mothers Day Quotes and Sayings
happymothersdaypoemsmessages.com
Happy Mothers Day Poems
ReplyDeleteMay Day Images, Wallpapers, Pictures
Maharashtra Day 2016 Wishes, SMS, Quotes, Messages, Images
This comment has been removed by the author.
ReplyDelete