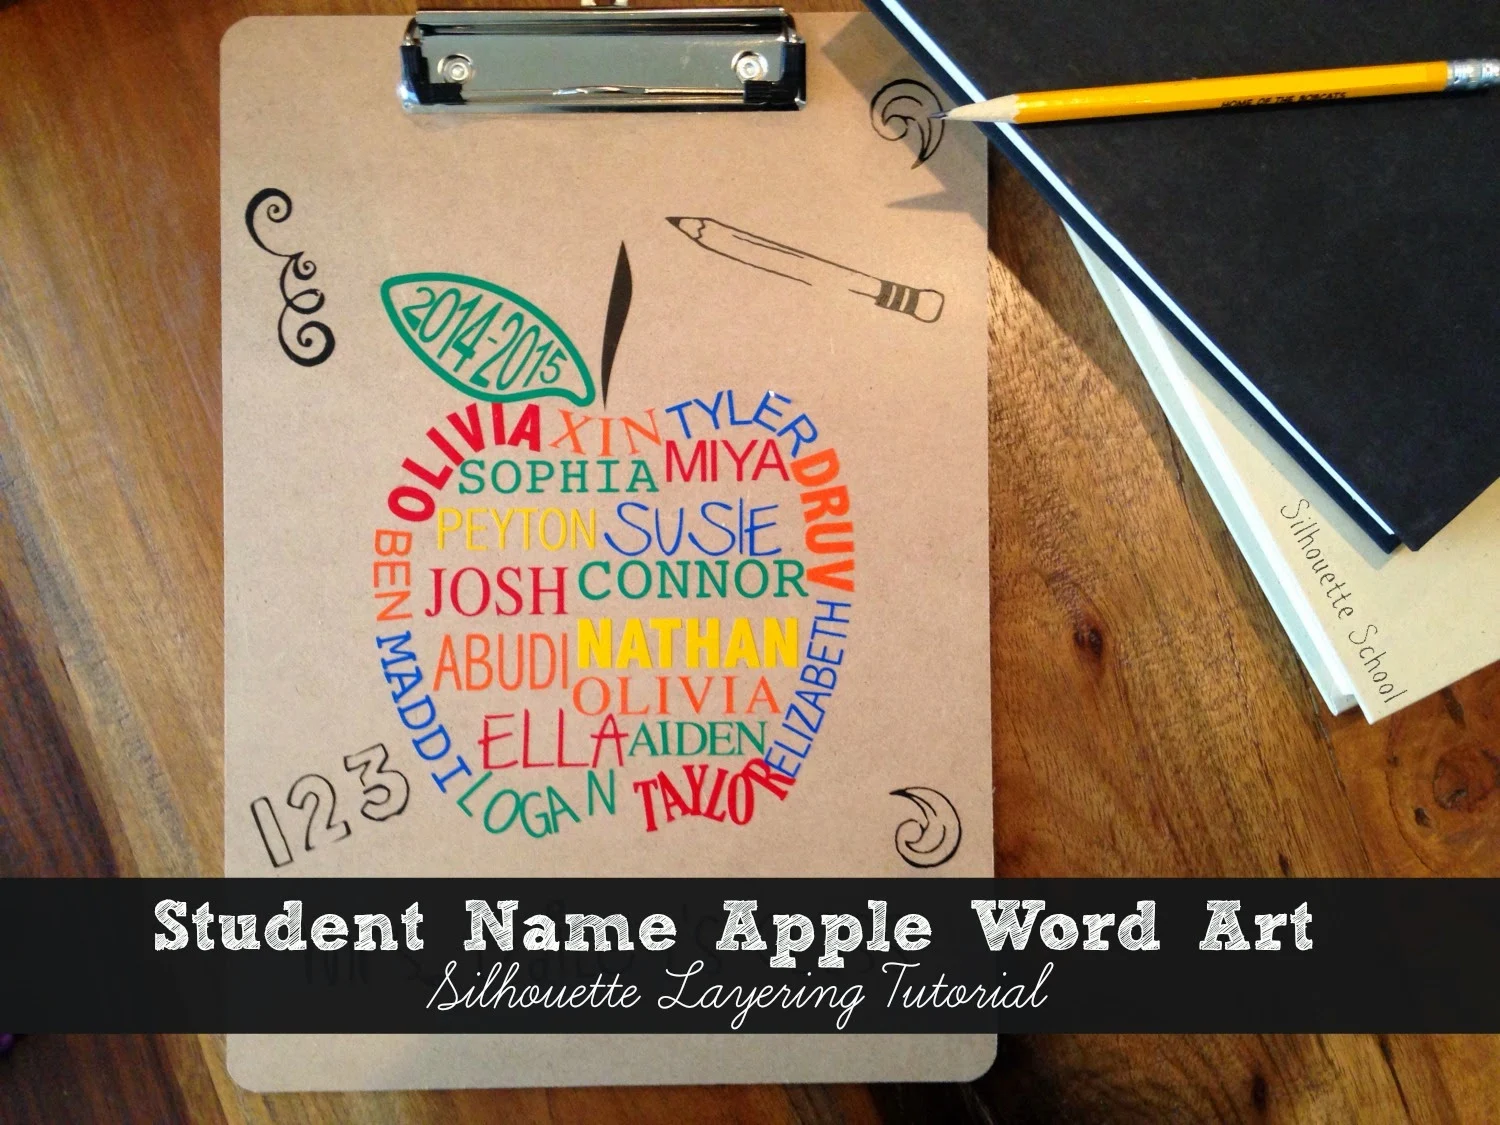
The first thing you need is an apple design. Either create the design yourself, purchase one from the Silhouette Design Store or do a google search for 'apple vector' and then import into Studio and trace. It's best if the stem and leaf are separate from the apple shape. Use the knife tool or ungroup to separate them and move to the side.
I find it easier to work in large dimensions, if you do too, either zoom in or select the entire design (stem and leaf included) and enlarge the apple. Basically what we're going to do is a whole lot of text to path here.
Start by using the text tool to type out the first name. You can choose to either stylize the font type, size and fill color now or after the next step.
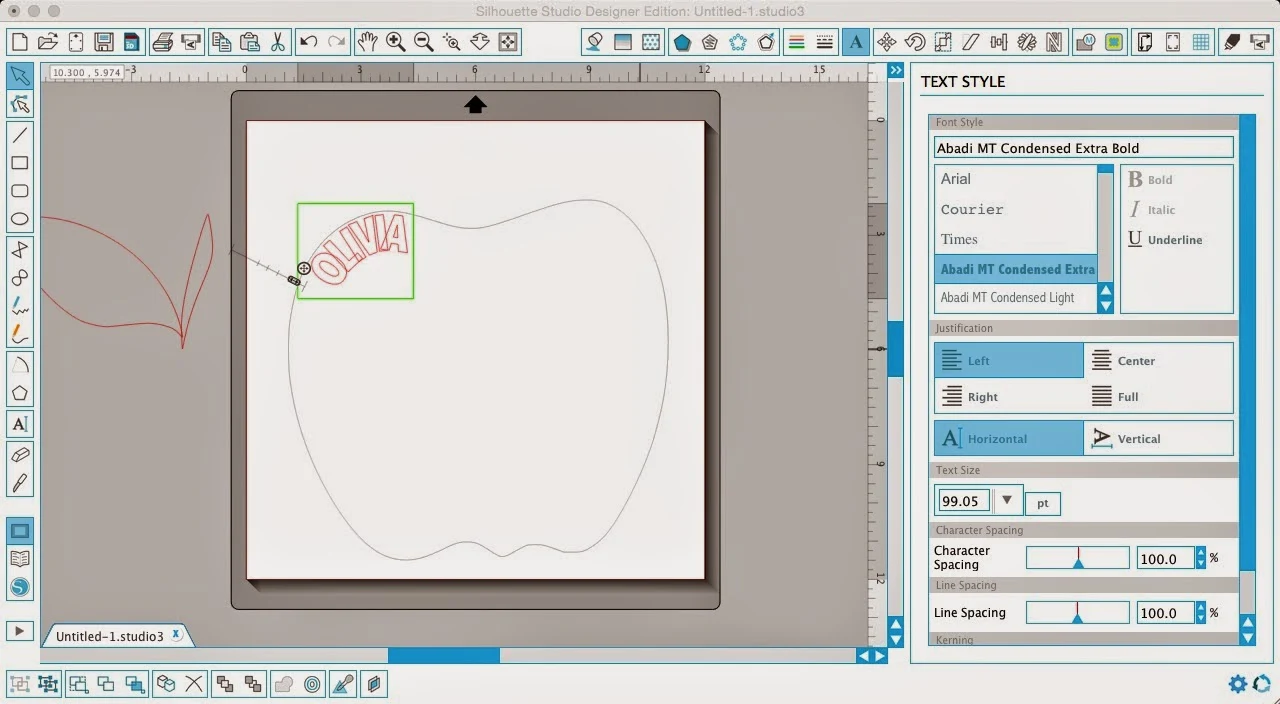
Double click the name so you get the green box around it.
Then grab the little circle directional arrow in the lower left corner of the green box and drag it, with your mouse, to the border of the apple.
It's now sitting on the outside of the apple, and we need it on the inside so hover the mouse over the slider bar until you get control of the slider and pull it down until the name is inside the apple.
You can use the circle with the directional arrow again to position the name where you want it along the inside of the apple. If after you do this, some letters over overlapping, as you can see in the above image, use the Character Spacing bar to add extra space between the letters.
Repeat this process with the remaining names varying the font sizes and styles if you'd like. I found it easiest to fill in the edge of the apple first with name and then added names to the center. If you get to an area of the apple, like 'Tyler' below, where the letters are either overlapped or too far apart when using the character spacing, you can manually adjust the spacing.
Instead of typing out the full name, you may need to separate the name into several parts to get the letters just how you like them. In this example, the E and R would not cooperate. So I deleted them and kept TYL in tact. Then I typed out ER in a separate text box.
This gave
me more control over ER's placement around the curve and allowed me to adjust their character spacing to a different distance than TYL.
Once you have the entire apple filled with names go back and fill them with color, if you haven't already.
Now comes the most important step! You need to go through and select every name that's along the edge of the apple and convert it to path. You can do this by selecting name > right clicking > convert to path. The other option is to select the name > Object menu > convert to path.
It's crucial to convert to path the text along the edges otherwise when you resize or mirror (to cut for HTV) the text will not stay in the same shape or size.
After you convert to path, you can group the entire design to resize it...or don't group it and get ready to cut!
Now to complete this project, check out Part 2 of the tutorial which explains how to cut this layered design so it all aligns perfectly!
PS... If you're wondering how I did the leaf with the year inside, check out this tutorial for more on word art.
Note: This post may contain affiliate links. By clicking on them and purchasing products through my links, I receive a small commission. That's what helps fund Silhouette School so I can keep buying new Silhouette-related products to show you how to get the most out of your machine!
Thanks for coming to class today at Silhouette School. If you like what you see, I'd love for you to pin it!


.png)


This is such a great gift! My niece is a 2nd grade school teacher and what a great way to create a memory of the year! Thank you for all the hard work you put into your tutorials, it is truly appreciated! I recently purchased your book and it is a great resource. Looking forward to more on this technique! Thank you!
ReplyDeleteExcellent!! Thank you for such an awesome tutorial - I can't wait to try this!
ReplyDeleteI cannot get the name on the top of the apple to appear right side up. It continues to go upside down :( help!
ReplyDeletecan this be done without the designer edition?
ReplyDeleteWow! I saw this really great post today how to buy apple product.for more information please visit apple decals
ReplyDeleteWow, that is awesome! I just have a question I can change the colors of my letters. How do I do that?
ReplyDeleteThis is too good i am try to do this process thank you for sharing this i like it very much. custom essay writing service
ReplyDeleteI'm wondering if this can be done in Cricut Design Space?
ReplyDelete