The easiest way to decorate charger plates is to first have the charger plate in hand. I got four of these gold charger plates at Dollar Tree last year.
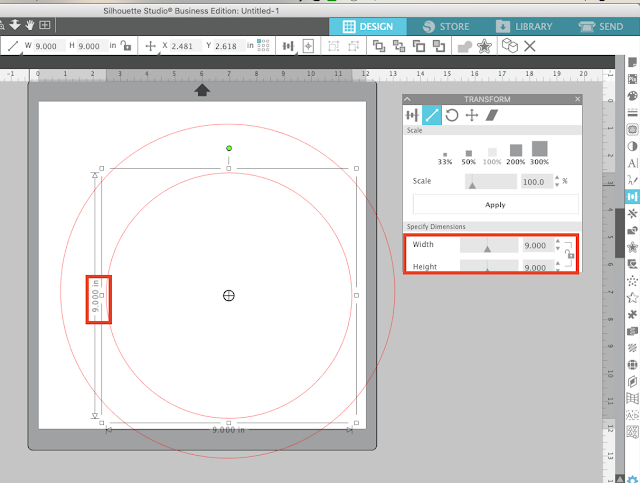
You want to measure the full diameter of the plate. Because this plate has bumps, I measured the area from just inside the bumps because I don't want my vinyl going over them.
This plate was 12.25" in diameter so in Studio I drew out a circle and then from the Scale window manually typed in 12.25 leaving the box checked for 'lock aspect.
Then measure the inside area of the plate (the part inside the rim).
In Studio, make a second circle that's that exactly that same size.
Place the smaller circle inside the larger circle and use the Align tool to exactly center the smaller circle > Select both > Center.
Usually I would tell you to group the circles, but if you do that the text to path in the next few steps gets all wackadoodle so don't group them, just don't move them.
Double click on the first line of font until you get the green outline.
Then click on the directional arrow in the lower left corner of the
font box and use it to drag the font so it sits on top of the inner circle.
If necessary, use the character spacing tool to adjust the space between the letters.
...then use the bar to drag the text down into the rim.
Again adjust the character spacing, if necessary.
If necessary, weld the letters together.
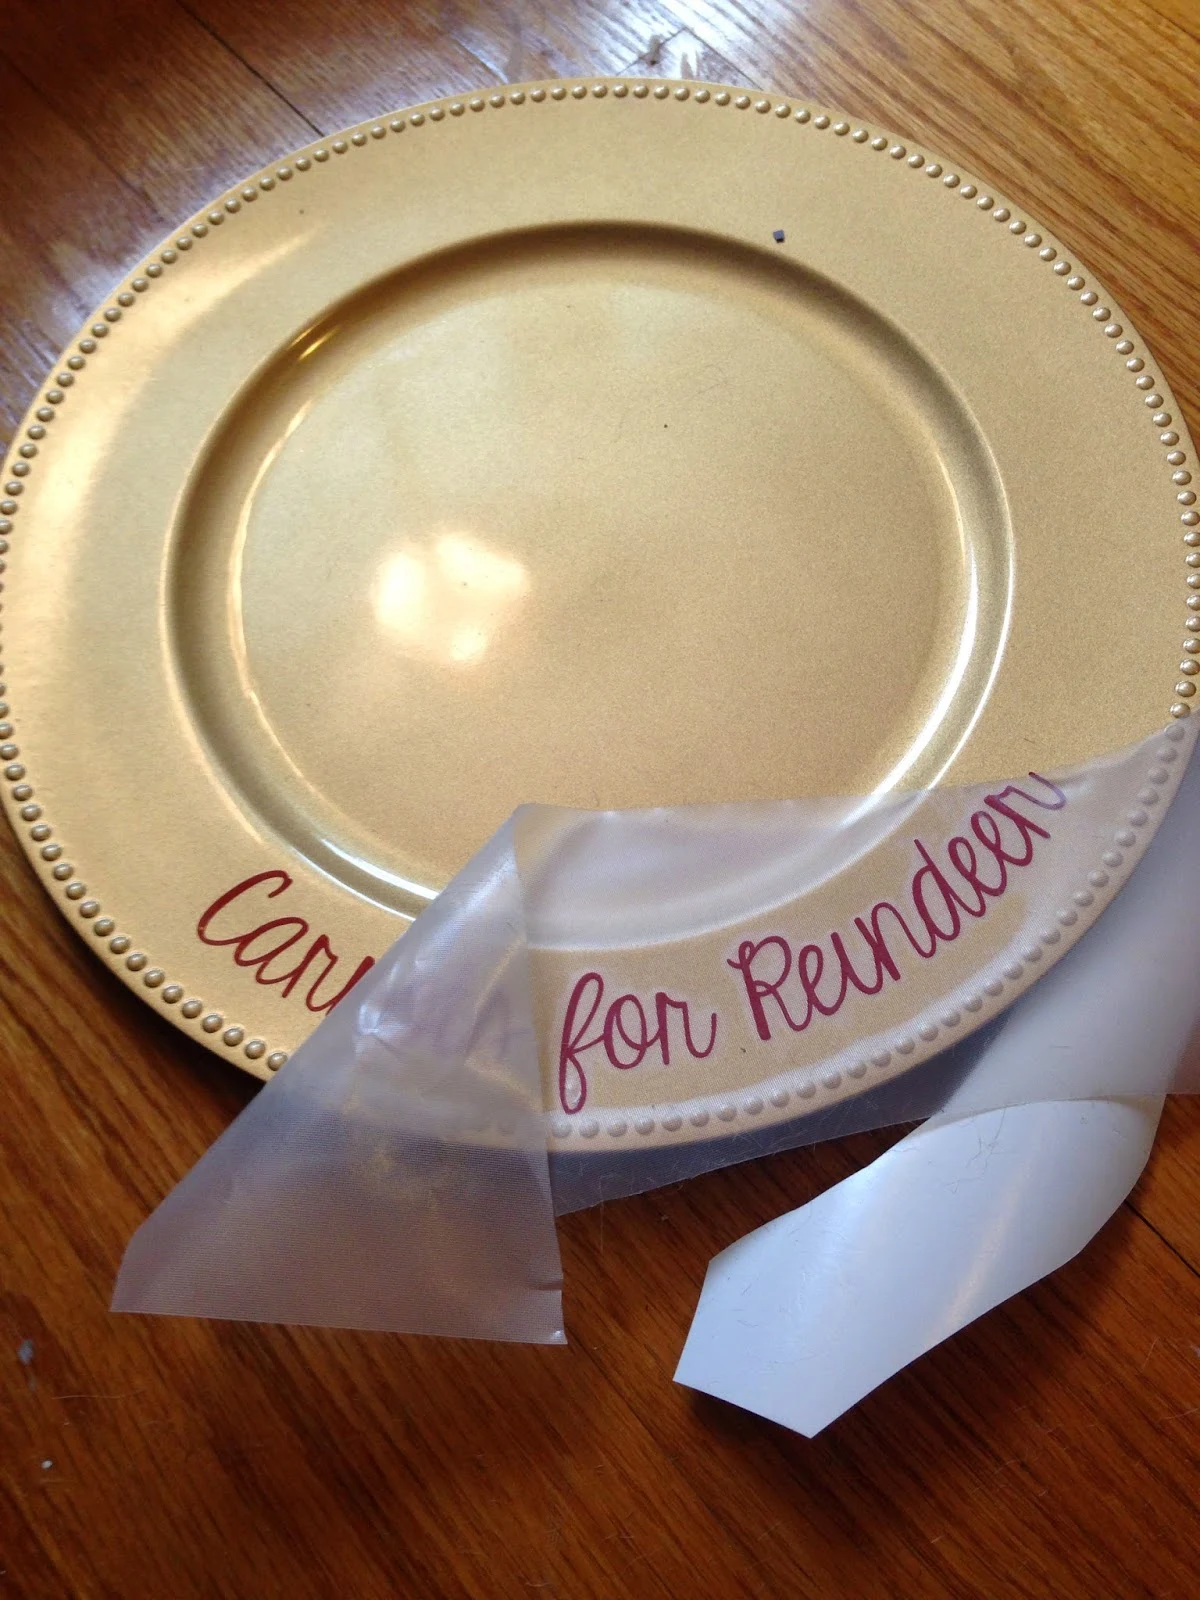
Then the last and most important step is to go back and click on each line of text > right click > convert to path. This makes the text stay in the curve even when you delete the "plate."
I found the middle of the bottom design and then used a piece of painters tape to mark the middle up to the top of the plate. Very scientific, I must say.
Then I used my favorite hinge method to add the second piece of vinyl to ensure it was centered, straight, and even.
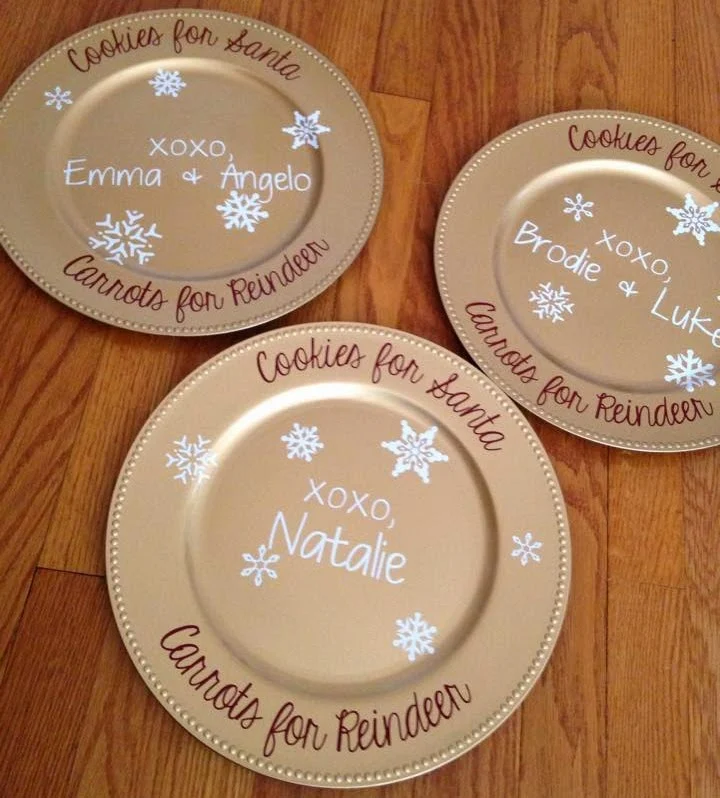
And here are a few more Santa-inspired vinyl-decorated dishes to help get your crafty Christmas ideas flowing...
 |
| Vinyl is not food safe...so the plates are for decoration only. |
Thanks for coming to class today at Silhouette School. If you like what you see, I'd love for you to pin it!


.png)


I'm having a hard time with this step:
ReplyDeleteRepeat for the second line of text...except that you'll have to put the text on the inside of the larger circle...then use the bar to drag the text up into the rim.
The font on the bottom aligns with the larger circle and I cannot drag it up. When I do, it moves the location of the curve to straight again. How can I just adjust the words as it stays curved?
Vicky Jaegar once you get both lines like you want them you can click on both circles and hit click convert to path unless you need those circles to add other text or design then at that time you can click on the circles and click on convert to path. Good Luck. You may want to go back and go over the tutorial again. sometimes I also get confused. Hope this helps.
DeleteAre these plates able to go into the dishwasher or hand wash with soap and water?
ReplyDeleteHi, my vinyl is not sticking...im using the regular transfer tape...
ReplyDeleteTdunn, did you make sure to clean your plate with rubbing alcohol first?
Deleteok help please tried typing in the size of say 12.25 for plate and hit apply to resize circle and nothing happens....what am I doing wrong....TIA
ReplyDeleteI really love reading and following your post as I find them extremely informative and interesting. This post is equally informative as well as interesting . Thank you for information you been putting on making your site such an interesting. Decoration
ReplyDeleteThis comment has been removed by the author.
ReplyDeleteHi
ReplyDeleteI decorate charger plates often and the best charger plate to decorate is 13 inches round. It fits a lot more, my opinion. And, no, these charger plates are not dishwasher safe nor are they food safe.
I can't wait to try this for the vinyl. Last year I did some of these plates and it was a total nightmare. I had such a hard time guessing on the size. I feel so dumb now that you just made a circle the sizes of the plate and it looks so elementary. This will make my life so easy and will not dread making these plates. The cameo has so much to offer and if I could craft all day long and quit my job I would be able to just learn more. LOL
ReplyDelete