Copyright Silhouette School 2016. Powered by Blogger.


DIY Chore Chart Using Chalkboard Vinyl (Free Studio File)

Chalkboard, vinyl, chore chart, Silhouette, Silhouette Studio, free cut file
Last week I gave you a sneak peek of this project in the tutorial on applying vinyl straight, but today I'm going to share the full reveal.   My daughter has come up with some pretty creative ways to fill up her piggy bank...like selling water with Craisins in it (when life runs out of lemons..make craisin water, I guess). So my husband and I decided to have pity on the poor neighbors and come up with some chores that our 6 year old could do to earn herself some money to fill out her stuffed animal collection (are you picking up on my sarcasm here?) ;) 

Anyway, we needed a way to keep track, so I thought I'd make a chore chart that she could check off the chores she's done throughout the week allowing us to add up her chores at the end of the week.  The easiest way I thought we could do it is by using something like a chalkboard that could be erased and re-used.  Enter Chalkboard Vinyl and Chalkboard Markers!

This project is actually super simple...and I'm making it even easier for you by proving the free cut file at the end of this post.  I used a label design from my library and made it really big to get the shape of the chart.  I cut out the chalkboard vinyl (you can pick some up at My Vinyl Direct in the specialty vinyl category) out - it's about 8x10.
Chalkboard, vinyl, chore chart, Silhouette, Silhouette Studio, free cut file

After it was cut, I left the backing on the vinyl while I added the other elements.  The next thing I did was cut out "Olivia's Chores" and "Allowance" out of some silver vinyl that I came as one of my free samples a few months ago.   I applied the "Olivia's Chores" first to the chalkboard vinyl.  Since I wasn't using registration marks and was more 'eyeballing' it, I waited to add the Allowance until the rest of the design was put together so I made sure it was placed correctly.

Chalkboard, vinyl, chore chart, Silhouette, Silhouette Studio, free cut file

Next I added the red lines. I drew the lines in Studio using the line tool. This alone will just cut a slit. I needed a weighted line. To get the grid, I grouped all the lines together and gave them a slight offset. Then I deleted the original lines.  I described here in great detail about adding the red lines to the chalkboard vinyl to ensure they were placed exactly straight, even, and centered.

Chalkboard, vinyl, chore chart, Silhouette, Silhouette Studio, free cut file, grid lines

Chalkboard, vinyl, chore chart, Silhouette, Silhouette Studio, free cut file

Finally, we came up with a few chores: empty bathroom waste baskets, put away her laundry, empty the utensil rack from the dishwasher and clear her dishes from the table. I did google searches for images that were related and then traced each of them in Studio before cutting on white vinyl.  I cut on permanent adhesive vinyl - 651 - to ensure I got a good stick.

Chalkboard, vinyl, chore chart, Silhouette, Silhouette Studio, free cut file, icons
Sorry for the blurry picture...wahhhh
I used transfer tape - not paper - to apply these. The tape allowed me to see through so I could  more easily see where I was placing the designs to ensure they were relatively centered.

Chalkboard, vinyl, chore chart, Silhouette, Silhouette Studio, free cut file

I had some Chalkboard Markers on hand and these are perfect for the chalkboard vinyl.   My daughter can check off what she's done and then at the end of the week, we can wipe the chart clean with a wet paper towel to start over.

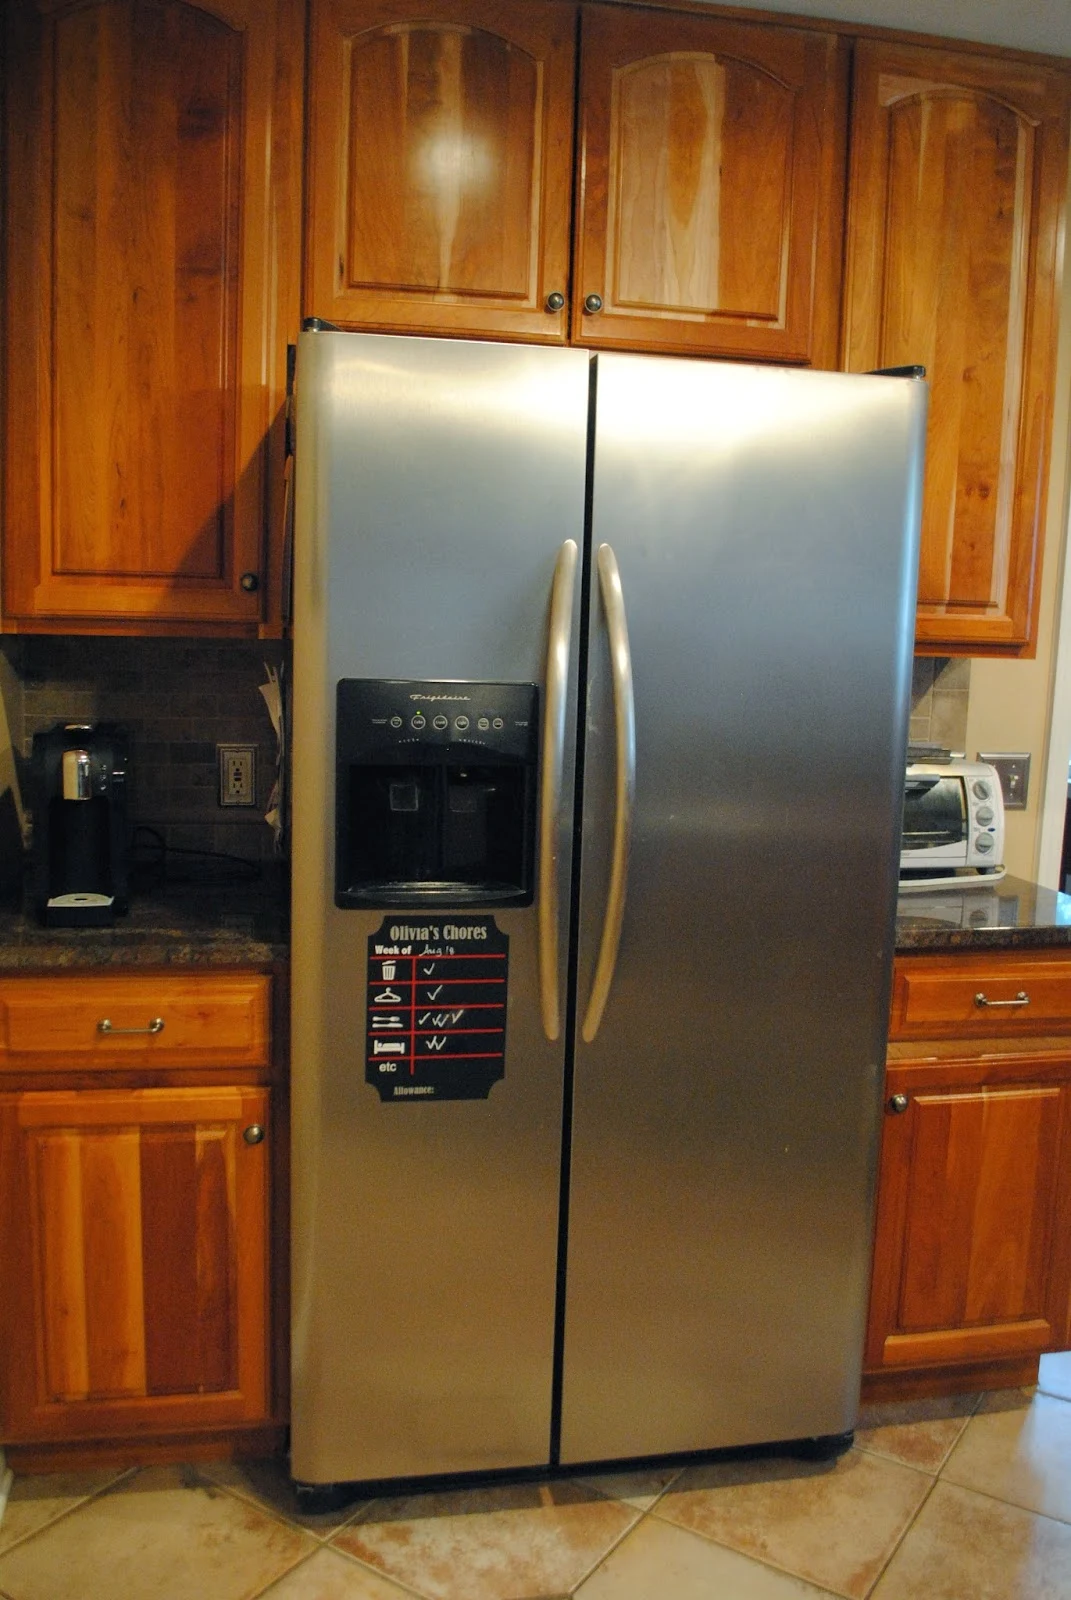
The last step was to remove the backing of the chalkboard board and put it on my finger-print covered refrigerator (Sorry, just being real...).

Chalkboard, vinyl, chore chart, Silhouette, Silhouette Studio, free cut file

This stuff would stick to a door, inside of a cabinet, wall...you name it. The great part is it's removable and doesn't leave any sticky residue behind. I can also peel off the white designs and replace them as my daughter's chores change with her age, etc.

Chalkboard, vinyl, chore chart, Silhouette, Silhouette Studio, free cut file

This is for personal use only...please! 

Note: This post may contain affiliate links. By clicking on them and purchasing products through my links, I received a small commission. That's what helps fund Silhouette School so I can keep buying new Silhouette-related products to show you how to get the most out of your machine! 

Thanks for coming to class today at Silhouette School.  If you like what you see, I'd love for you to pin it!


 photo 2b820f06-c93b-4b24-929c-96287390140f_zpsf3cd3a23.jpguse twiter photo Twitter_48x48_zps4e06061c.pnguse twiter photo Twitter_48x48_zps4e06061c.pngUse Feed photo Feed_48x48_zps63f27a4f.png photo 2b820f06-c93b-4b24-929c-96287390140f_zpsf3cd3a23.jpgUse Feed photo Feed_48x48_zps63f27a4f.pngUse Feed photo Feed_48x48_zps63f27a4f.png

1 comment

  1. Thank you for the great tutorial and the file. This expedites the process SO much in getting a project done. Thanx again. Jerri

    ReplyDelete

Thanks for leaving a comment! We get several hundred comments a day. While we appreciate every single one of them it's nearly impossible to respond back to all of them, all the time. So... if you could help me by treating these comments like a forum where readers help readers.

In addition, don't forget to look for specific answers by using the Search Box on the blog. If you're still not having any luck, feel free to email me with your question.