Did you ever have a design in your library (or a JPEG that you've traced) that part of it would be perfect for your project, but how to just pull that one section out. I try, at all costs, to avoid the eraser tool because it just freezes up my software and basically drives me to crazytown. So...this is my anti-eraser disassembling method.
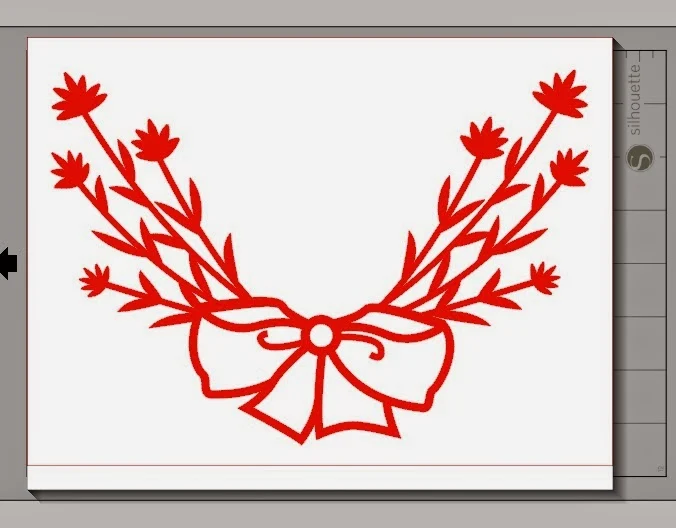
I recently was working on a card and I needed a bow. I searched my library, but the only bow shape that came up was this...
Yeah...the little leafy branches just aren't going to work on my baby onesie card. BUT the bow would definitely work if only I could separate it from the branches.
Oh but I can....
The first thing you want to do is open the shape in Silhouette Studio.
Select the design. Now we want to release the compound path. Do this by right clicking > release compound path. You may have to do this several times to get 'down' far enough if there have been several compound paths created. You may also have to ungroup - again depending on how the shape was designed. You'll know you've disassembled far enough when you can start pulling the design part.
Since I wanted to keep the bow intact, I pulled away the branches and the outline which were all one big piece.
You can see a few stray pieces remained so I just selected them and clicked 'delete'.
I'm left with what resembles a bow, but what is really just a bunch of pieces. To put this thing back together I need to make it a compound path again. So right select the pieces > right click > make compound path.
If I cut like this it will cut in like 8 difference pieces..this girl doesn't have time for that! The easiest way to fix this is to put an offset around the entire design. So select the design > click the offset tool > offset. An now I have this! Wahooo...a bow I can use. Remember, personal use only if you don't have the commercial license.
I filled it in and the image on the left is what I got.....but what if you want the image on the right?
Well, then, you need to click the image and release the compound path...and you'll get this image on the right...kinda, sorta, no.
Now ONLY select the offset and fill it in with white. Can you hear the angels singing?! That's a thing of beauty!
And that's how you go from this to this to this
And here's a look at how I used my bow!
Tomorrow I'm going to show you how I got the faux stitching on there!
Note: This post may contain affiliate links. By clicking on them and purchasing products through my links, I received a small commission. That's what helps fund Silhouette School so I can keep buying new Silhouette-related products to show you how to get the most out of your machine!
Thanks for coming to class today at Silhouette School. If you like what you see, I'd love for you to pin it!


.png)


That card is so stinkin cute. I love it. And the color is awesome. Can't wait to see how to do the faux stitching.
ReplyDelete