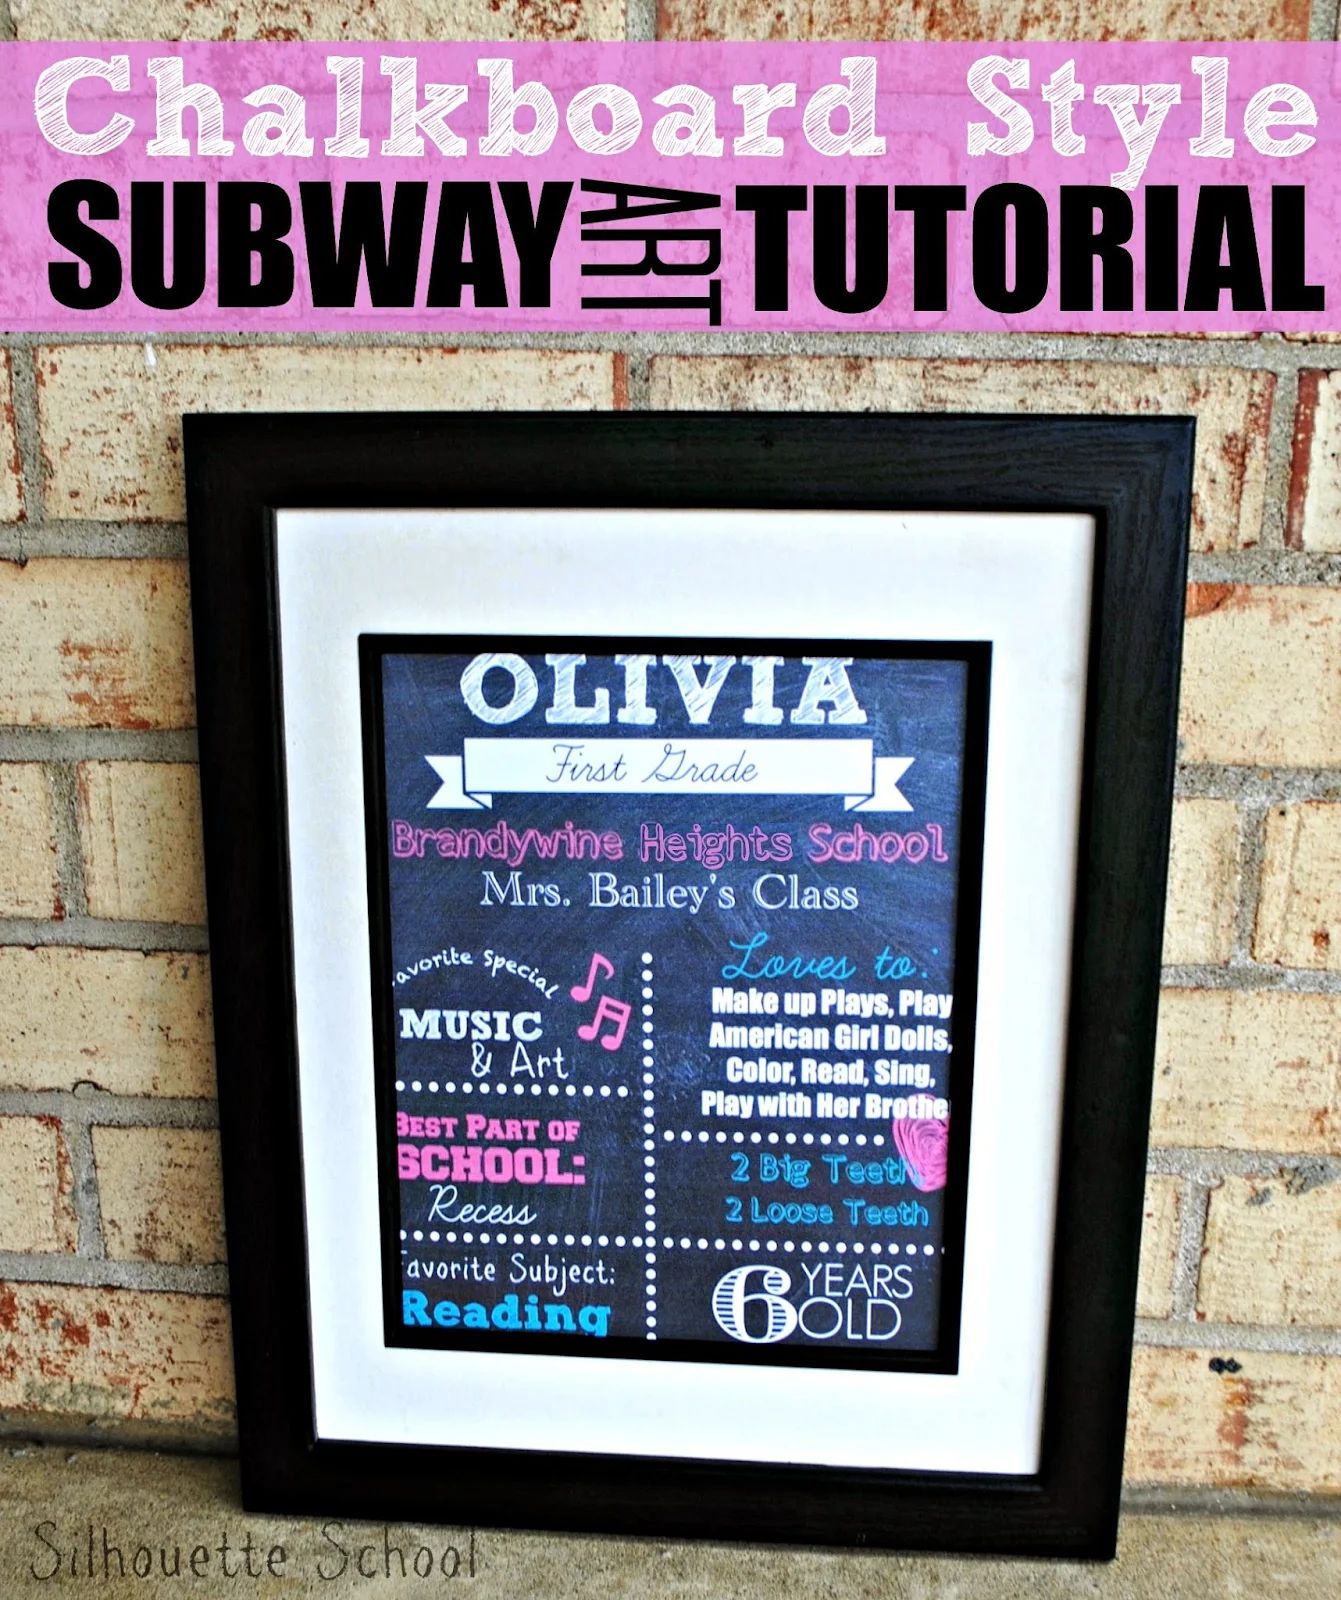
 Almost as popular as the recent Ice Bucket Challenge is the Chalkboard Style Subway Art. I've had several people ask how they are made and so today I thought I'd share how you can make one with birth stats, first day of school info, or a milestone birthday. I'm making one for my daughter's first day of school, but you can do whatever theme you'd like - the process is the same.
There are several programs you can use to create these, but I think the easiest, most user-friendly and best graphics package is PicMonkey. So we're actually going to start in PicMonkey - you can design the entire chalkboard subway art there, but I want to incorporate a few 'extras' so we'll be using Silhouette Studio, as well. If you're not familiar, PicMonkey it's a free photo editing and design website that offers tons of fonts, designs overlays, graphics and more. You can get the upgraded Royale version which I think is more than worth it for $33 a year, to gain access to ALL of the graphics and fonts...but it's definitely not necessary for this project. Royale features are indicated by a little gold crown in the program.
Start by going to PicMonkey.com
Click 'Design' along the top to open up a blank work area.
Immediately crop your page size so you don't accidentally create in a space that ultimately won't be printed. Click on the crop tool at the top left and then pick the 8x10 (or whatever size your prefer) from the drop down menu of pre-sets.
Since these are chalkboard style, we want our background to look like a chalkboard so go to the little apple at the bottom of the left sidebar. This is where you'll find all of the themes including the School theme.
Click 'School U' and then scroll all the way down to the Textures/'Boards' tab. These are some of the options for your background. For this I'm going to pick the black chalkboard. Click 'Apply'.
At this point you can start adding your text. Because it's chalkboard style, I like to use the chalkboard type fonts which area all under the Text/Penmanship tab still in the School U theme. you'll see some of them are only available with the Royale, but there are still plenty of options.
Type out everything you'd like on your subway art sign in various fonts, colors, and sizes...just play around with font size and fonts and configurations until you have what works for you!
Some ideas to Inspire You:
First Day of School:
School Name, Grade, Teacher, Bus #, Favorite Subject, Favorite 'Special, Favorite Food, Favorite Color, Age...
Birth Stats:
Name, Birth Date, Weight, Length, Time of Birth, Hospital, Doctor, Little Brother/Sister, Godparents, Boy/Girl
Milestone Birthday:
Happy Birthday, Name, Date, Age, Favorites (Color, Food, Action Figure/Princess/Character), Friends, Party Theme

Here's how my chalkboard stat sheet looks...it's nice, but not complete yet. This is as far as I can go in PicMonkey right now. Now I switch over to Silhouette Studio for a few more elements. There is one VERY important thing you need to remember about PicMonkey: You can NOT save in the program and you are VERY limited by how much you can edit a saved design...so be sure it's perfect or at least be sure you don't close out of your design.
Once you've saved, open up the design in Silhouette Studio then drag and drop the design into the work area. It will probably come in larger, so you just resize the design so it fits within the printable area on your Silhouette work area.
To make the curved text, I'm just going to wrap the text like I normally would when making curved text in Studio. Click here for a full tutorial on text to path. I use the Fill tool and the Line Color tool to change the font to white. After the font is converted to a path you can change the size of the curved text to fit your design.
Now for the dividing lines. You could just use a straight line....and that would be perfectly great. Be sure to give your lines a 'weight' so that they print....even if you color them, if they are a weight of "0" they won't print. More details here...
I finished up my chalkboard style subway art by adding the musical notes (google images that were traced in Studio and filled with color) and the teacher's name.
I grouped everything together so that I could resize. Now you can print from Studio...which is what I did on my home printer using cardstock. Or you can send your design off to have it printed at a copy center. Before you do that though you'll want to covert the Studio file to PDF format.
Frame it up all cute and snap those pictures. Create those memories. Cherish these days...
Note: This post may contain affiliate links. By clicking on them and purchasing products through my links, I received a small commission. That's what helps fund Silhouette School so I can keep buying new Silhouette-related products to show you how to get the most out of your machine!
Thanks for coming to class today at Silhouette School. If you like what you see, I'd love for you to pin it!


.png)


Do you have a list of suggested fonts for Subway art?
ReplyDelete