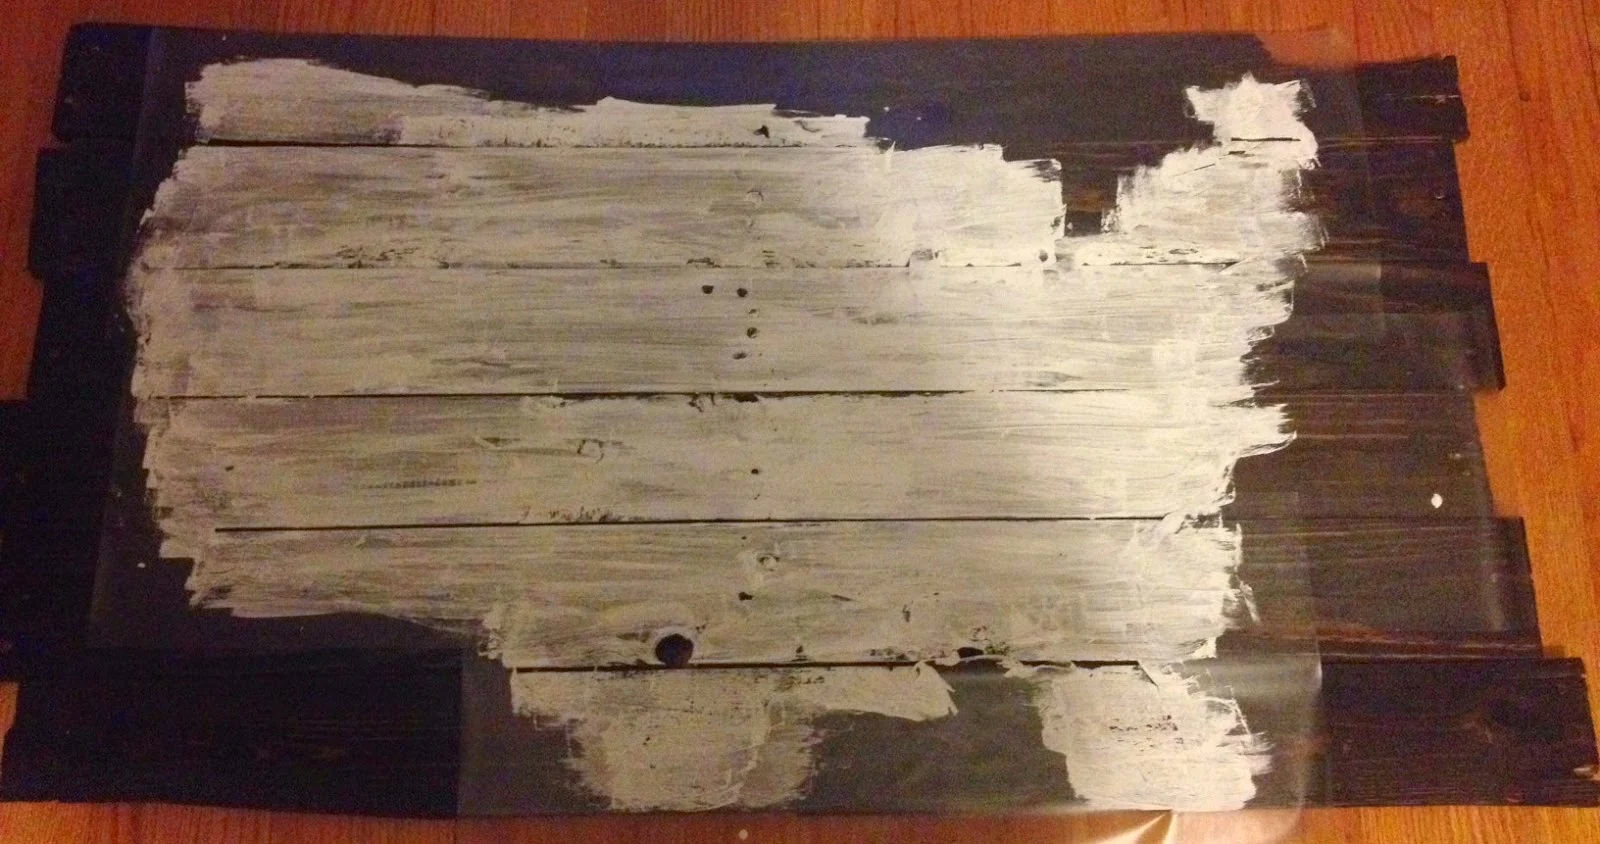
If you've ever made a paint stencil with you Silhouette you've probably run into this common problem: Paint Bleed! It's so frustrating that no matter how hard you press the edges of the stencil down, paint seems to somehow seep underneath leaving you with lines that just aren't that crisp. Today's lesson is a little trick for how to paint a stencil without bleeding.
The first thing you want to do is cut your stencil on your Silhouette...duh. There are different materials you can use to make a stencil: stencil vinyl, adhesive vinyl (631), freezer paper (for painting on fabrics) or you can do what I do and cut stencils on contact paper from the dollar store.
After the stencil is cut, weed it and transfer it to the surface that will be painted be it wood or tile or some other hard surface. (If you are painting onto fabric click here.) I was painting a large wood sign for this project.
With you hand go around the edge of the stencil and really press down to make sure you get a tight seal. The next step is the key step (sorry for the blurry shot). Using a foam brush, paint a layer of Matte Mod Podge around the entire edge of the stencil. This will do two things: 1) It will seal the edge of the stencil down 2) If anything leaks under the stencil, it will be mod podge which is clear when it dries.
Let the mod podge dry completely before painting the entire stencil with paint.
When you're finished painting, let the paint dry before removing the stencil. Now stand back - or better yet, get up real close - and admire just how crisp and sharp those paint lines are! Even on this rather bumpy pallet wood, my lines are near perfect!
PS. Head over to our sister site Two It Yourself for the full step by step tutorial on making this Pottery Barn Knockoff Wood USA Sign. (And don't forget to enter the giveaway to win!)
Note: This post may contain affiliate links. By clicking on them and purchasing products through my links, I received a small commission. That's what helps fund Silhouette School so I can keep buying new Silhouette-related products to show you how to get the most out of your machine!
Thanks for coming to class today at Silhouette School. If you like what you see, I'd love for you to pin it!


.png)


Will this work on glass? I am using 813 and armour etch on wine glasses, and I am still seeing bleeding. Thanks!!
ReplyDeleteI don't think it would work very well on glass.
DeleteOramask 811 is great for etching. 813 is for wood signs.
DeleteSo I just tried this trick and it pulled up my paint when I pulled the vinyl off. How do I fix that?
ReplyDeletepull the stencil off while the paint is still wet, then you solve that issue
DeleteSo I just tried this trick and it pulled up my paint when I pulled the vinyl off. How do I fix that?
ReplyDeleteI Am having the same problem and cant seem to find a fix anywhere
DeleteI Am having the same problem and cant seem to find a fix anywhere
DeleteI have tried this twice. When I first came across it last year I tried it and it peeled the paint off. I am constantly having problems with my paint bleeding so back to the research. I come across this tip everywhere so I figured maybe I did something wrong. Just tried it again and the same thing happened to me. I really dont know what Im doing wrong.
DeleteLove this tip Melissa! Thanks.
ReplyDeleteDo you ever have the problem with the contact paper leaving behind a sticky residue? Any suggestions? I use the contact brand of contact paper.
ReplyDeleteI just did my first small sign... after painting the first coat I put Mod Podge on it. My thinking is that the vinyl needs something non-porous to stick to. I put my vinyl letters down and again coated it with the Podge, sealing around the lettering. I gently removed the letters (about 3.5" per letter) and it came off clean.I also did this same technique putting a thin, double border around the sign. Crisp and clean. My final phase is putting vinyl across the larger lettering... LOL I'm having trouble with the final phase because the vinyl does not want to release from the transfer. I would post the finished product but I don't see a way to do it... go slow, let the coats dry and cure is all I can say.
ReplyDeleteI tried this on stained wood and when I pulled up the vinyl the paint stuck to it. Any way to fix that ??
ReplyDeleteDollar store contact paper...brilliant! Definitely going to try that!
ReplyDeleteI also am having the issue of the paint peeling up with the vinyl when I take it off. I end up having to repaint the edges. I have tried pulling it up when wet, I have tried pulling it up after totally dry.. Nothing is helping. At this point I am better off tracing the
ReplyDeletevinyl lettering and hand painting it. PLEASE HELP
I also am having the issue of the paint peeling up with the vinyl when I take it off. I end up having to repaint the edges. I have tried pulling it up when wet, I have tried pulling it up after totally dry.. Nothing is helping. At this point I am better off tracing the
ReplyDeletevinyl lettering and hand painting it. PLEASE HELP
Is there a certain kind of mod podge that you're using to put on the contact paper?
ReplyDeleteIs there a certain kind of mod podge that you're using?
ReplyDeleteI am staining instead of painting. Will this same method work? I am staining a rolling pin.
ReplyDelete