Since you all went pretty much crazy over my tip on how to easily clean Silhouette cutting mats I figured why not just give the people what they want...
Tips on How to Resticky Your Cutting Mat!
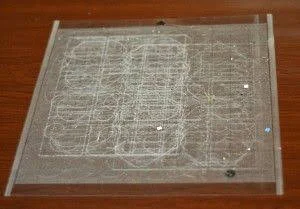
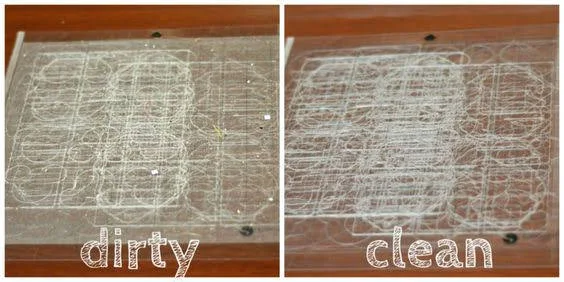
So here's my standard 12 x 12 Silhouette brand mat that has been severely used and abused. I think at one point I was even taping my cardstock on the mat because it had absolutely no stick left!For this tutorial on how to restick a Silhouette mat, your supplies will be: Goo Gone, kitchen sponge, dish soap, spray adhesive and tape. This is a two part process - first the cleaning and removal of the original adhesive and then the resticking process.
Cleaning a Dirty Silhouette Cutting Mat
1. Take the dirty Silhouette cutting mat and lay it on a flat surface, such as a counter or table.2. Open the bottle of Goo Gone and dribble a little around the mat.
3. Grab your sponge and start-a-scrubbin'. You should be able to see all the nasties coming off your mat.
4. Once I feel fairly certain that the old sticky is gone, grab the dish soap and give your mat a good washing. You can use the same sponge.
5. Drag the Silhouette mat over to the sink for a rinse. If you see that you haven't gotten all the old sticky mess off, just repeat steps 2-4 until it's nice and clean.
6. Once clean, dry with a towel and set to the side. You want to make sure the mat is fully dry before applying the spray adhesive.
ReSticking a Silhouette cutting Mat
1. To restick the Silhouette mat (and another off-brand cutting mat), I used Dritz Basting Spray from my local Wal-Mart for less than $10.00.2. Tape off the edges of your mats to prevent spraying adhesive on the entire surface. Why? Because you don't want adhesive where your rollers will make contact, it'll just gunk them up.
3. Before spraying any adhesive, remember these two important rules: ALWAYS spray in a well ventilated area {AND} spray on a safe surface, such as outside or a covered table. With any product, crafting or not, we always recommend reading the full manufacturer's instructions before using.
4. Spray away! Try to spray an even coat over the exposed surface of your mat. I continued to spray until I had a nice white layer. Once dry, I even went back for a second, thinner layer.
5. Allow to dry completely before using! You'll notice that your mat may have some fuzzies on there, but fear not! Pat your hand on the mat a little, like you would if you were testing the stickiness, and the fuzzies will fit right in with the rest of the adhesive. They just need a little encouragement! You may be able to see them, but they won't interfere with the stickiness of your mat.
6. Remove the tape from the edges of your mat.
7. Voila --- a resticky-ed cutting mat!
So to recap, I revamped two cutting mats to like-new shape for less than $10.00, with adhesive left over for future use!
In my experience cleaned and re-stickied cutting mats don't last quite as long as a new Silhouette mats, but in a pinch and for on the cheap, it definitely beats having to wait or make a special shopping trip to finish your project!
Thanks for coming to class today at Silhouette School. If you like what you see, I'd love for you to pin it!
Note: This post may contain affiliate links. By clicking on them and purchasing products through my links, I receive a small commission. That's what helps fund Silhouette School so I can keep buying new Silhouette-related products to show you how to get the most out of your machine!
Get Silhouette School lessons delivered to your email inbox! Select Once Daily or Weekly.


.png)


I found the Eclipse mat to last WAY longer the the Silhouette mat and it is by far less expensive. Thanks for the re-sticky tips.
ReplyDeleteI tried a basting spray by Spray n' Bond. It did re-stick the mat, however it also left sticky residue on the back of my vinyl backing. Since I'm making wall decals to sell having a gunk covered backing is less than desirable! Not sure what else to try though . . .
ReplyDeleteYou won't need googone to get ride of the old sticky. I found plain ol Dawn dish soap works fine with a scrub sponge.
ReplyDeleteI haven't tried it yet but I once worked as an architect and we used a lot of reworkable fixative on the surface of all kinds of materials building models and such. An old can I have is labeled Krylon Workable Fixatif. Amazon has many brands amzn.to/2lZG1S5
ReplyDeleteWill this tutorial make the mat as sticky as a standard cutting mat or more of a light hold cutting mat?
ReplyDeleteI did this, and was cutting HTV, it left a sticky mess all over the vinyl. There's no way I can use it. I'll stick to buying new mats.
ReplyDeleteThank you for the instructions I will give that a try next time I use my mats
ReplyDelete