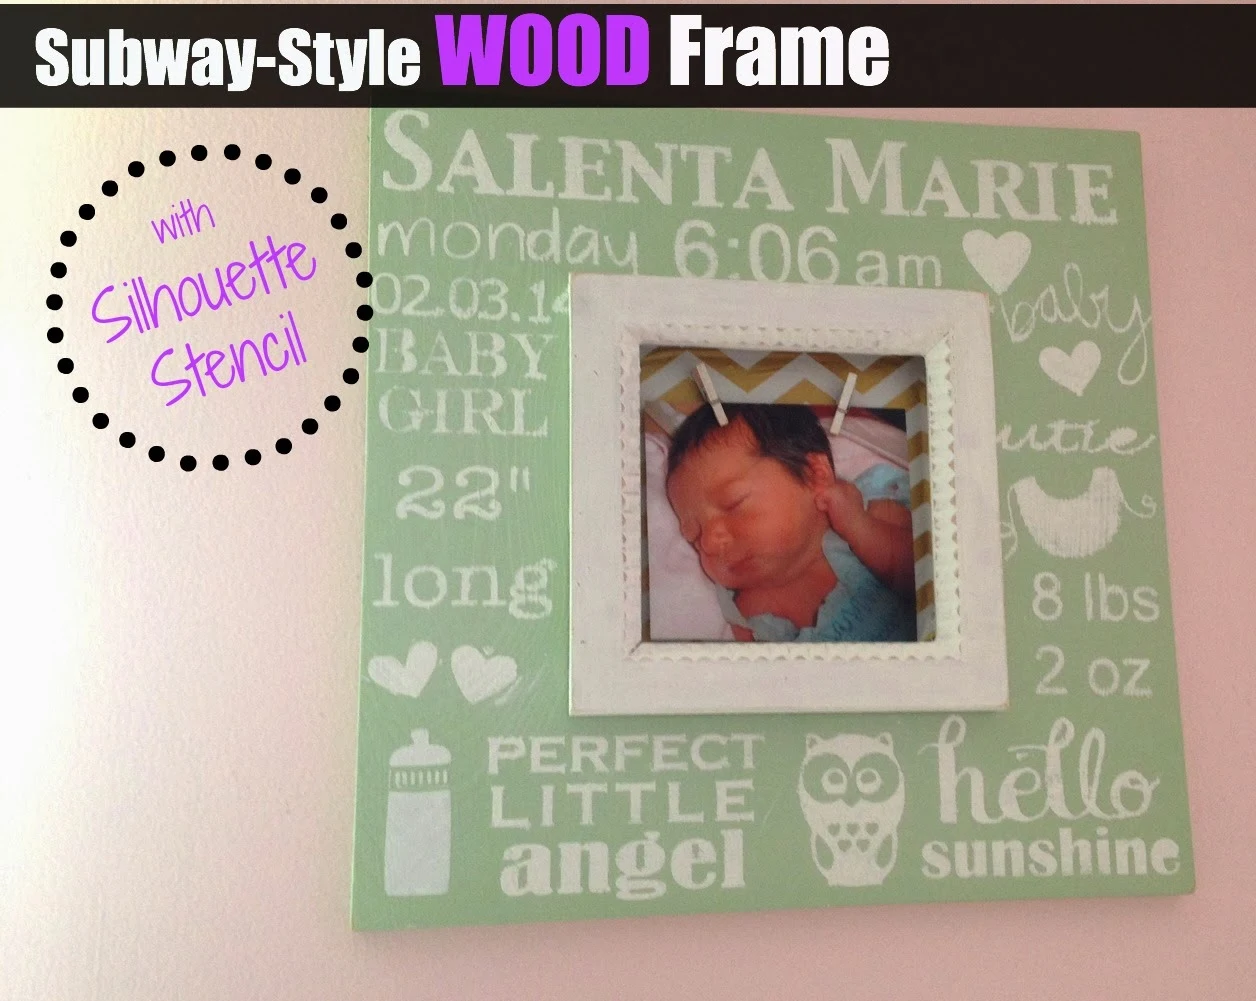
Personalized Chunky Wood Frame using Silhouette
Thursday, February 13, 2014
If you're not following along on my DIY blog, Two It Yourself, you're missing out on goodies like this. I shared the tutorial on how to make this chunky wood frame today and here I'm going to show you who I made the stencil using my Silhouette. Of course this stencil can be personalized in so many ways starting with the most obvious - that baby's name and birth information. You also have endless options for different fonts, sayings and little designs.
I have to say that this is one of the only times I've ever wished my Silhouette Portrait was a Cameo. The wood frame I was working on stenciling was 12 x 12" so being limited by the 9 x 11" work area really created a lot of extra work for me. I ended up having to cut several different stencils to fill the space instead of just one. It required lots of measurements and a few missteps before I finally got it done.
The Cameo work area is 12 x 12 so had I had that machine, I would have just squared off the center to the exact size as the center of my frame and then added my text and designs around it. Instead I worked on two different Portrait work areas one for the top and left side and another for the right side and bottom. Then I had to cut a few extra stencils to fill in the gaps. See what I mean about Cameo making this easier?
Anyway...I didn't use any purchased designs. Of course, all fonts installed are your computer can be used in Silhouette Studio which gave me a lot of options. I did download one font and that was a baby-themed dingbat font called "MTF Itty Bitty Baby." It's free to download here and includes the bib, bottle and 'baby' with heart. The owl is also from a free downloadable dingbat font; this one is called Chouette Alors. If you haven't discovered the awesomeness of using dingbat fonts in Silhouette, well allow me to introduce you here.
So fonts are the name of the game for this subway art-style frame. I typed out my text in Silhouette Studio then sized it and picked various fonts so it has that subway art feel. That's really all there is to this.
I cut it on vinyl so I could use the negative image as a sticker-like stencil.
This prevented a lot of paint bleeding. I worked in small areas at a time and used my foam pouncers to blot the paint up and down onto the frame.
I like to remove my stencil right away, but this is totally up to you.
Isn't it amazing what the Silhouette can do? It truly never stops blowing my mind with its precision.
Thanks for coming to class today at Silhouette School. If you like what you see, I'd love for you to pin it!
Labels:
Craft Ideas,
Fonts,
Gift Ideas,
How to,
Intermediate Silhouette Tutorials,
Painting Projects,
Sihouette Stencils,
Silhouette Studio,
Vinyl
loading..
3 comments
Thanks for leaving a comment! We get several hundred comments a day. While we appreciate every single one of them it's nearly impossible to respond back to all of them, all the time. So... if you could help me by treating these comments like a forum where readers help readers.
In addition, don't forget to look for specific answers by using the Search Box on the blog. If you're still not having any luck, feel free to email me with your question.
Subscribe to:
Post Comments (Atom)


.png)


Hi! I have been making my own subway art on wood and something that I keep having problems with is that the vinyl/contact paper leaves a sticky residue on the wood. Do you ever have this happen? I have painted my wood and use the vinyl/contact paper as either a stencil or to cover up the basecoat of paint. I try to pull the vinyl/contact paper up as soon as I am done painting to see if that reduces the stickiness but it is still there. Any suggestions? Thanks!!!!
ReplyDeleteHi I just finished my first subway art and it left a sticky residue too. Did you get any suggestions?
DeleteHi! I have been making my own subway art on wood and something that I keep having problems with is that the vinyl/contact paper leaves a sticky residue on the wood. Do you ever have this happen? I have painted my wood and use the vinyl/contact paper as either a stencil or to cover up the basecoat of paint. I try to pull the vinyl/contact paper up as soon as I am done painting to see if that reduces the stickiness but it is still there. Any suggestions? Thanks!!!!
ReplyDelete