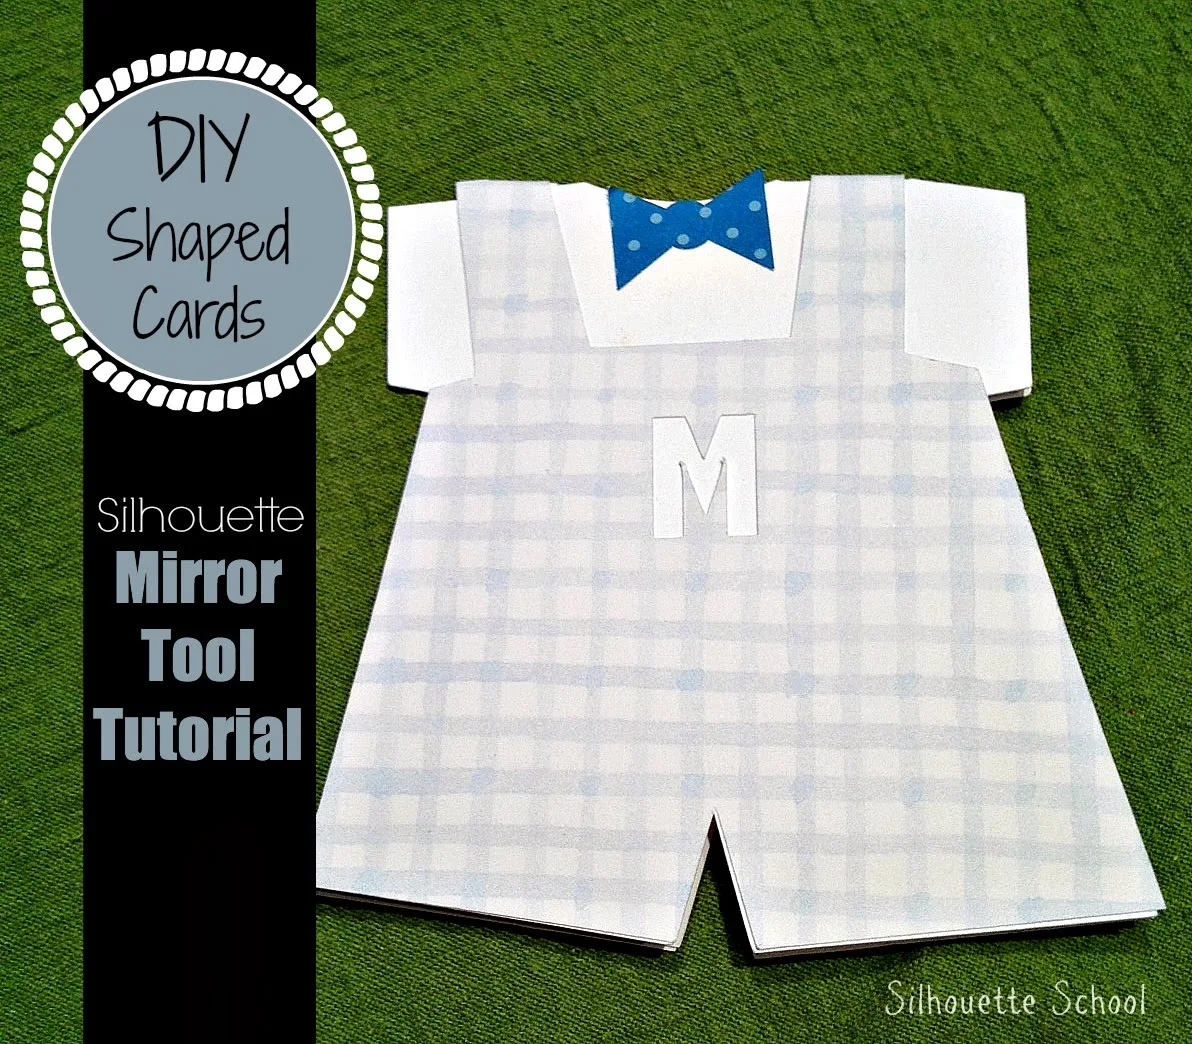
Fortunately, the Silhouette can make cards faster than I could even drive to the store, browse the card aisle, pick just the perfect one out, and hand over my hard earned cash. I did just that last week when I made this cute little shaped baby card for a friend who just had her first little boy. (Oh, she has no idea what she's in for after having two girls...I can say this with confidence having one of each myself.)
I hadn't decided what card I would make for my friend until I got a question from a Silhouette School reader about a baby card she was having trouble making. Virginia was having trouble with her baby card and wrote to me asking for some help.
"I wanted to take the basic shape that was the melting of the overalls and onsie to make a card that folds over from the top. I mirror imaged it, adjusted points to the shoulders would touch and then welded it. Unfortunately the basic design is not square so now I am stuck with a card that does not fold and match....Would you be willing to do a tutorial for this idea on your site?"Why, yes, Virginia I would! Thanks for asking...and I'll make the same card right along with you.
The design we're working with is the 'Baby Boy Motifs' in the Silhouette Online Store, but many designs would work for this tutorial on making shaped cards.
Start by bringing your design into Silhouette Studio. If it's a large design with several pieces, ungroup them (highlight > right click > ungroup) and delete those pieces you are not working with.
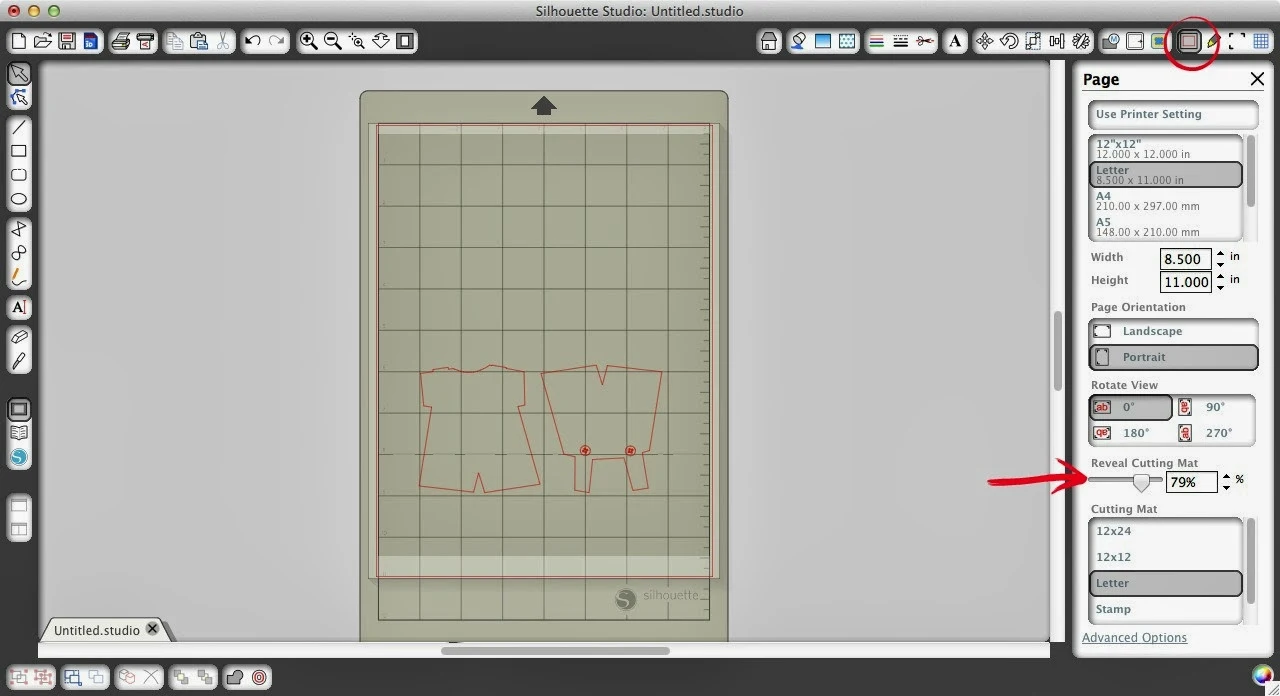
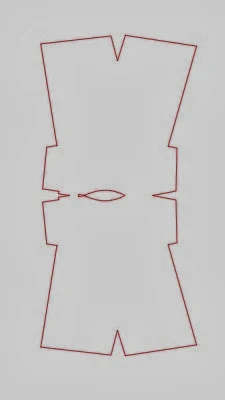
If you reveal your cutting mat (Click the 'Open the Page Tools Window' > Slide bar to the right to 'Reveal Cutting Mat') and line up the onesie on the grid you can see it's not exactly square or symmetrical as Virginia referred to in her question. However, it doesn't have to be to make the card fold evenly so no worries there.
I moved my overalls out of the way and into the gray area, making sure to regroup the buttons and overalls first, to give myself some room to work with the onesie.
Now I'm ready to mirror my onesie so it can start to make the shape of a card that folds at the top. To do this highlight the design and click the "Open the Replicate Window'. Then I select "Mirror Above' because I want the exact image only mirrored above my original.
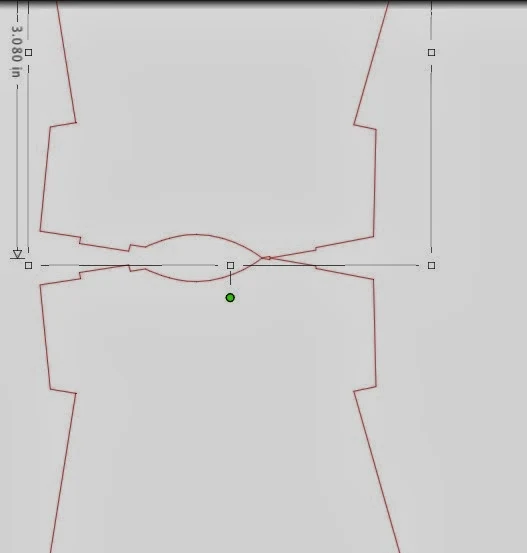
Zooming in you can see only a very tiny area is overlapping at the right shoulder. I need much more of the two onesies to overlap so the card can actually fold at the top.
I highlight my top design and use my arrow keys (NOT MY MOUSE) to nudge the design down moving it closer to the original onesie. Now you can see the right shoulders are overlapping more than the left, but that's okay. It's also okay that the entire left shoulder is not touching..there is still plenty of overlap that the paper won't easily rip.
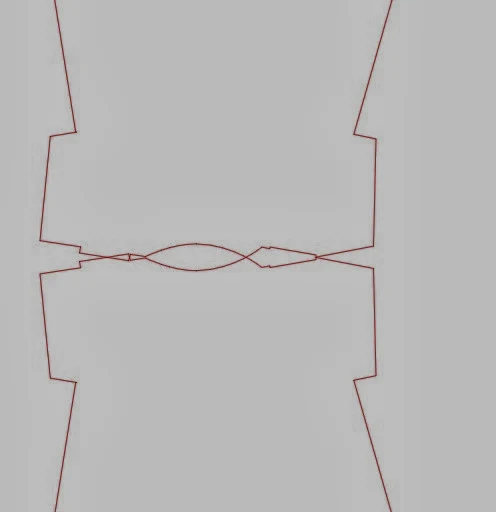
At this point the designs are still two different pieces. We want them to be one large piece so we need to weld them together. (Find the basic welding tutorial here.) Highlight both > Right Click > Weld. Now you can see the crossed lines at the shoulder have disappeared and there is just one large outline around the design.
If you want to adjust the size of the the onesie, you can do that now by highlighting design > dragging corner in or out.
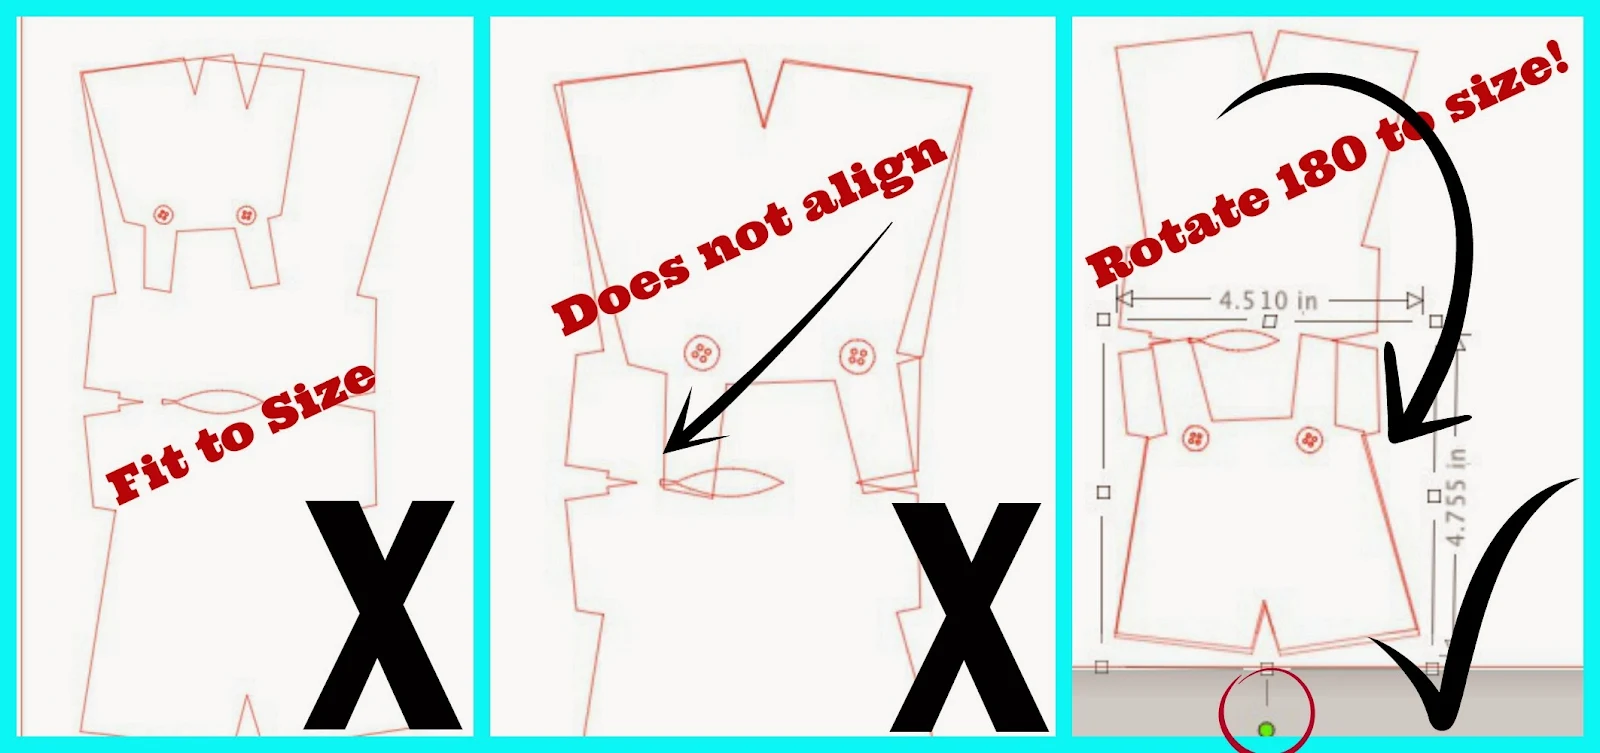
Now it's time to start working on the overalls. You want to make sure the overalls are the exact same size as the onesie (or a tad bigger) so they cover them at the bottom. You do not want to see overhang at the bottom, do you? No, I didn't think so.
So take your overall piece and line it up on top of the onesie. NOTE: If you are using the Boy Baby Motif, as I am here, you need to rotate (highlight > use green button at top of square to rotate around) the overalls. It's upside down (far left) and if you line it up with the top part of the onesie it will not match (center) and it will not fold correctly! Rotate it 180 degree and it's perfect (right).
Now you can mirror above the overalls the same way you did the onesie.
Tab the top part down to overlap at the shoulder, but before you weld them together move the overall set over by highlighting both pieces > right click > group. Then weld - this will just avoid you welding all four pieces together by accident.
You will notice the buttons will disappear once you weld. If you want the buttons to be cut you'll need to ungroup them from the overalls before you weld, move them out of the way, and then replace them after you weld. I did not use buttons so I did not do this step.
Now I have two pieces that are exactly the same size and when cut will fit together perfectly. And you're ready to send this baby to cut.
Optional Personalization and Add Ons:
I added an 'M' to the overalls because I'm just that obsessed with monograms as seen here and here and here.
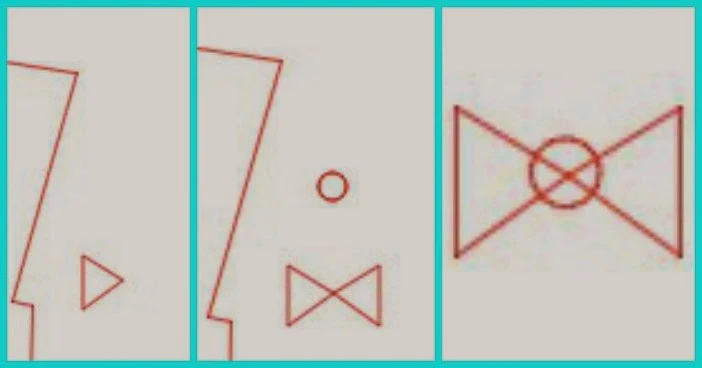
I also made a bow tie by drawing a triangle with the 'Draw a Polygon Tool' on the left side tool bar. I mirrored it to the right and then drew a circle with the 'Draw an Ellipse Tool' (left toolbar). I slightly overlapped the triangles and then moved the circle between the two triangles and welded it all together.
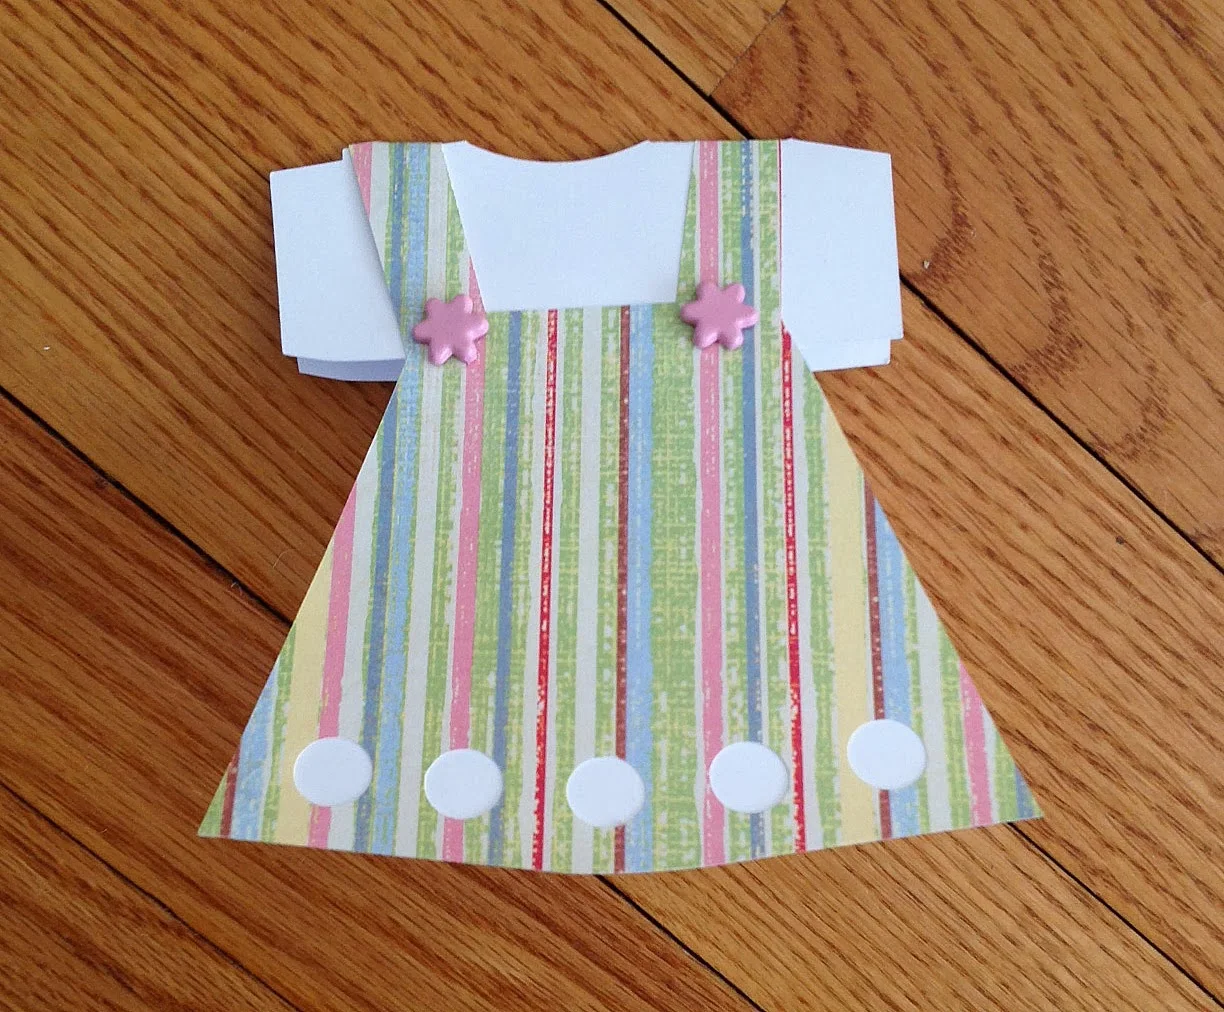
And once all the pieces were cut, here's how it call came together...so cute, right! And only about 10 minutes of my time.
Tomorrow on Silhouette School check out how, with just a few clicks, I slightly altered the original boy motif designs to make a baby girl card!
Thanks for coming to class today at Silhouette School. If you like what you see, I'd love for you to pin it!











.png)


When we do a mirror, then bring the items down so they touch, doesn't it make one smaller then the other once you open it up and try and fold it??
ReplyDeleteI am really enjoying reading your well written articles. It looks like you spend a lot of effort and time on your blog. I have bookmarked it and I am looking forward to reading new articles. cards scannable fake
ReplyDelete